Let’s start by creating a template!
There are two ways to access theCreate New Template :
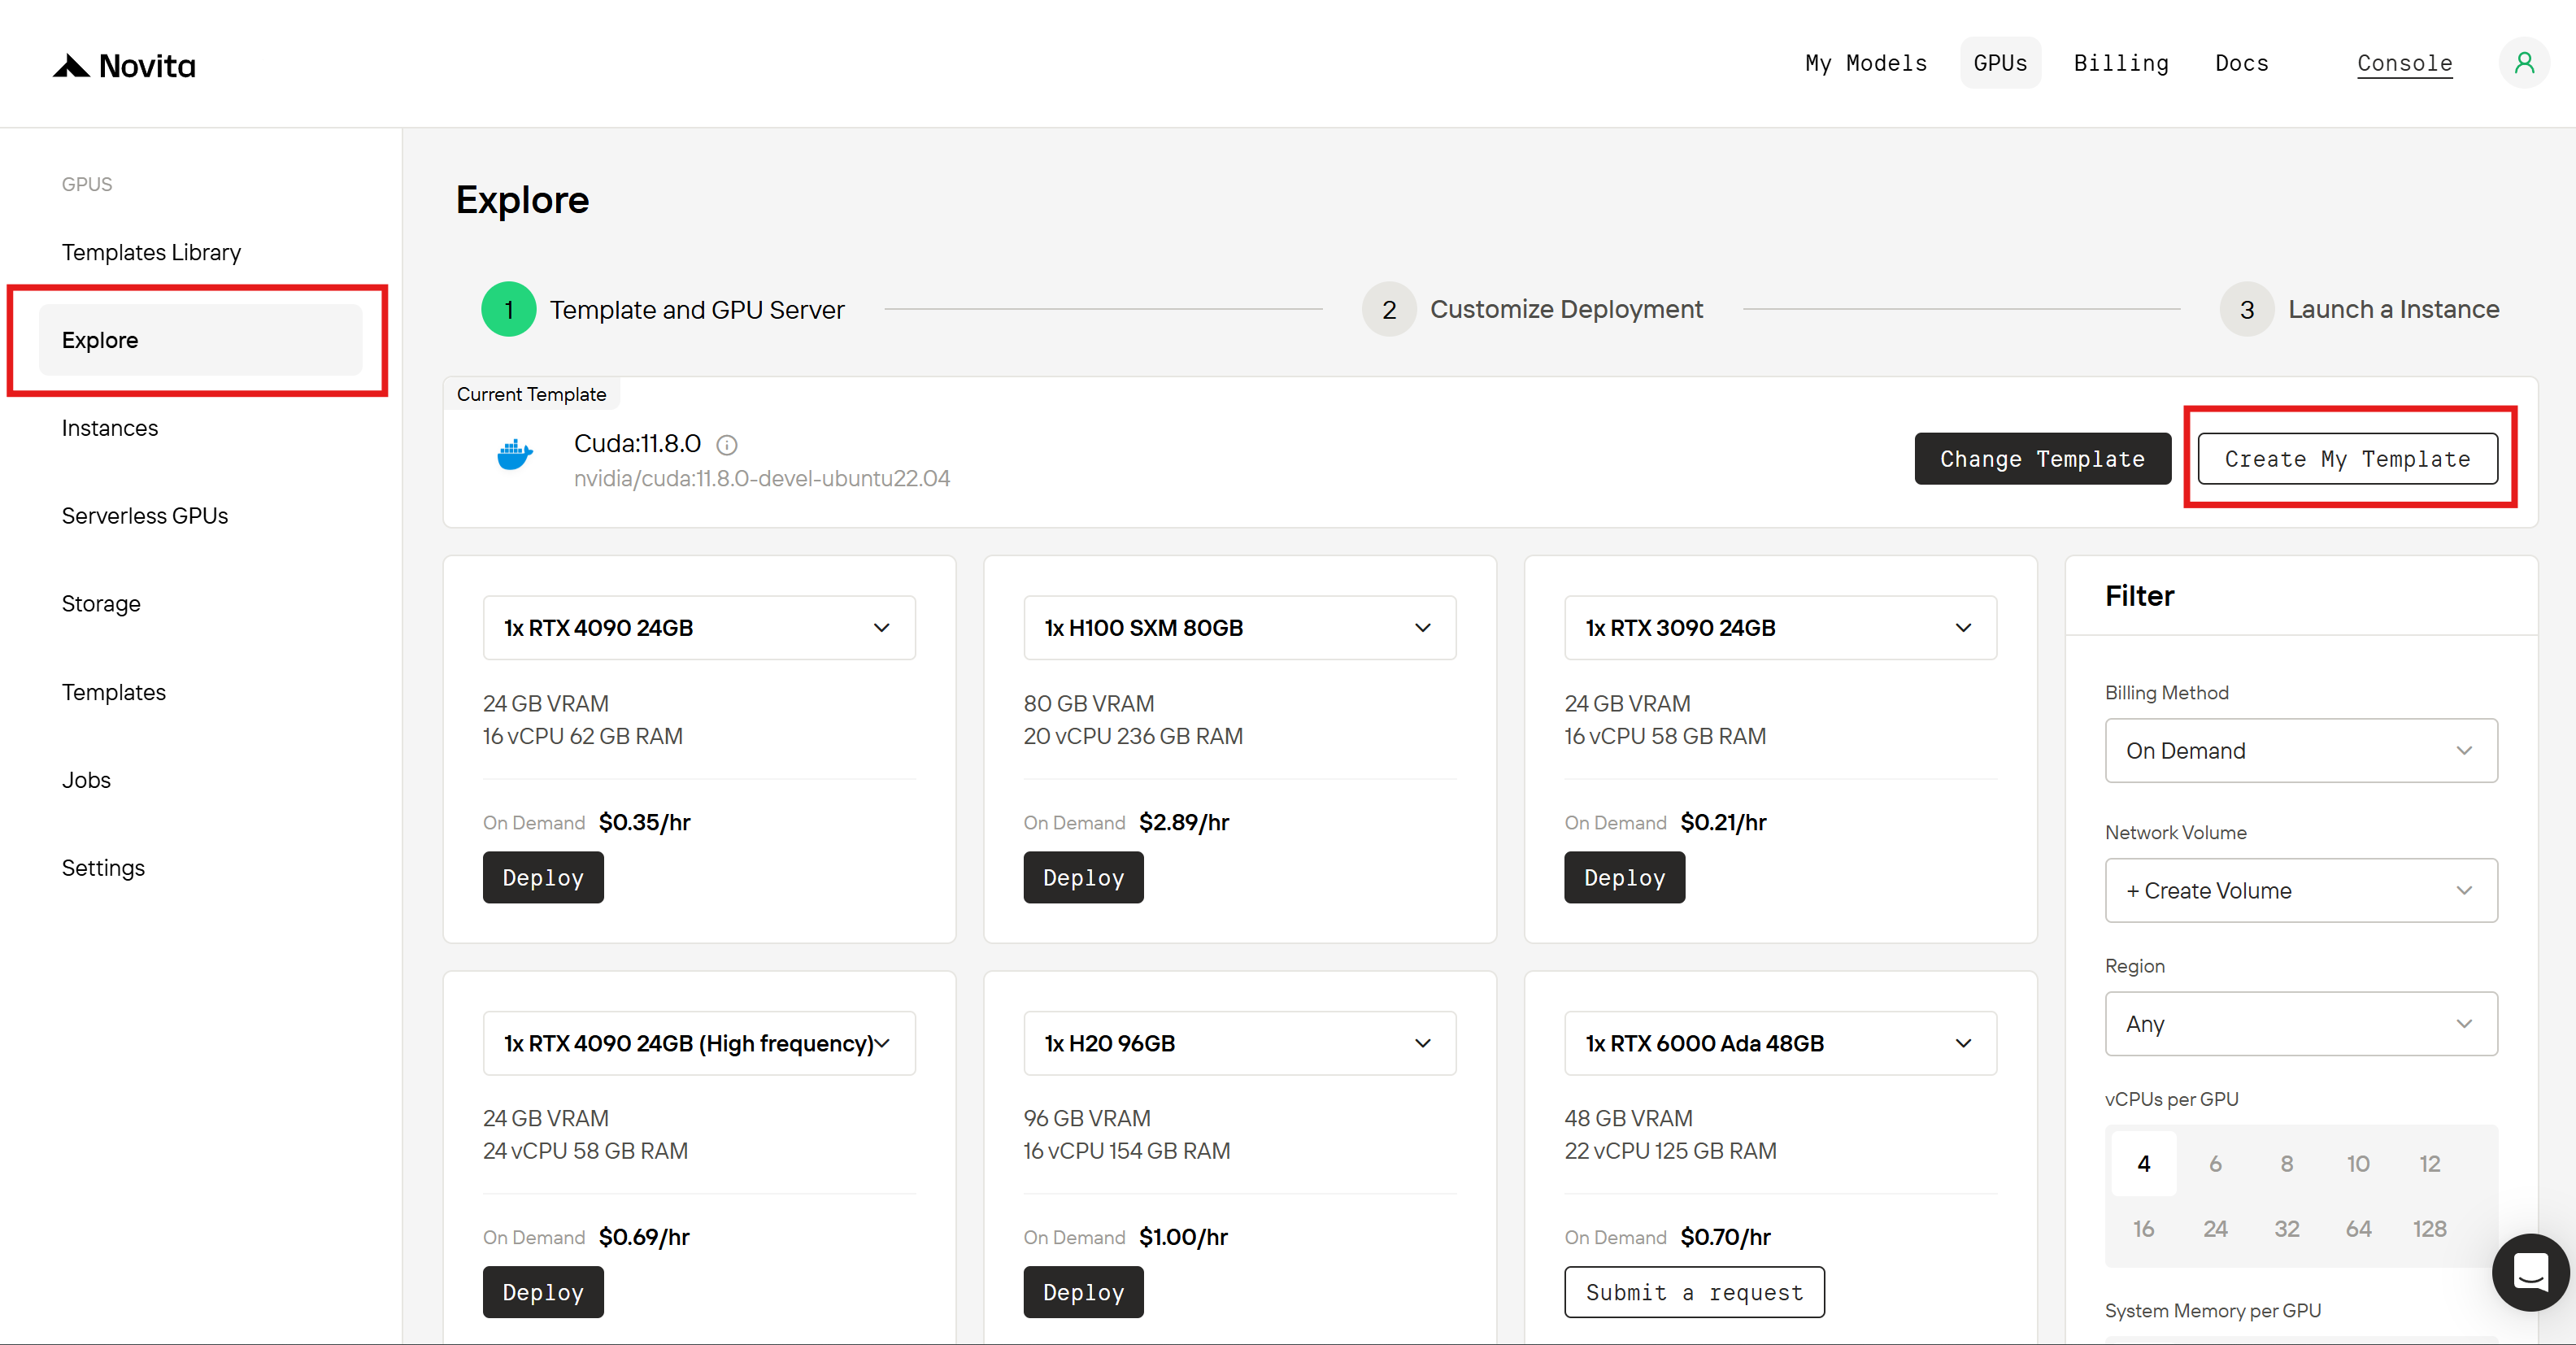
- Option 1: In the Console, go to the Explore section and find the
Create My Templatebutton.
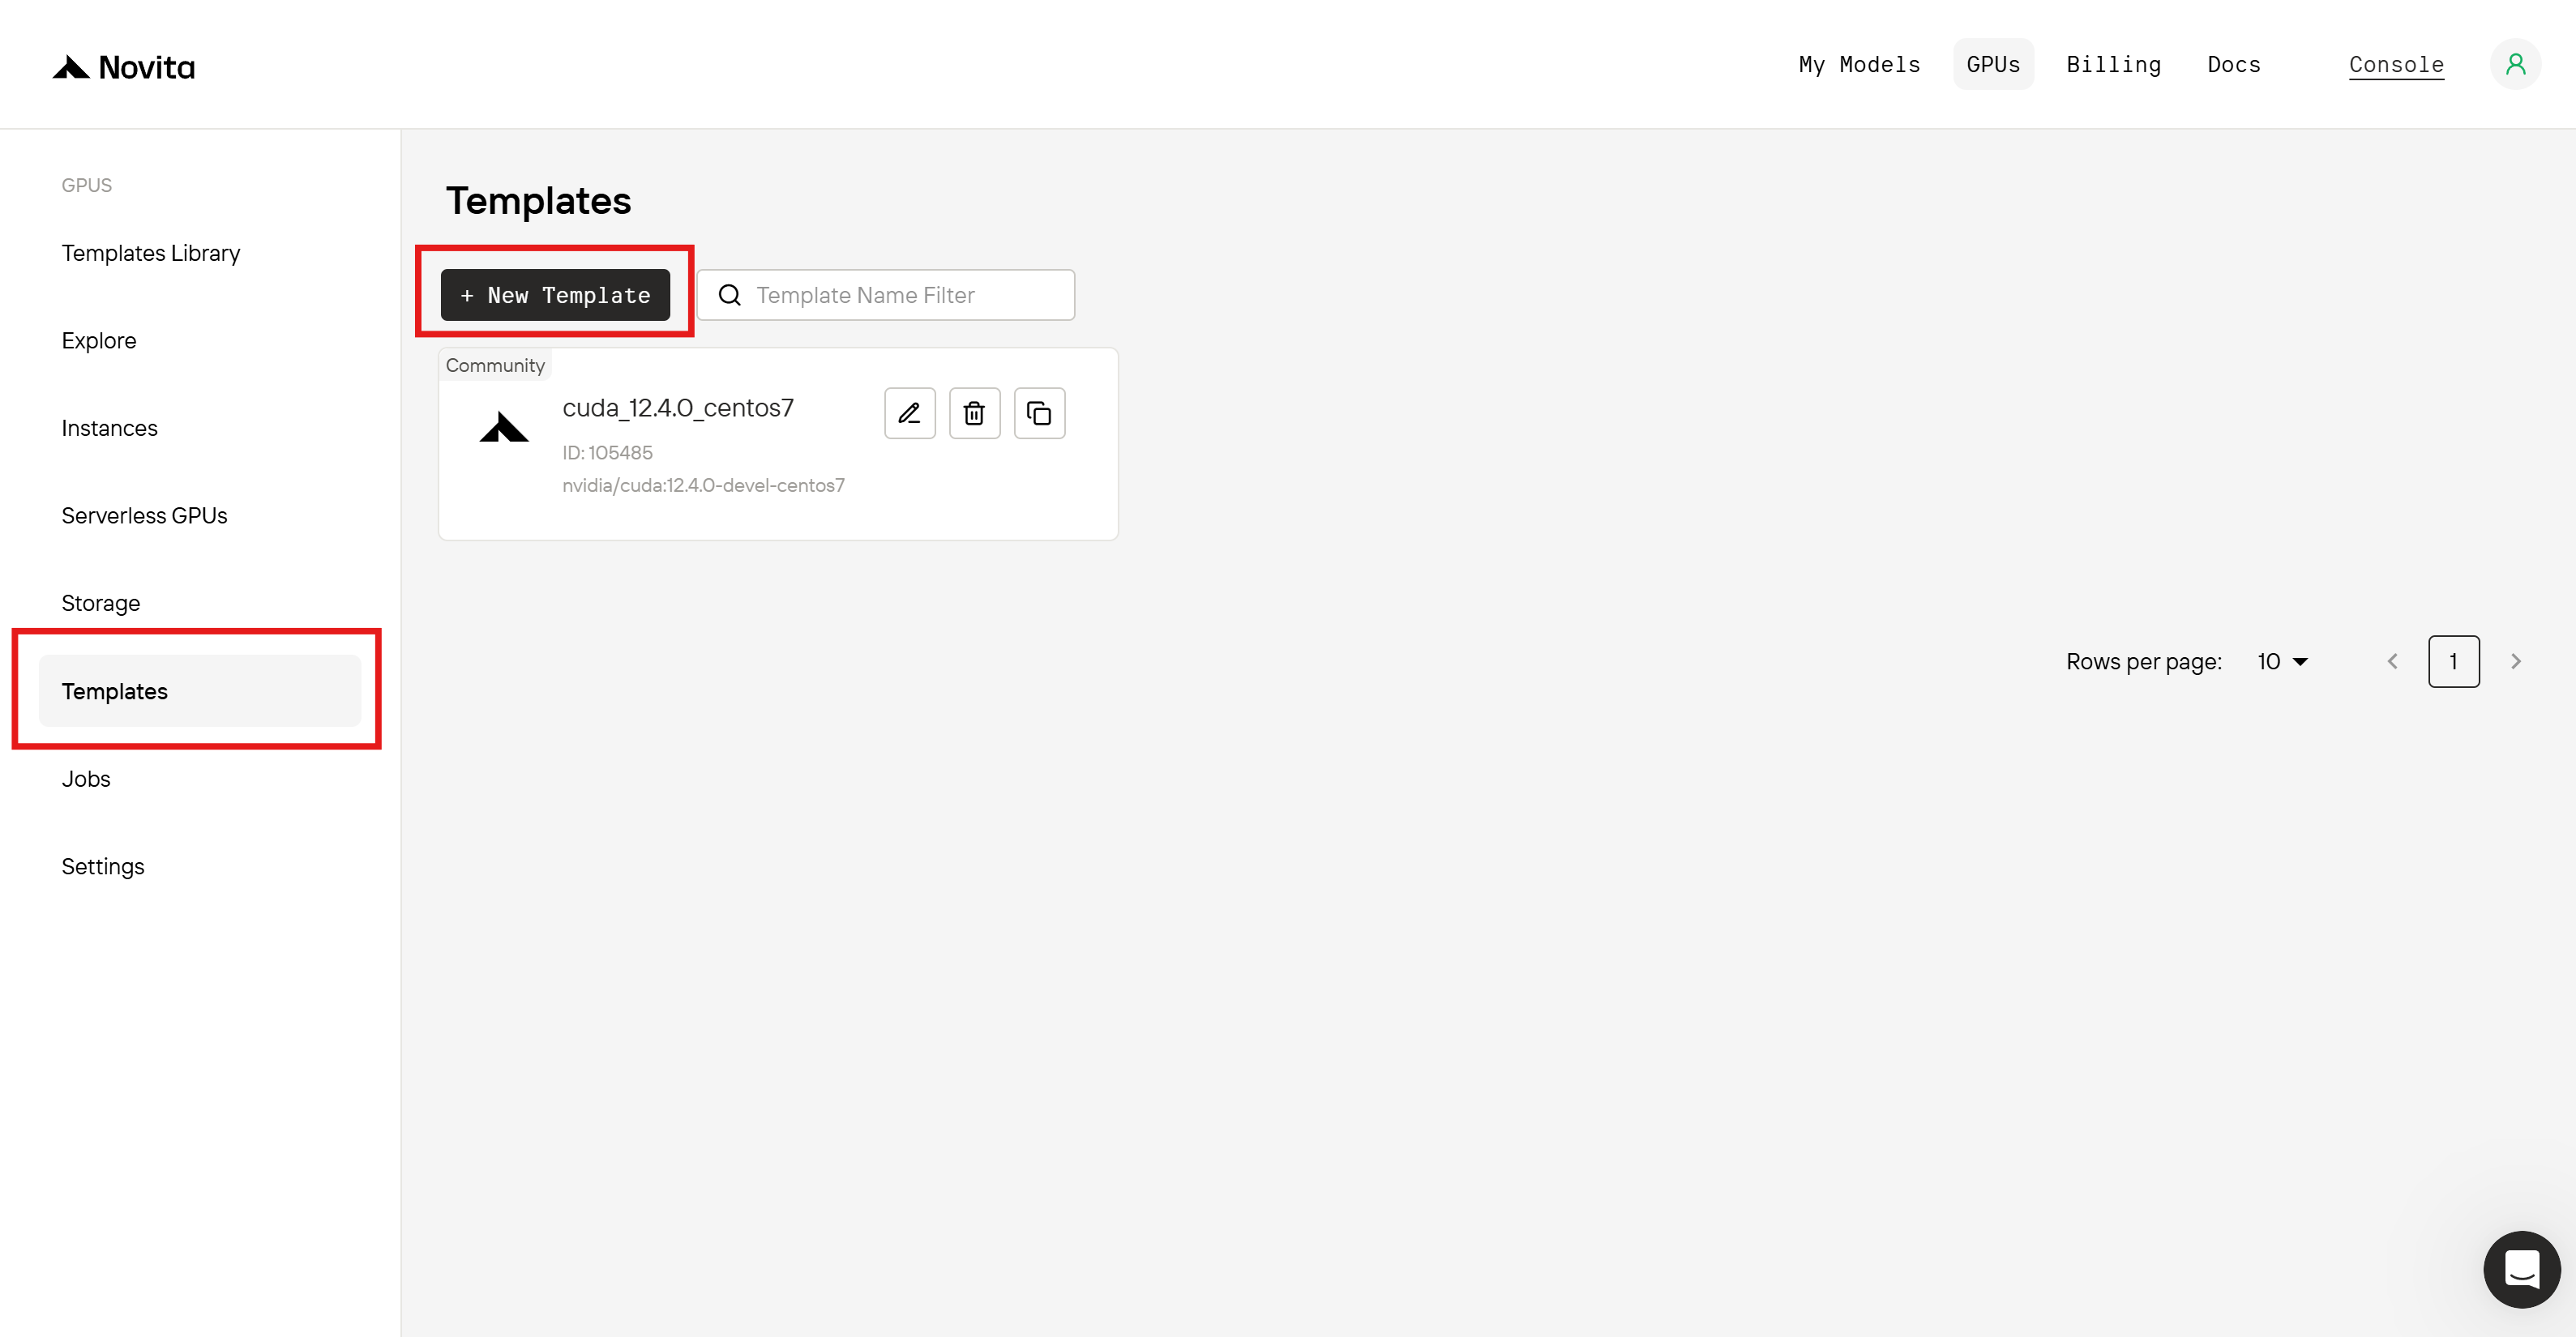
- Option 2: In the Console, go to the Template section and find the
New Templatebutton.
Create Template popup.
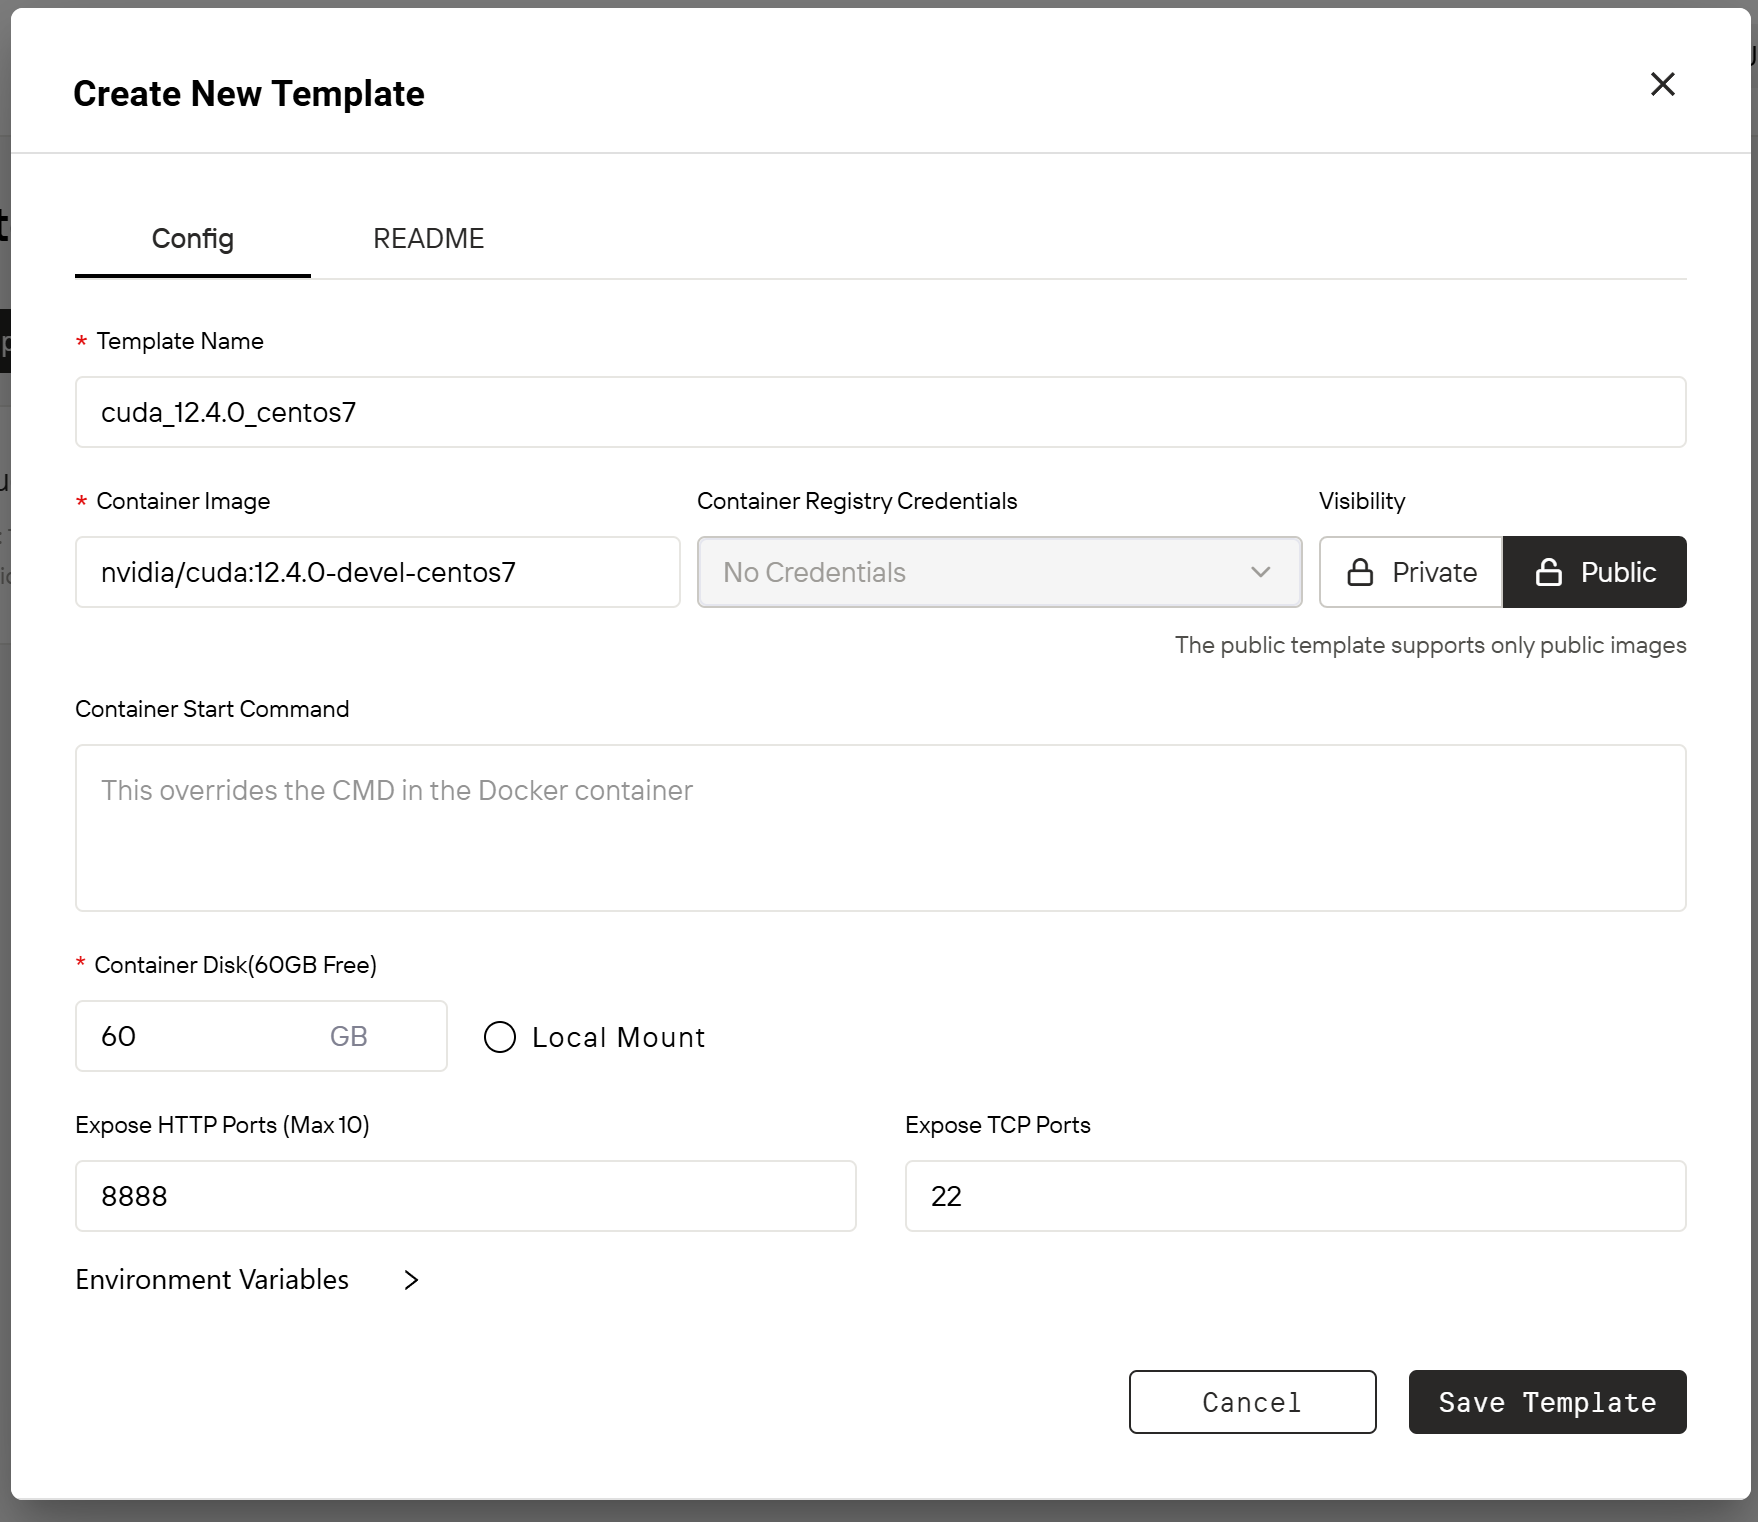
- Name Your Template: Choose a clear name that makes it easy to identify and use. We suggest selecting a name that relates to the content of the image.
-
Set up the image: Bundle your runtime environment into an image and upload it to an image repository ahead of time. Then, paste the image URL into the
Container Imagefield.
Novita AI supports both public and private image repositories (with optional access credentials). If you’re using a private image repository, you must provide Container Registry Credentials, which can be added under Settings > Container Registry Auth. -
Set Template Visibility: You can choose
Private, which makes the template accessible only to you and your team. However, we strongly recommend selectingPublicto share your work with the broader community. Public templates will appear in the Template Library, where all users can view, deploy, favorite, and share them—helping your work gain visibility and appreciation. Please note: for security reasons, public templates only support public image repositories, and the Container Registry Credentials input will be disabled. - Specify Container Disk Size: Determine the disk size based on your needs. We provide 60 GB of free disk space by default.
-
Advanced Configuration Options: To improve usability, you can optionally provide advanced configuration options such as
Container Start Command,Local Mount,Expose HTTP/TCP Ports, andEnvironment Variables.
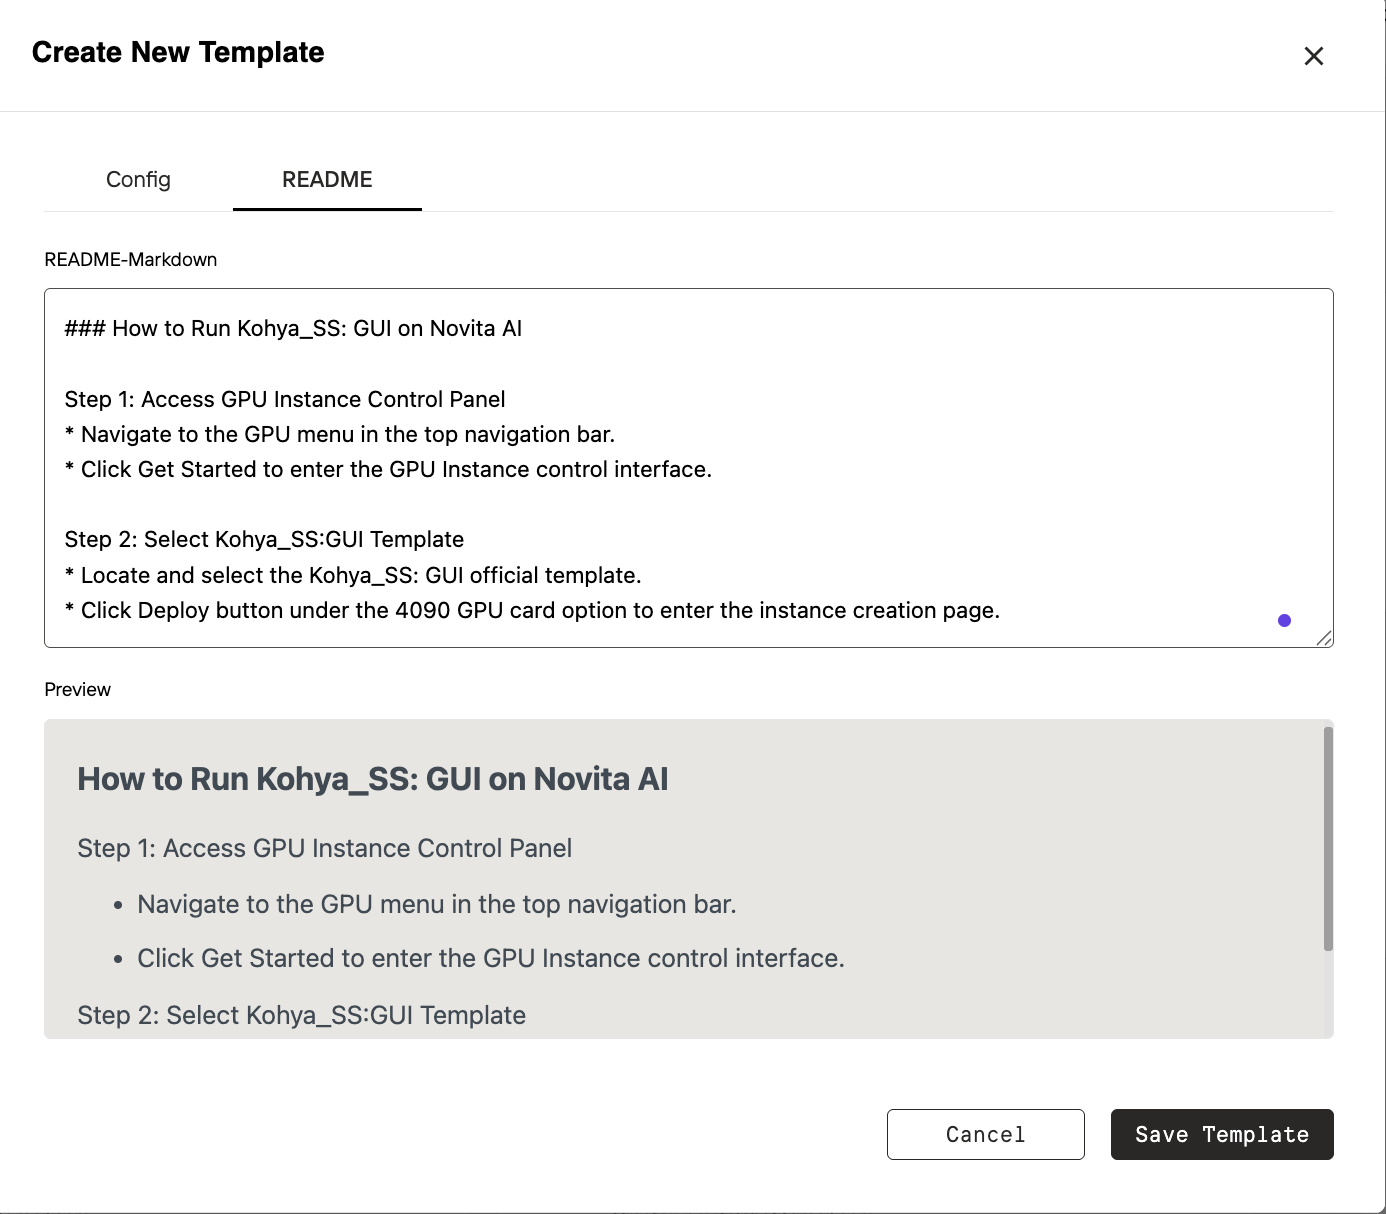
README that clearly explains the purpose and configuration of your template. A well-written README helps both you and your team quickly understand the template and makes it easier for others to use—especially if you choose to share it publicly.
- To ensure your template is easy to adopt, we recommend keeping your README concise and beginner-friendly.
- If your template requires any external dependencies, please include clear setup instructions within the README. This guidance helps others successfully deploy your template and ensures a smooth experience
- We suggest checking out popular open-source projects such as vLLM, SGLang, Ollama, ComfyUI, Stable Diffusion WebUI, or base environments like CUDA, PyTorch, or OS-specific setups (e.g., CentOS / Ubuntu, different versions).
Then try to explore some templates in the library!
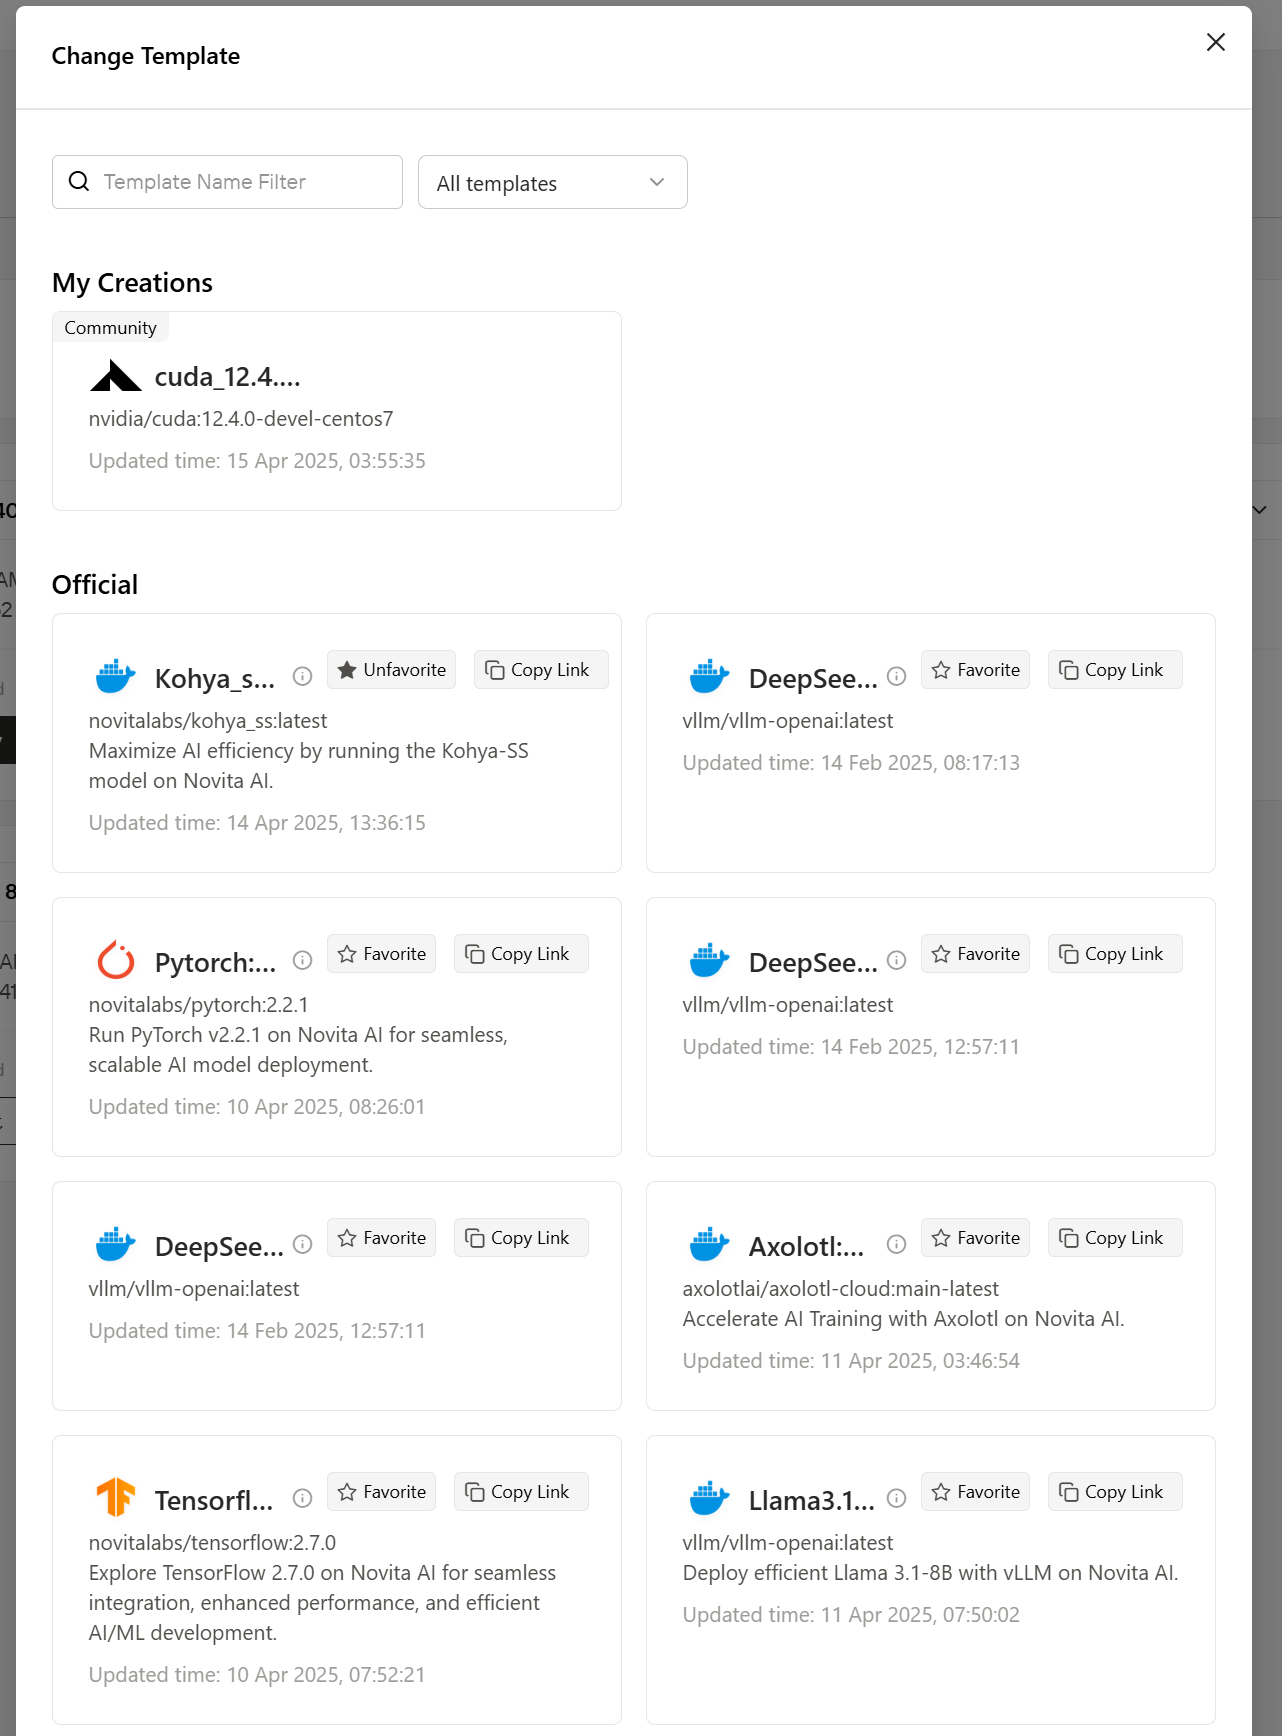
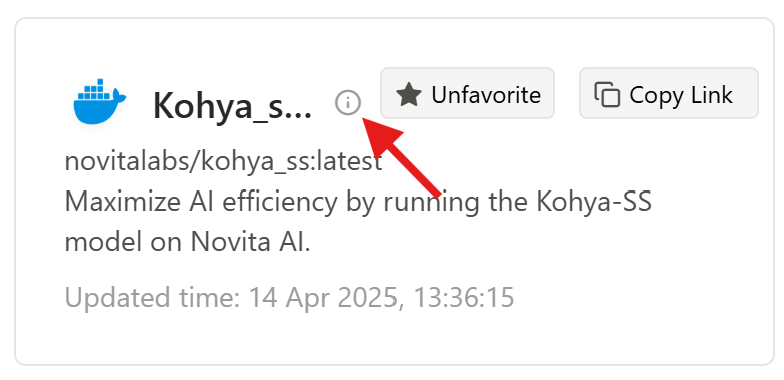
If you’ve created a public template, you’ll see it in the Console > Template Library section.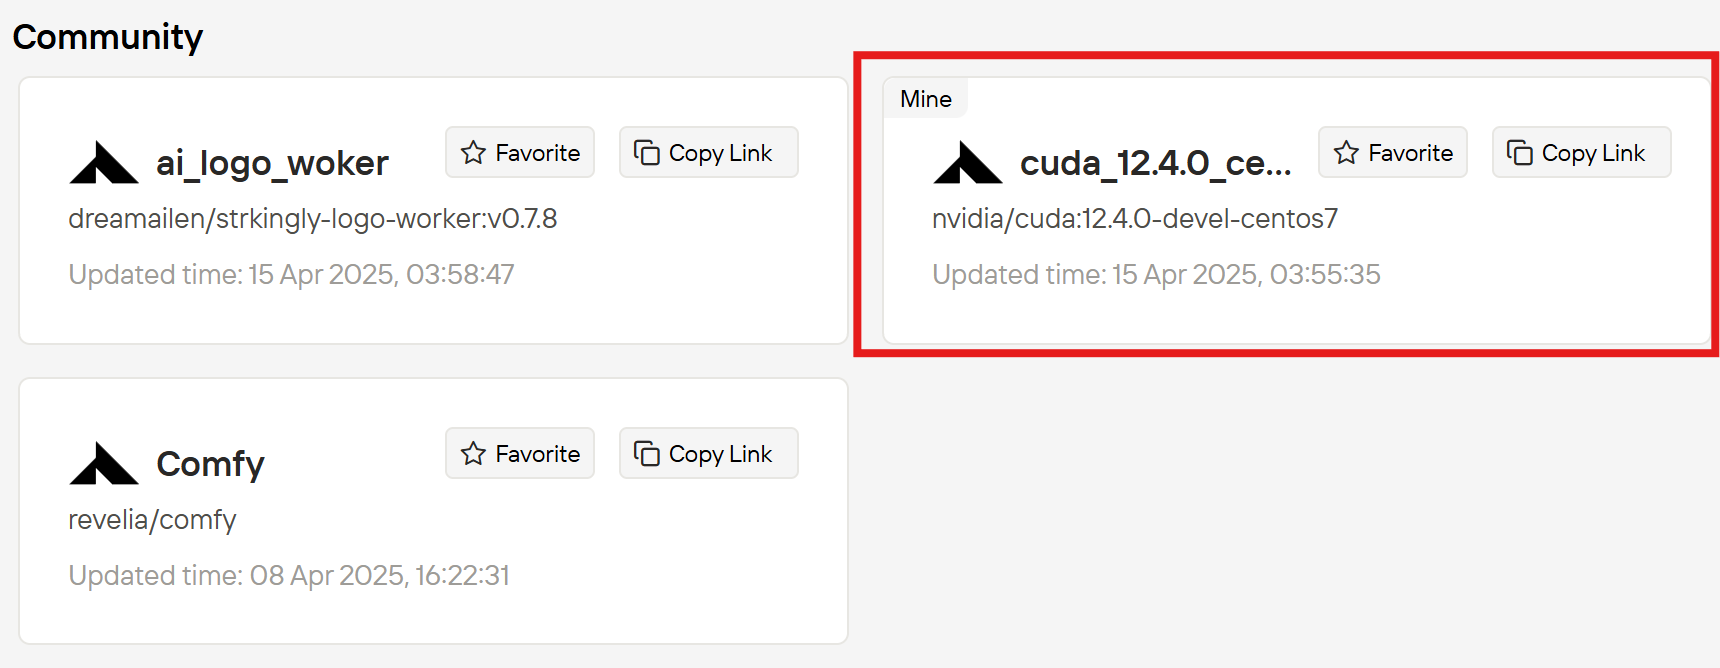
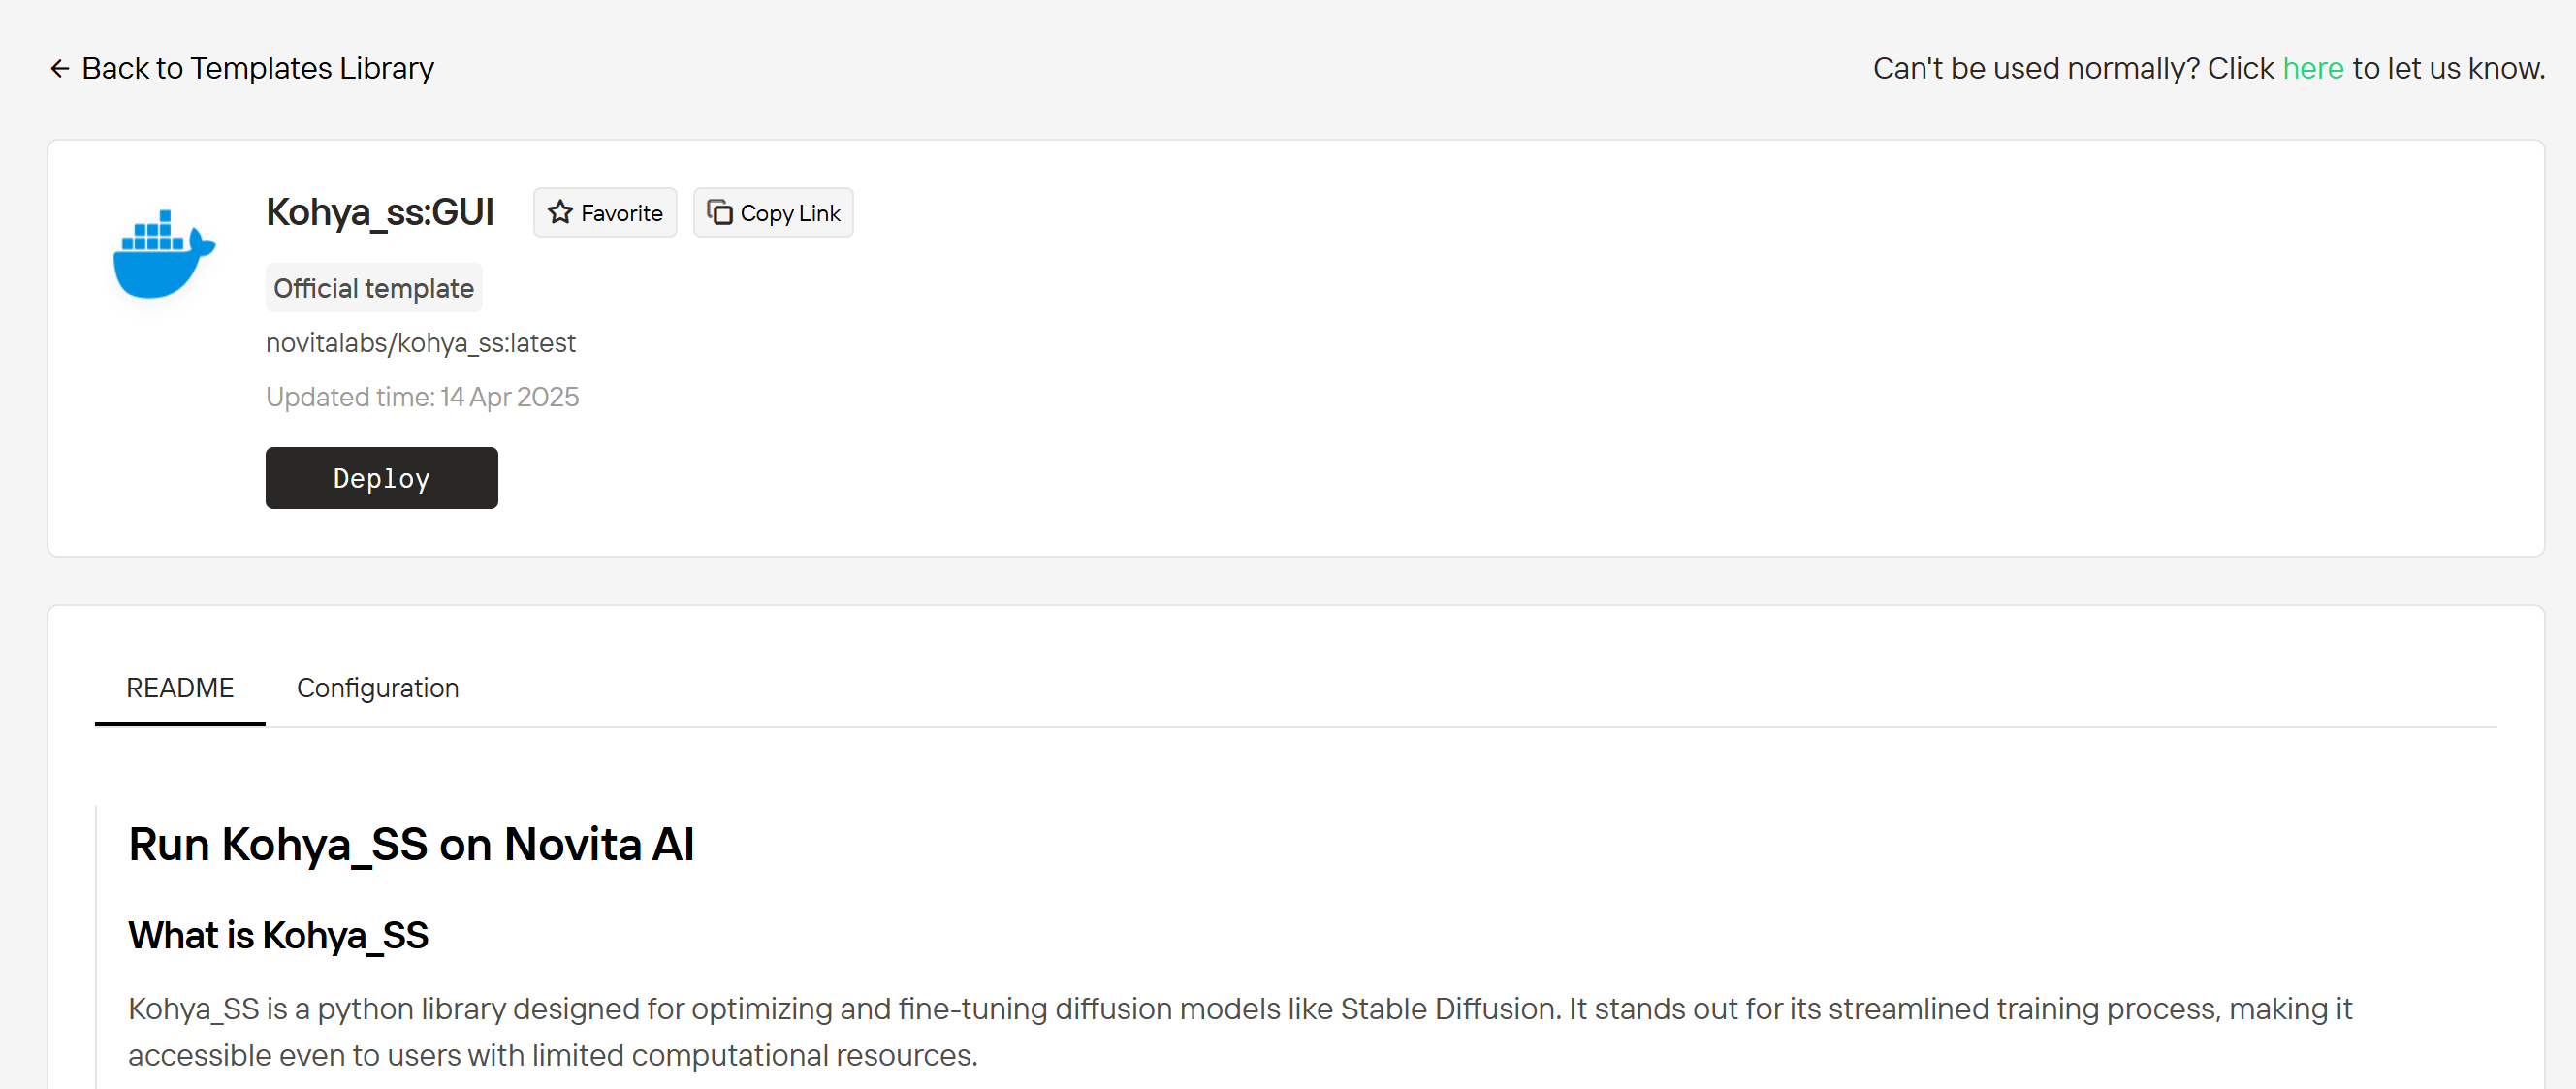
Template Library, you’ll find templates uploaded by both Novita and the community. Clicking on a template will display the information about it, including the README and configuration details. If you like the template, you can click Deploy to instantly deploy it.
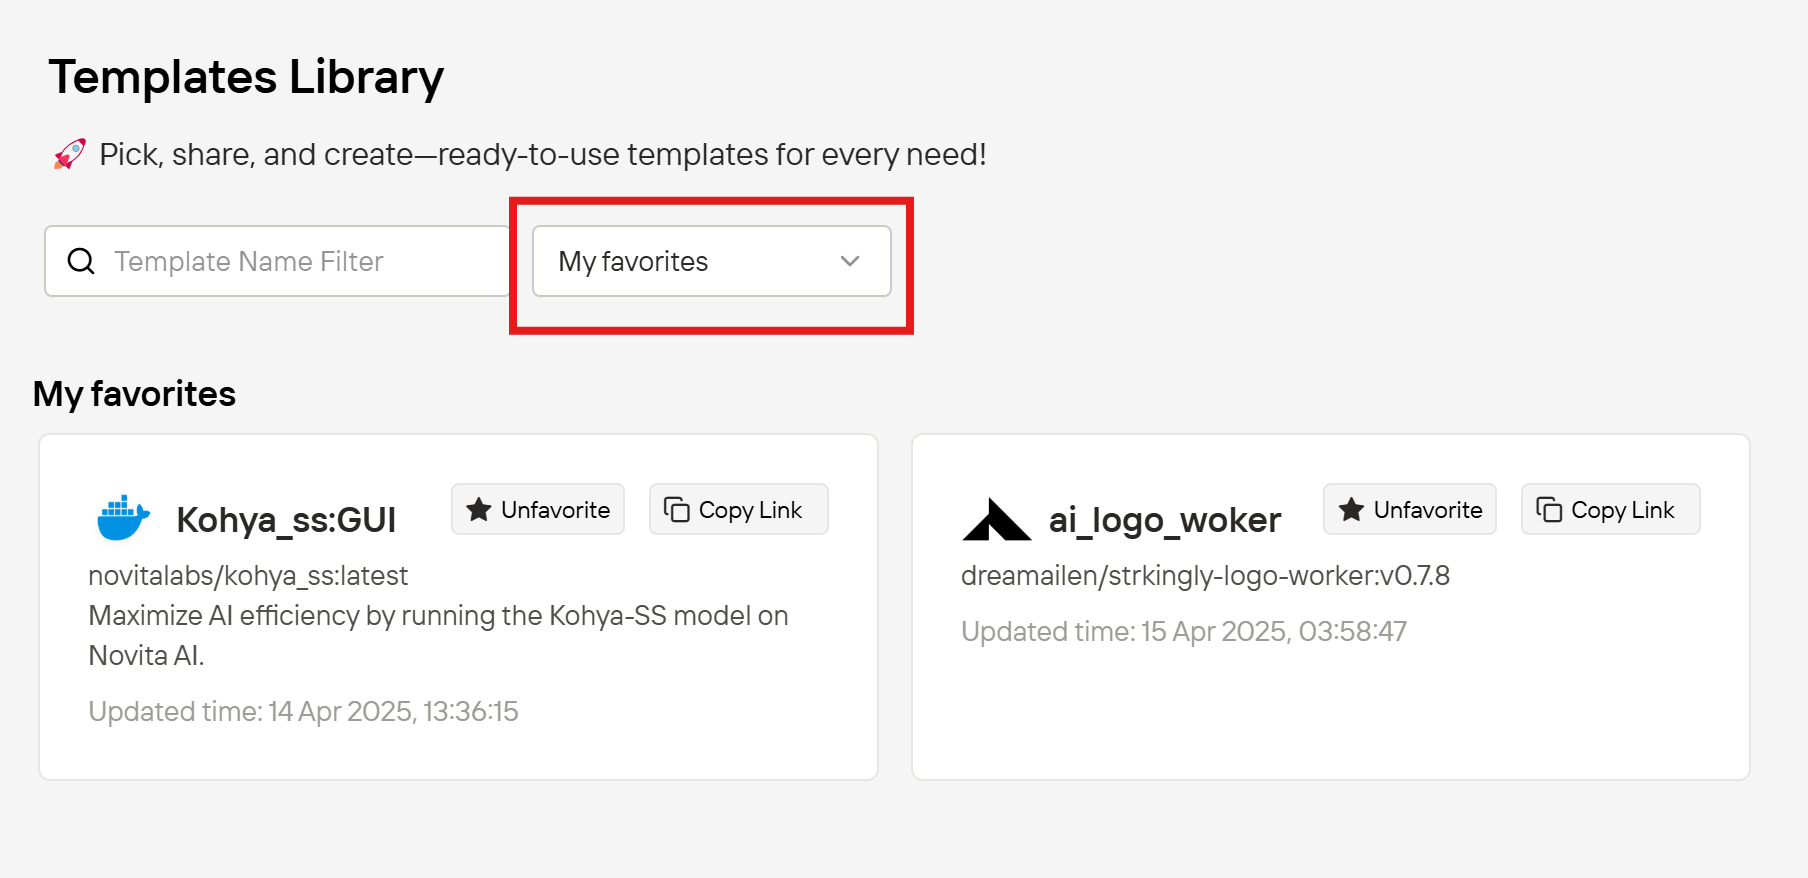
Favorite to save it to your favorites. This makes it easier to find later, and your favoriting helps bring attention to the template, allowing more users to discover it. Your favorited templates will be displayed when you filter by My favorites.
Copy Link button to easily share it. This way, they can check it out and use it!

Use a template to create an instance
TheTemplate Library is integrated into the Explore section during instance creation.
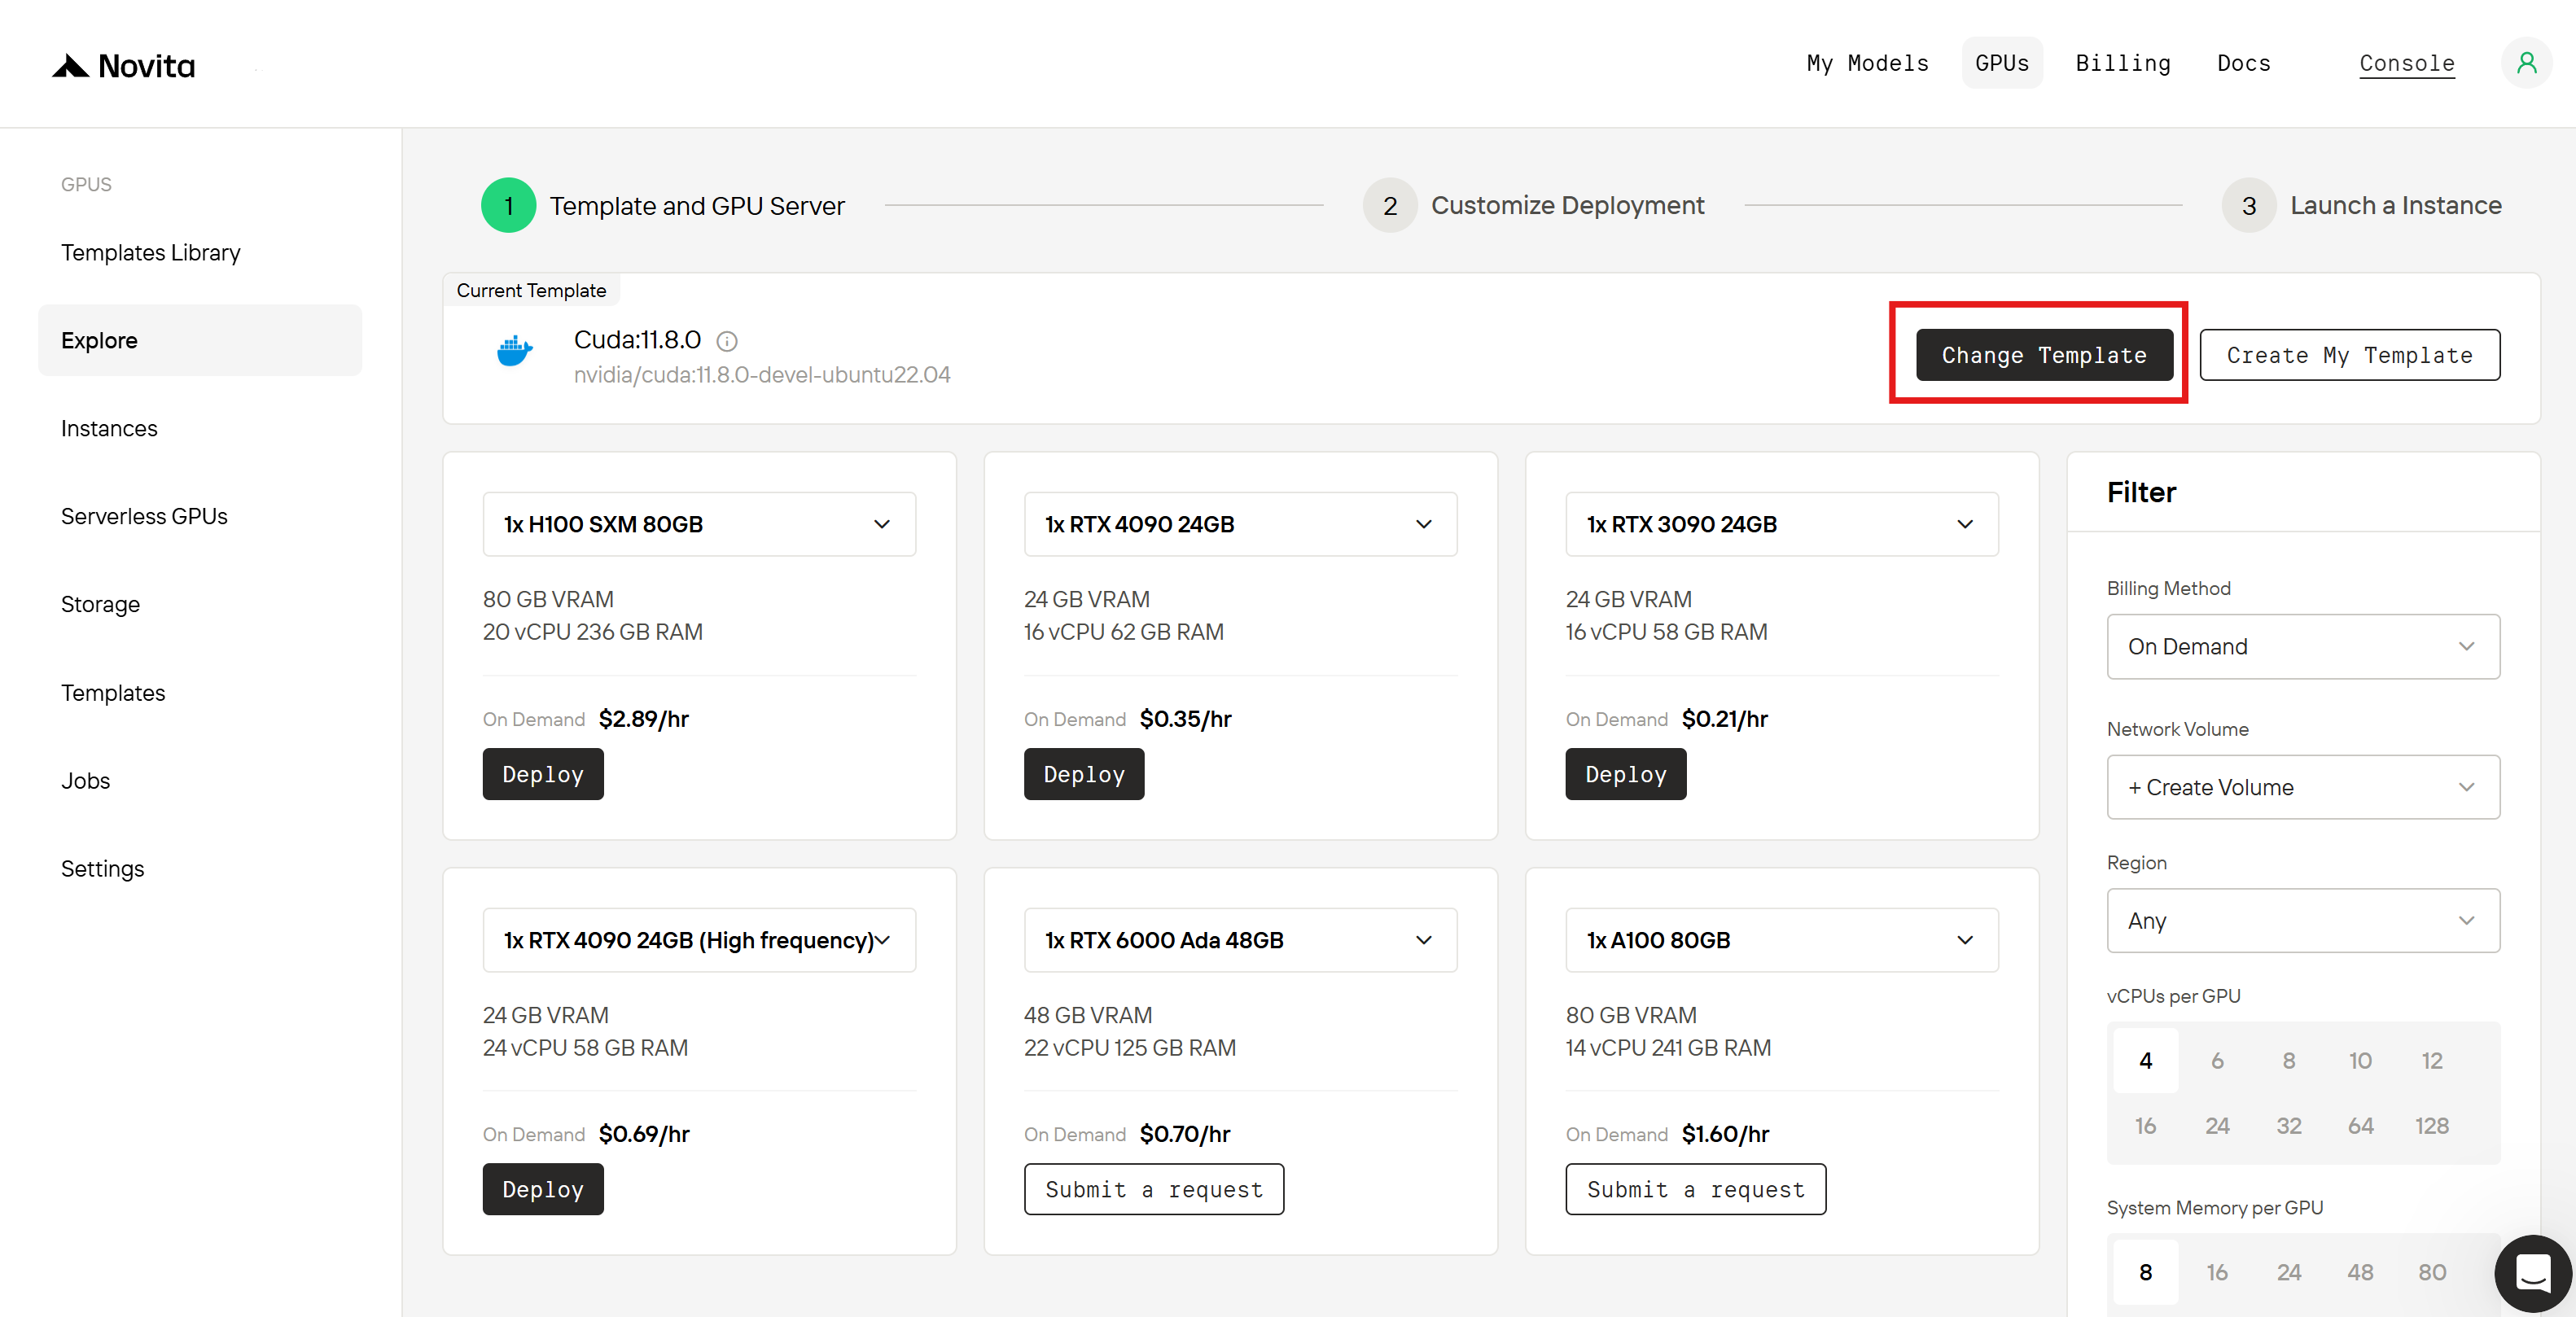
Change Template to view both personal/team-created templates and all templates from the Template Library. Here, you can also filter to select your favorited templates.
Join Us!
Now that you know how to create, upload, and share templates, come join us in building a community-friendly template ecosystem for tech enthusiasts! Get in Touch:- Discord: novita.ai