> ## Documentation Index
> Fetch the complete documentation index at: https://novita.ai/docs/llms.txt
> Use this file to discover all available pages before exploring further.
# Continue
> Ontdek hoe Continue en Novita AI hun krachten bundelen om je workflow voor softwareontwikkeling te versterken.
De krachtige integratie van Continue en Novita AI brengt AI-ondersteunde ontwikkeling rechtstreeks naar je codeeromgeving. Dit kan je helpen toegang te krijgen tot intelligente codesuggesties, geautomatiseerd testen en real-time pair programming zonder van context te wisselen. Novita AI blinkt uit in het direct implementeren van AI-modellen via onze intuïtieve API, schaalt moeiteloos met onze kosteneffectieve GPU-infrastructuur en behoudt topprestaties gedurende je hele ontwikkelproces.
Onze stapsgewijze gids leidt je door de implementatie van Novita AI op Continue, inclusief methoden voor het gebruik van Continue.dev en het integreren van Novita AI met Continue met behulp van een API-sleutel.
## Hoe gebruik je Continue.dev?
### VS Code
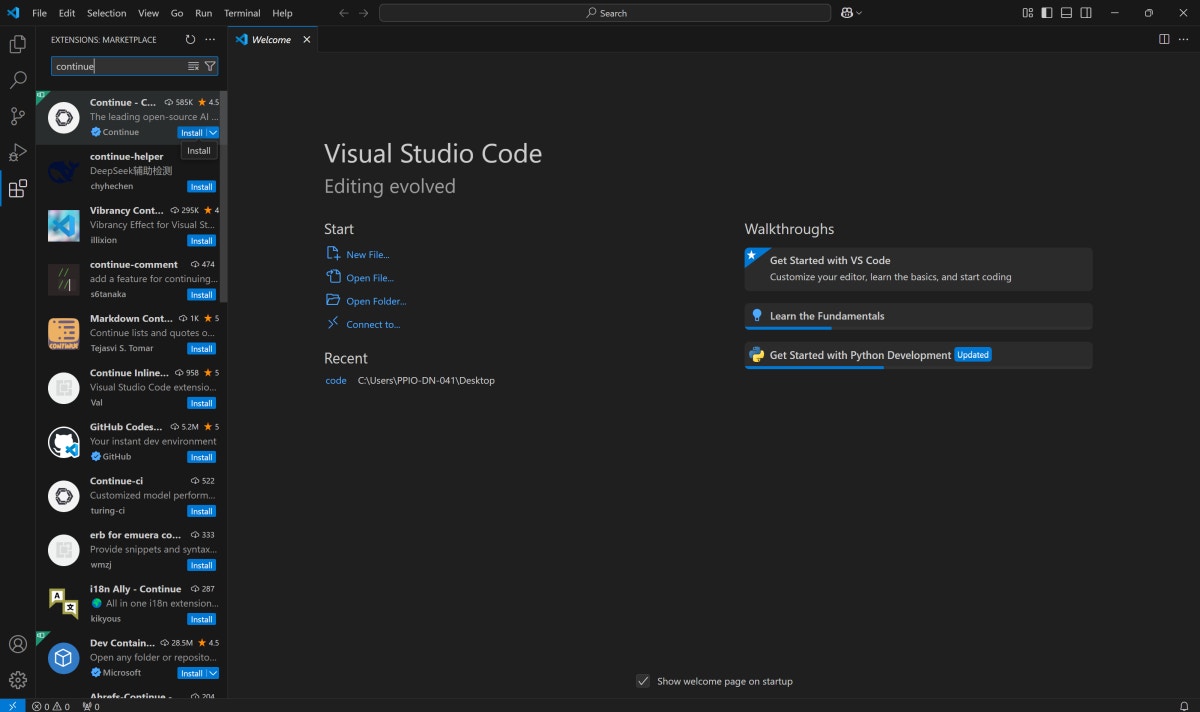
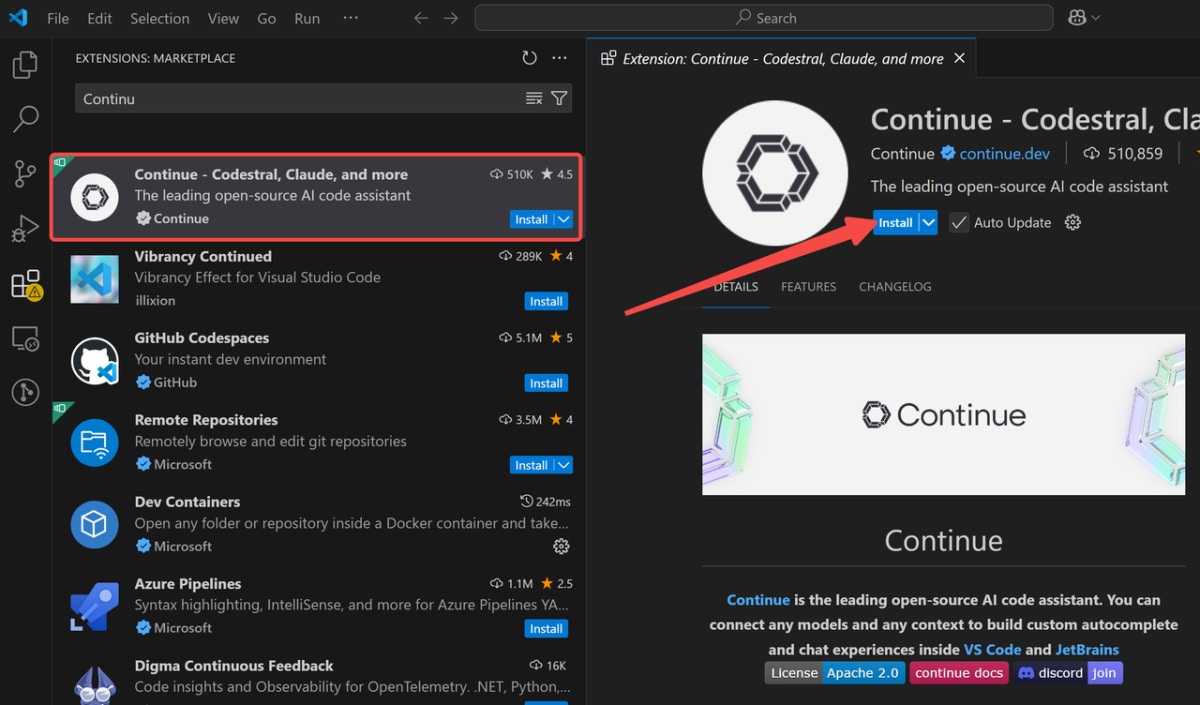
Stap 1: Klik op `Install `om de Continue-extensie toe te voegen vanuit Visual Studio Marketplace.
Stap 2: Klik opnieuw op`Install`in VS Code om de installatie van de Continue-extensie te voltooien.
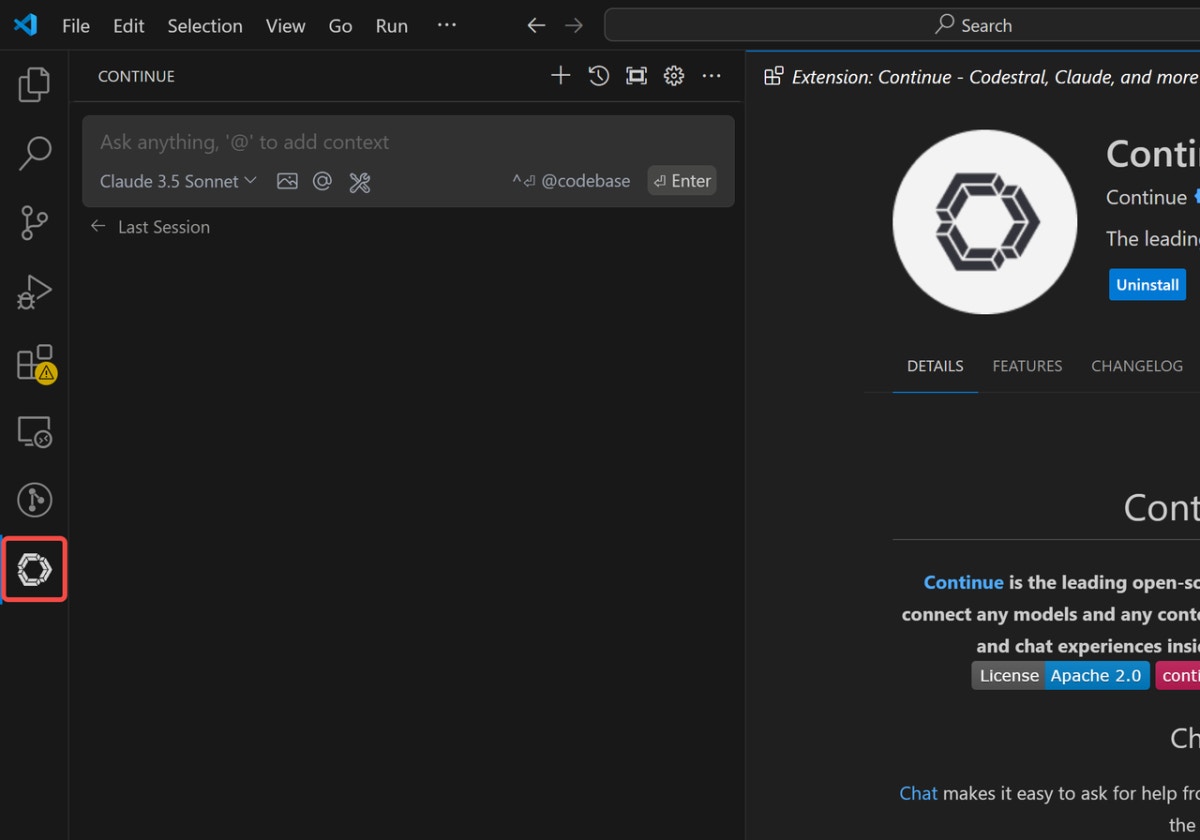
Stap 3: Verplaats het Continue-logo naar je rechterzijbalk voor betere toegang binnen je workflow.
 ### JetBrains
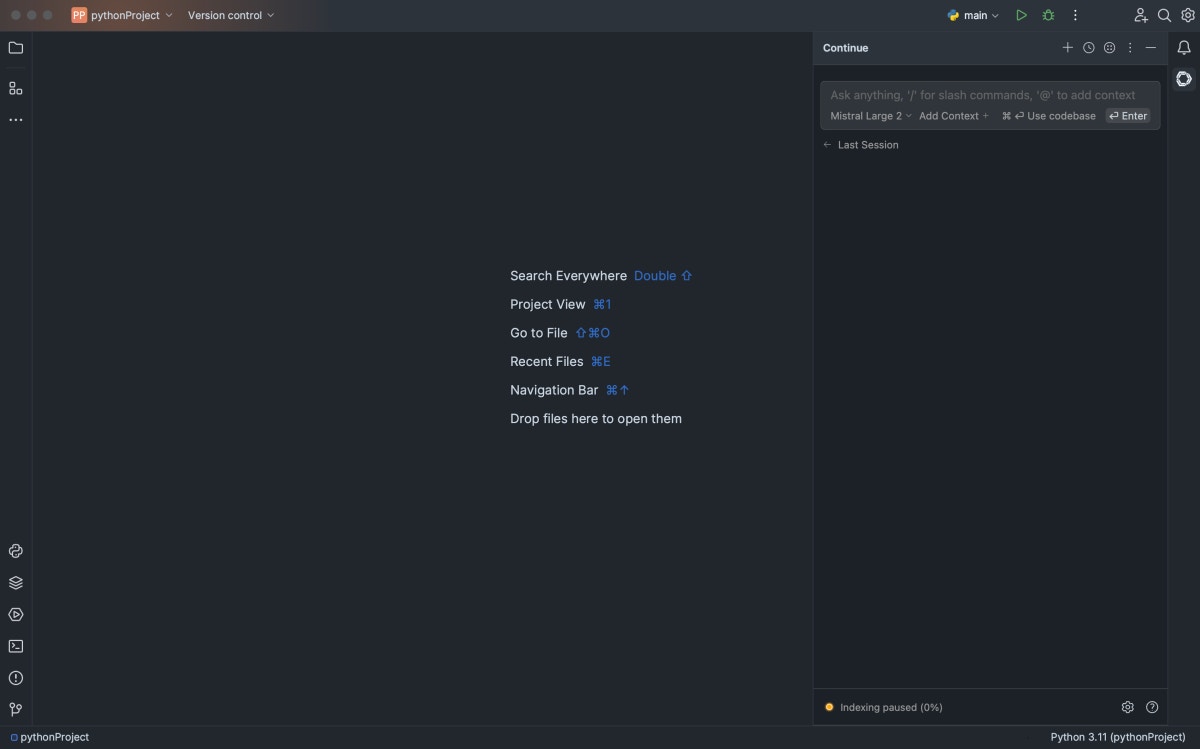
Stap 1: Open de IDE-instellingen door Ctrl + Alt + S in te drukken in je JetBrains-omgeving.
Stap 2: Navigeer naar plugins en zoek naar Continue in de JetBrains marketplace.
Stap 3: Klik op `Install`en vind het Continue-logo op je rechterwerkbalk.
### JetBrains
Stap 1: Open de IDE-instellingen door Ctrl + Alt + S in te drukken in je JetBrains-omgeving.
Stap 2: Navigeer naar plugins en zoek naar Continue in de JetBrains marketplace.
Stap 3: Klik op `Install`en vind het Continue-logo op je rechterwerkbalk.
 ## Novita AI integreren met Continue met behulp van een API-sleutel
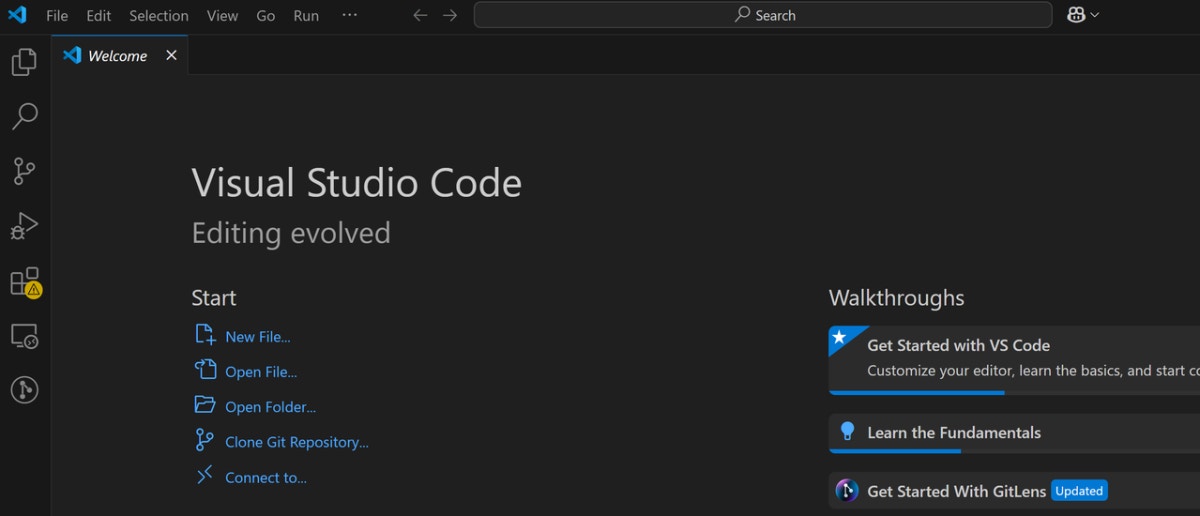
### Stap 1: Open VS Code
## Novita AI integreren met Continue met behulp van een API-sleutel
### Stap 1: Open VS Code
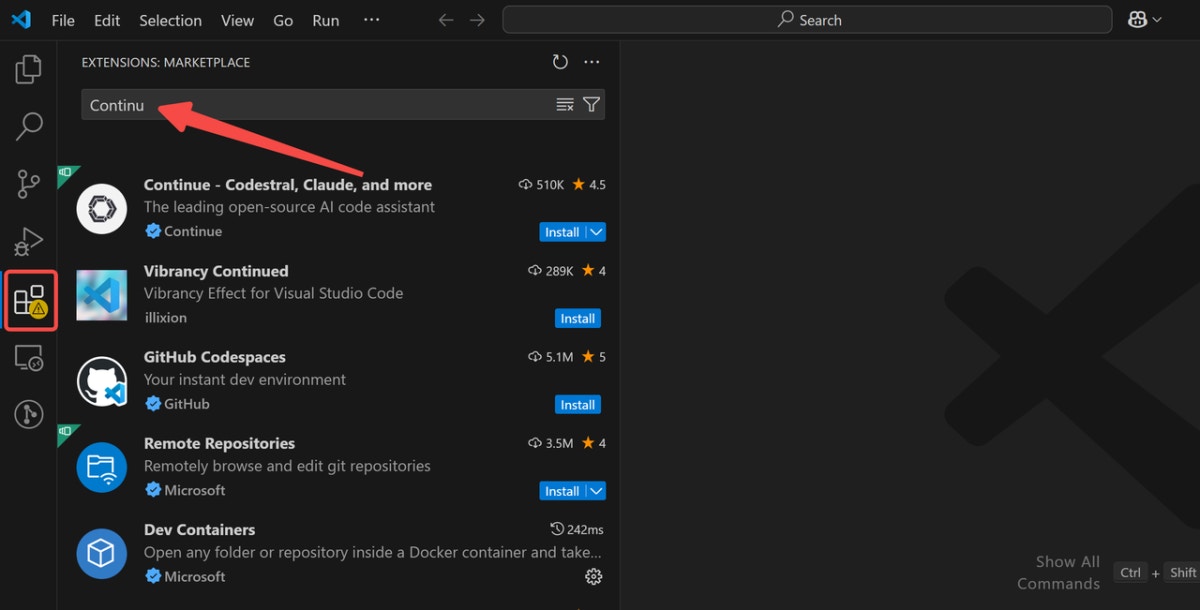
 ### Stap 2: Zoek naar Continue
* Navigeer naar extensions en zoek naar Continue in de bovenste zoekbalk.
### Stap 2: Zoek naar Continue
* Navigeer naar extensions en zoek naar Continue in de bovenste zoekbalk.
 ### Stap 3: Installeer Continue
* Installeer de Continue-extensie door het eerste resultaat te selecteren.
### Stap 3: Installeer Continue
* Installeer de Continue-extensie door het eerste resultaat te selecteren.
 ### Stap 4: Klik op Continue
* Klik op het Continue-pictogram in je linkerzijbalk nadat de installatie is voltooid.
### Stap 4: Klik op Continue
* Klik op het Continue-pictogram in je linkerzijbalk nadat de installatie is voltooid.
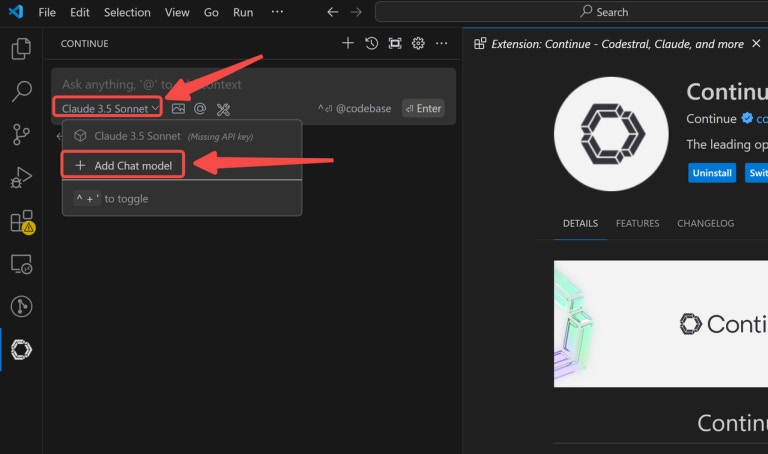
 ### Stap 5: Voeg je Chat Model toe (bijv. Novita AI)
* Selecteer Novita AI in het providermenu op elke gemarkeerde locatie.
### Stap 5: Voeg je Chat Model toe (bijv. Novita AI)
* Selecteer Novita AI in het providermenu op elke gemarkeerde locatie.
 ### Stap 6: Voer de API-sleutel van Novita AI in en maak verbinding
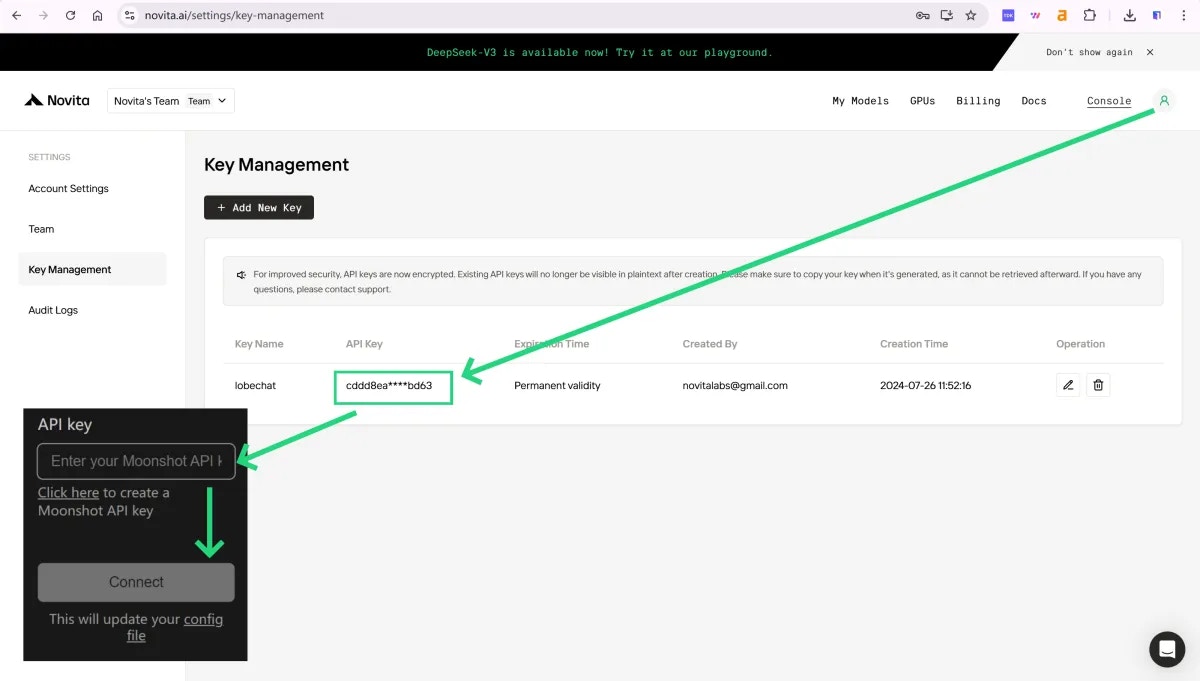
* Kopieer je Novita AI API Key uit het gedeelte met de gebruikersavatar voor authenticatie.
### Stap 6: Voer de API-sleutel van Novita AI in en maak verbinding
* Kopieer je Novita AI API Key uit het gedeelte met de gebruikersavatar voor authenticatie.