> ## Documentation Index
> Fetch the complete documentation index at: https://novita.ai/docs/llms.txt
> Use this file to discover all available pages before exploring further.
# 自動チャージ
\*\*「自動チャージ」\*\*を有効にすると、残高が指定したしきい値を下回った場合に、アカウントにクレジットが自動的に追加されます。この機能を設定するには、以下の手順に従ってください。
### 1. 自動チャージを有効にする
コンソールで 支払い方法 に移動します。
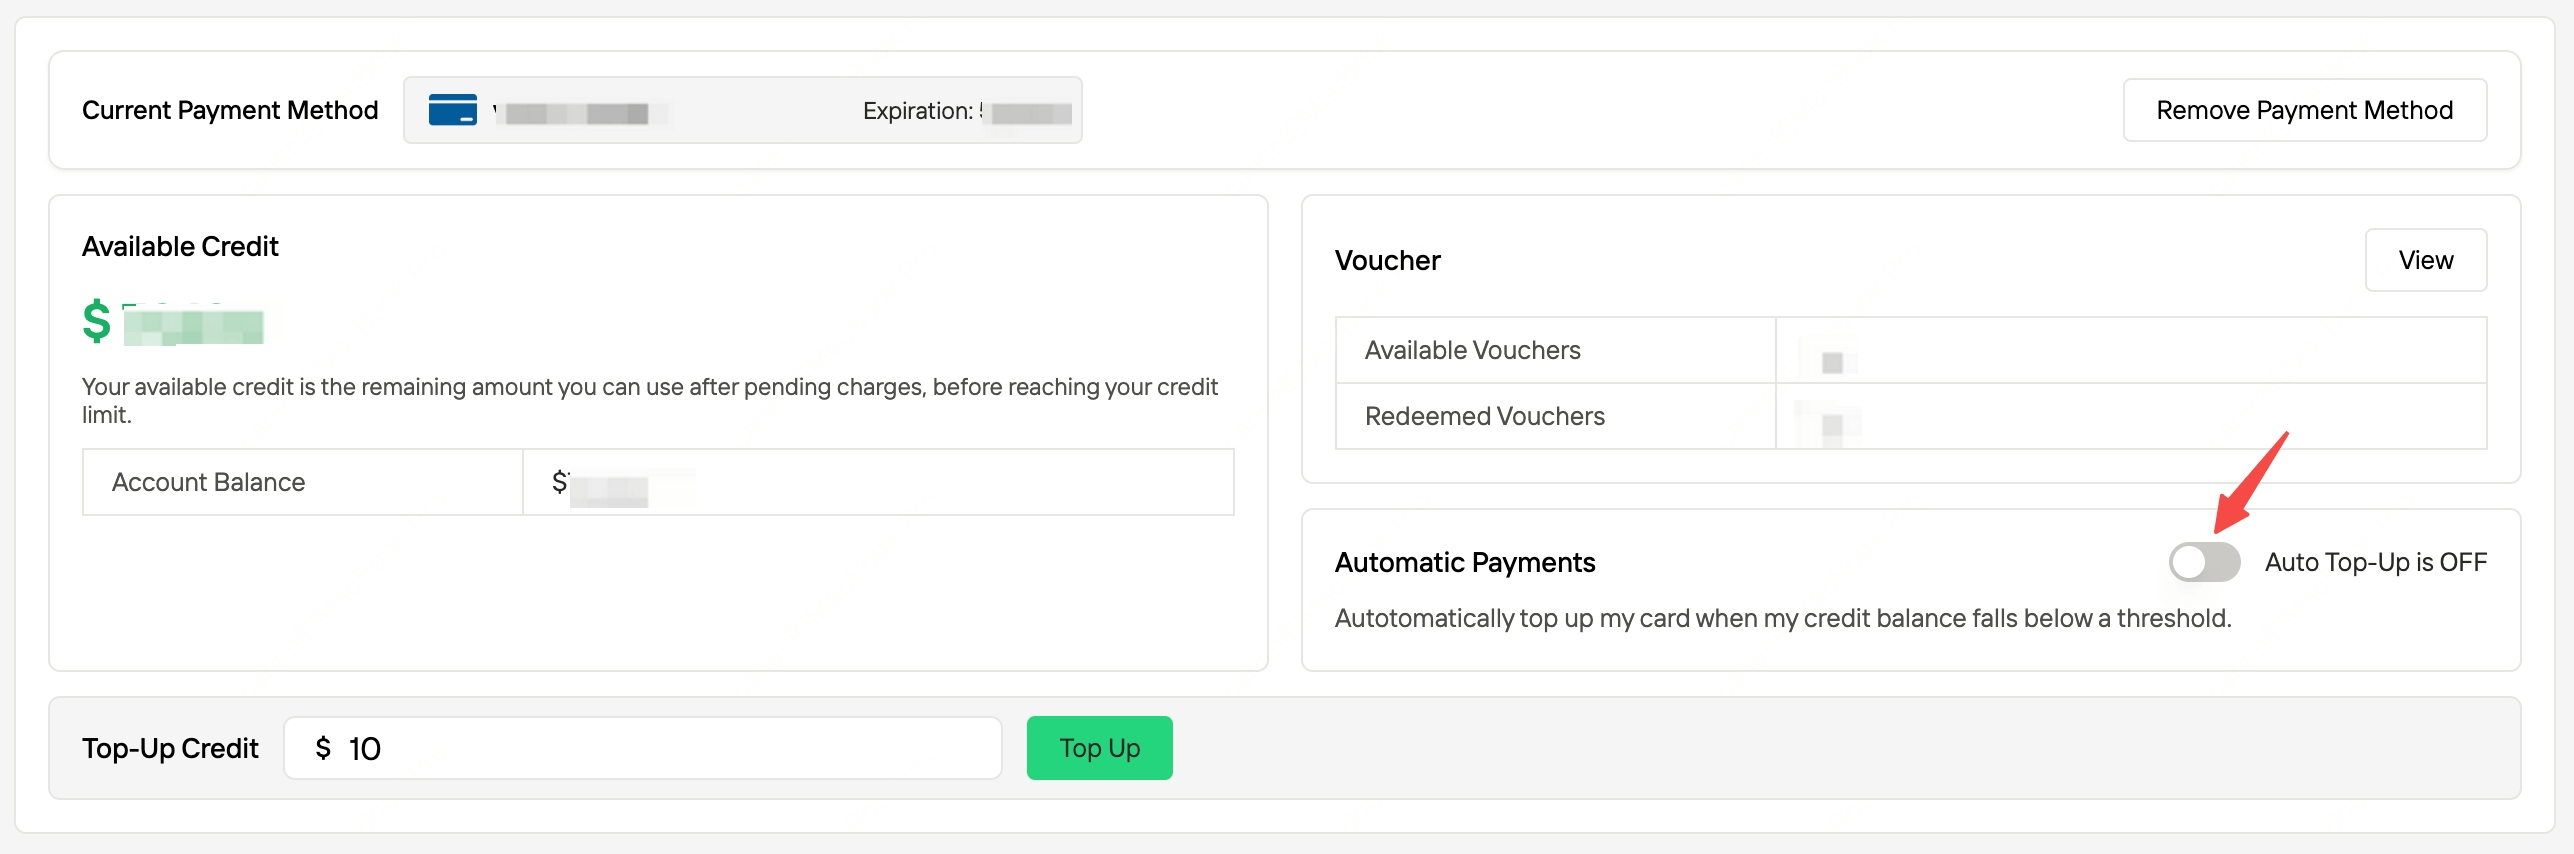 お支払い方法が登録されていない場合は、\*\*「お支払い方法を追加」\*\*をクリックします。追加するために Stripe の安全なページへリダイレクトされます。当社がお支払い情報を保存することはありません。
### 2. 自動チャージの設定
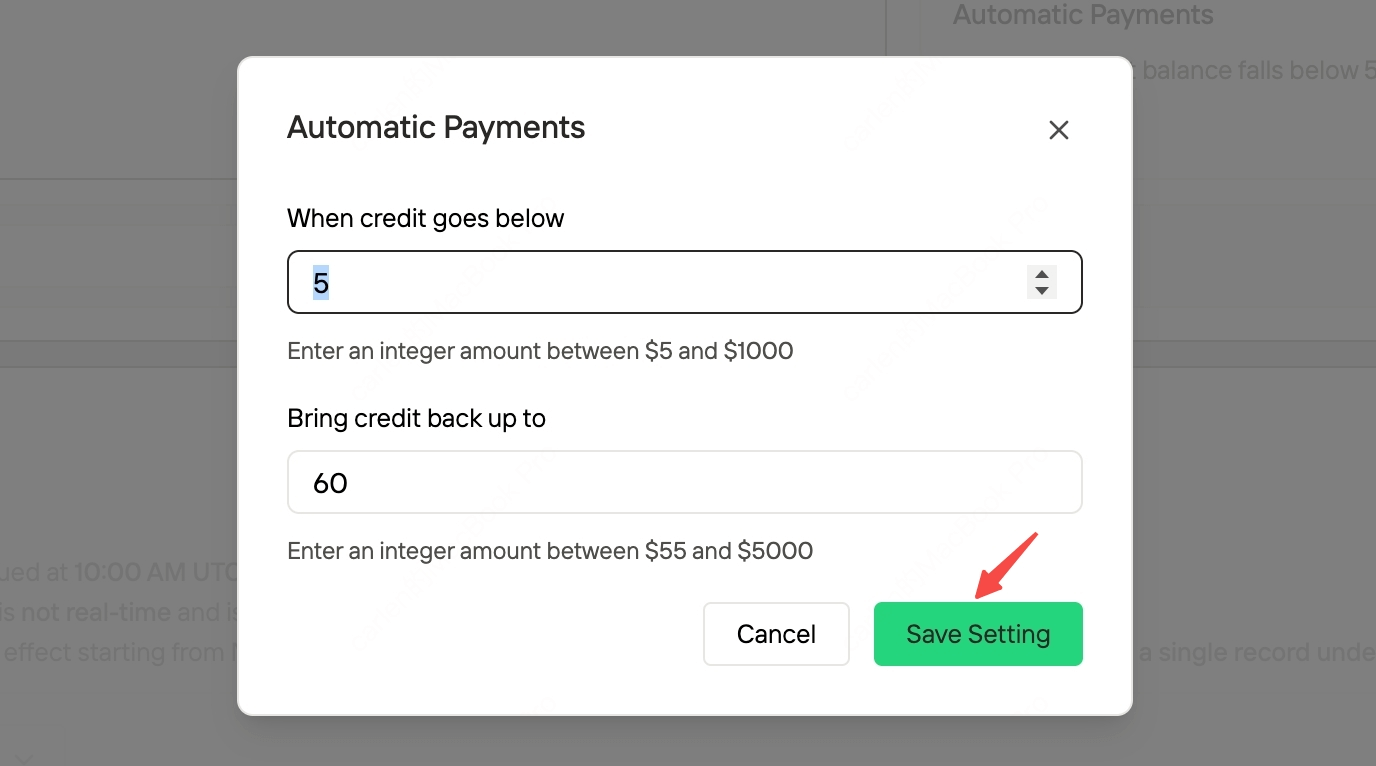
\*\*「自動支払い」\*\*スイッチをオンにすると、設定ポップアップが自動的に表示されます。
\*\*「クレジットが以下を下回った場合」**と**「クレジットを以下まで戻す」**に有効な値を設定し、**「設定を保存」\*\*をクリックしてプロセスを完了します。
お支払い方法が登録されていない場合は、\*\*「お支払い方法を追加」\*\*をクリックします。追加するために Stripe の安全なページへリダイレクトされます。当社がお支払い情報を保存することはありません。
### 2. 自動チャージの設定
\*\*「自動支払い」\*\*スイッチをオンにすると、設定ポップアップが自動的に表示されます。
\*\*「クレジットが以下を下回った場合」**と**「クレジットを以下まで戻す」**に有効な値を設定し、**「設定を保存」\*\*をクリックしてプロセスを完了します。