> ## Documentation Index
> Fetch the complete documentation index at: https://novita.ai/docs/llms.txt
> Use this file to discover all available pages before exploring further.
# LlamaIndex
> Intégrez facilement Novita AI à LlamaIndex pour créer des applications intelligentes alimentées par les données.
Conçu pour une indexation et une récupération optimales, LlamaIndex excelle dans la fourniture d’une efficacité élevée pour les applications nécessitant un accès aux données précis et rapide. En combinant [Novita AI](https://novita.ai/) avec LlamaIndex, vous bénéficierez d’avantages clés tels qu’une précision supérieure de récupération des données, une évolutivité inégalée et des performances rentables.
Ce guide vous expliquera comment utiliser LlamaIndex avec Novita AI sur la base de l’API OpenAI, afin d’offrir des solutions d’IA plus intelligentes, évolutives et hautement efficaces, qui stimulent l’innovation et apportent des résultats exceptionnels aux développeurs.
## **Comment intégrer l’API Novita AI avec LlamaIndex**
Étape 1 : Visitez la [bibliothèque de modèles](https://novita.ai/llm-api) sur Novita AI et sélectionnez un modèle qui vous intéresse.
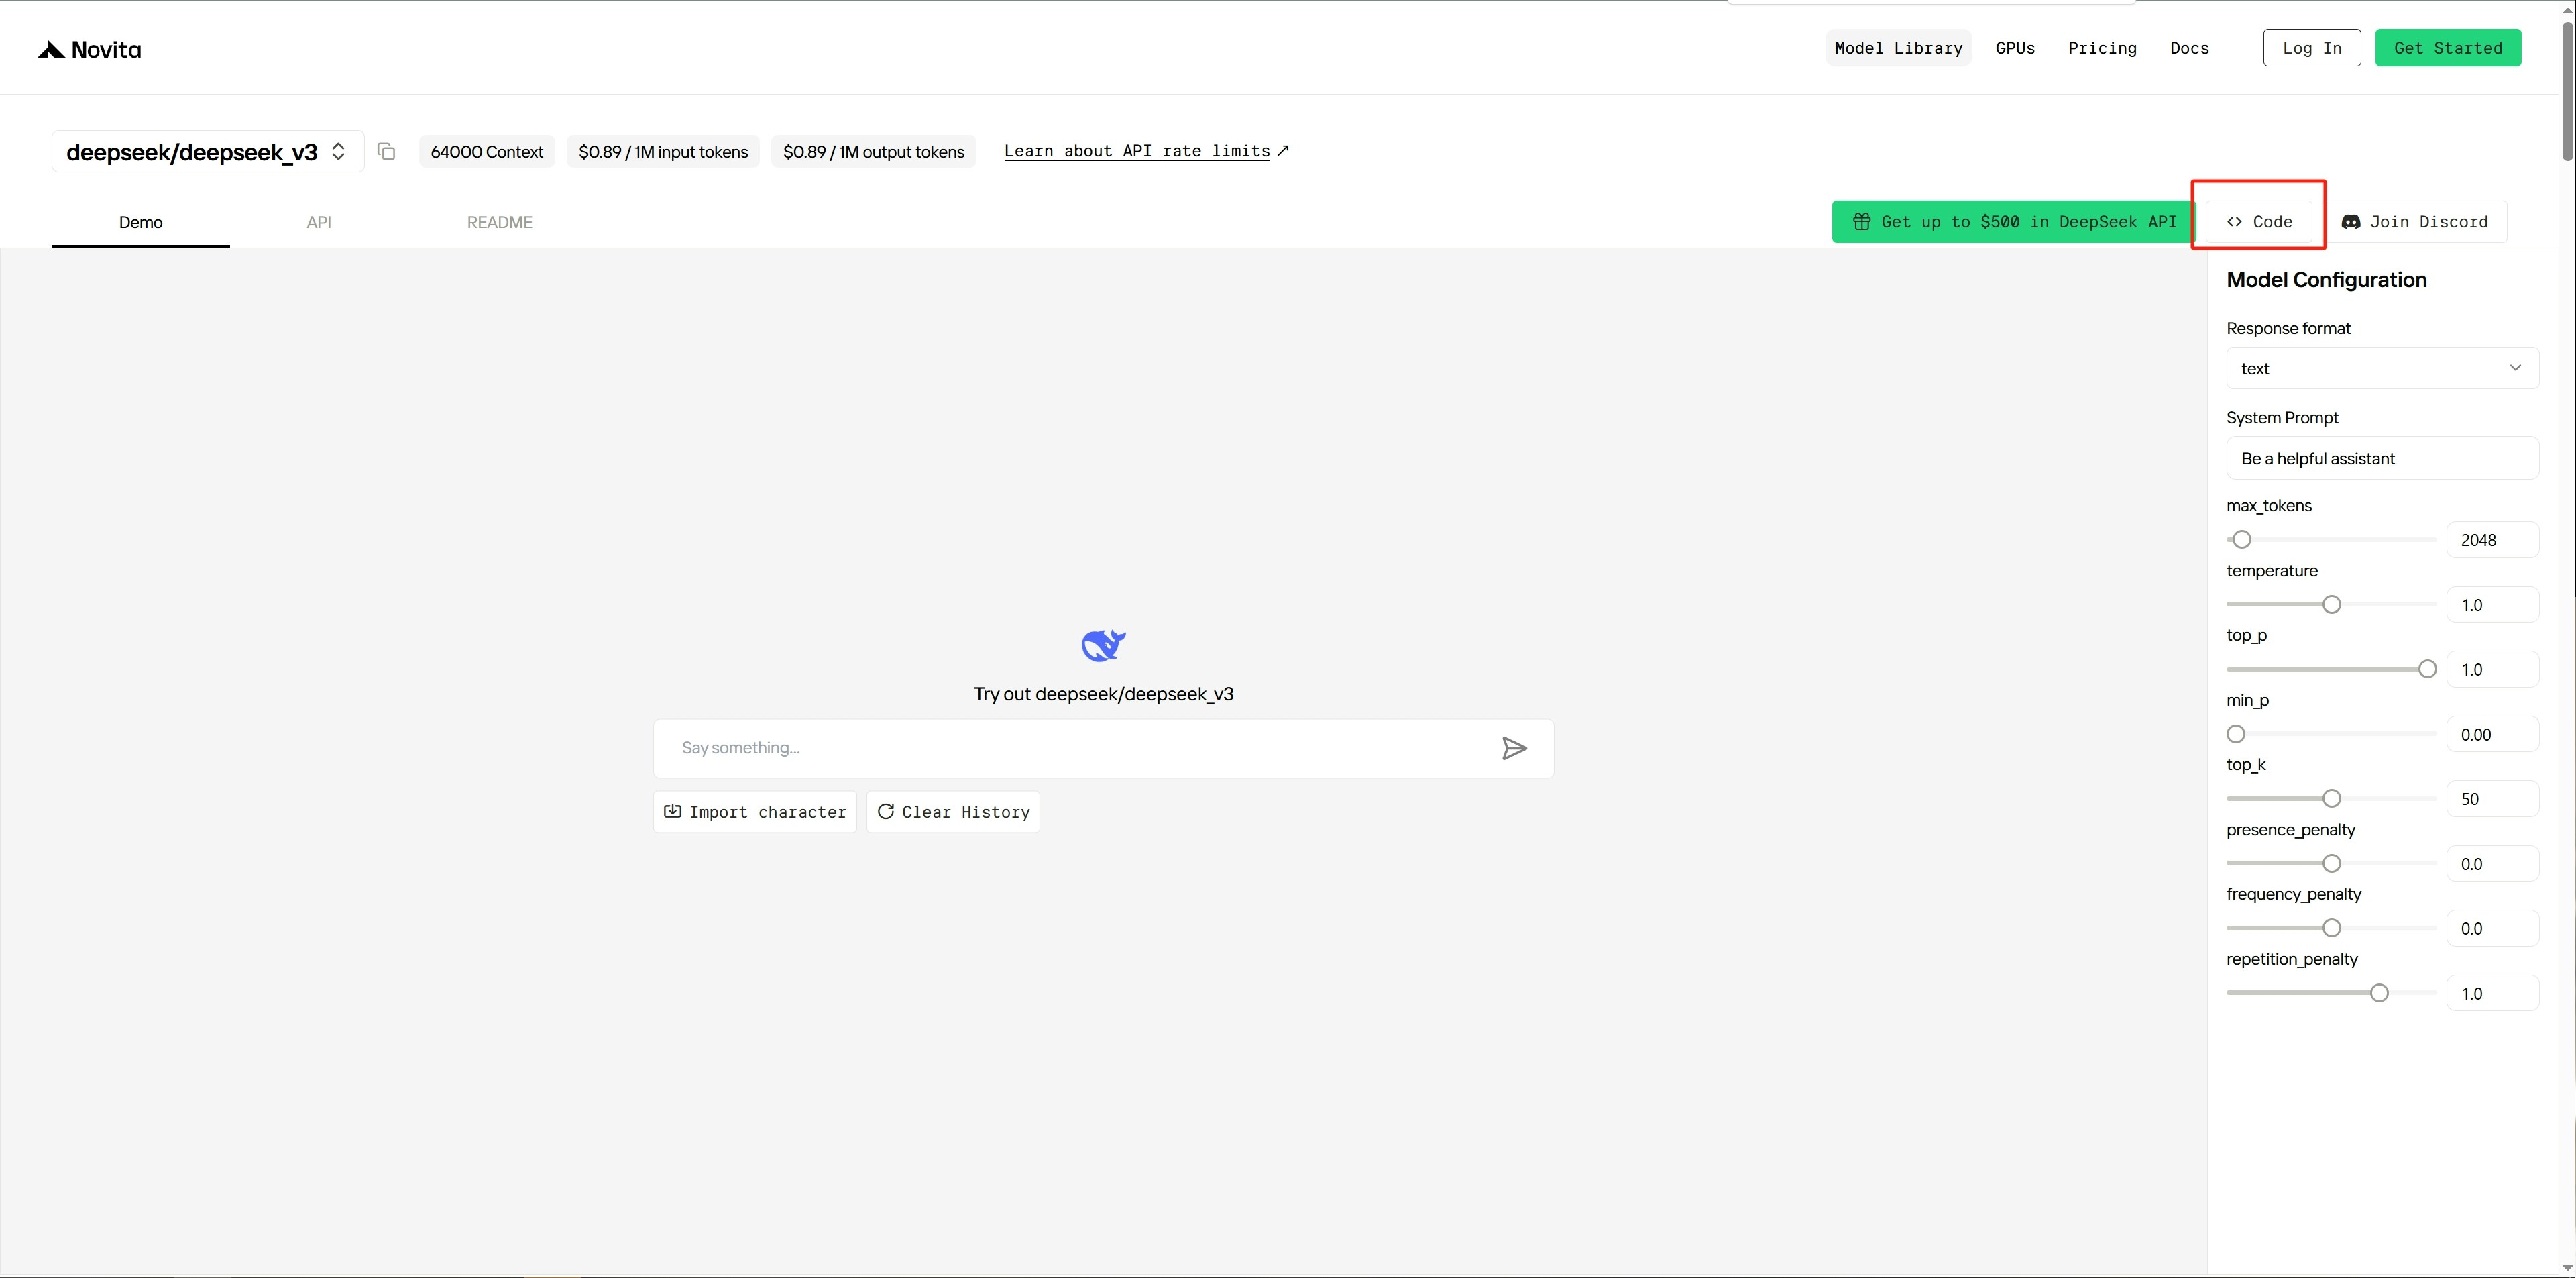
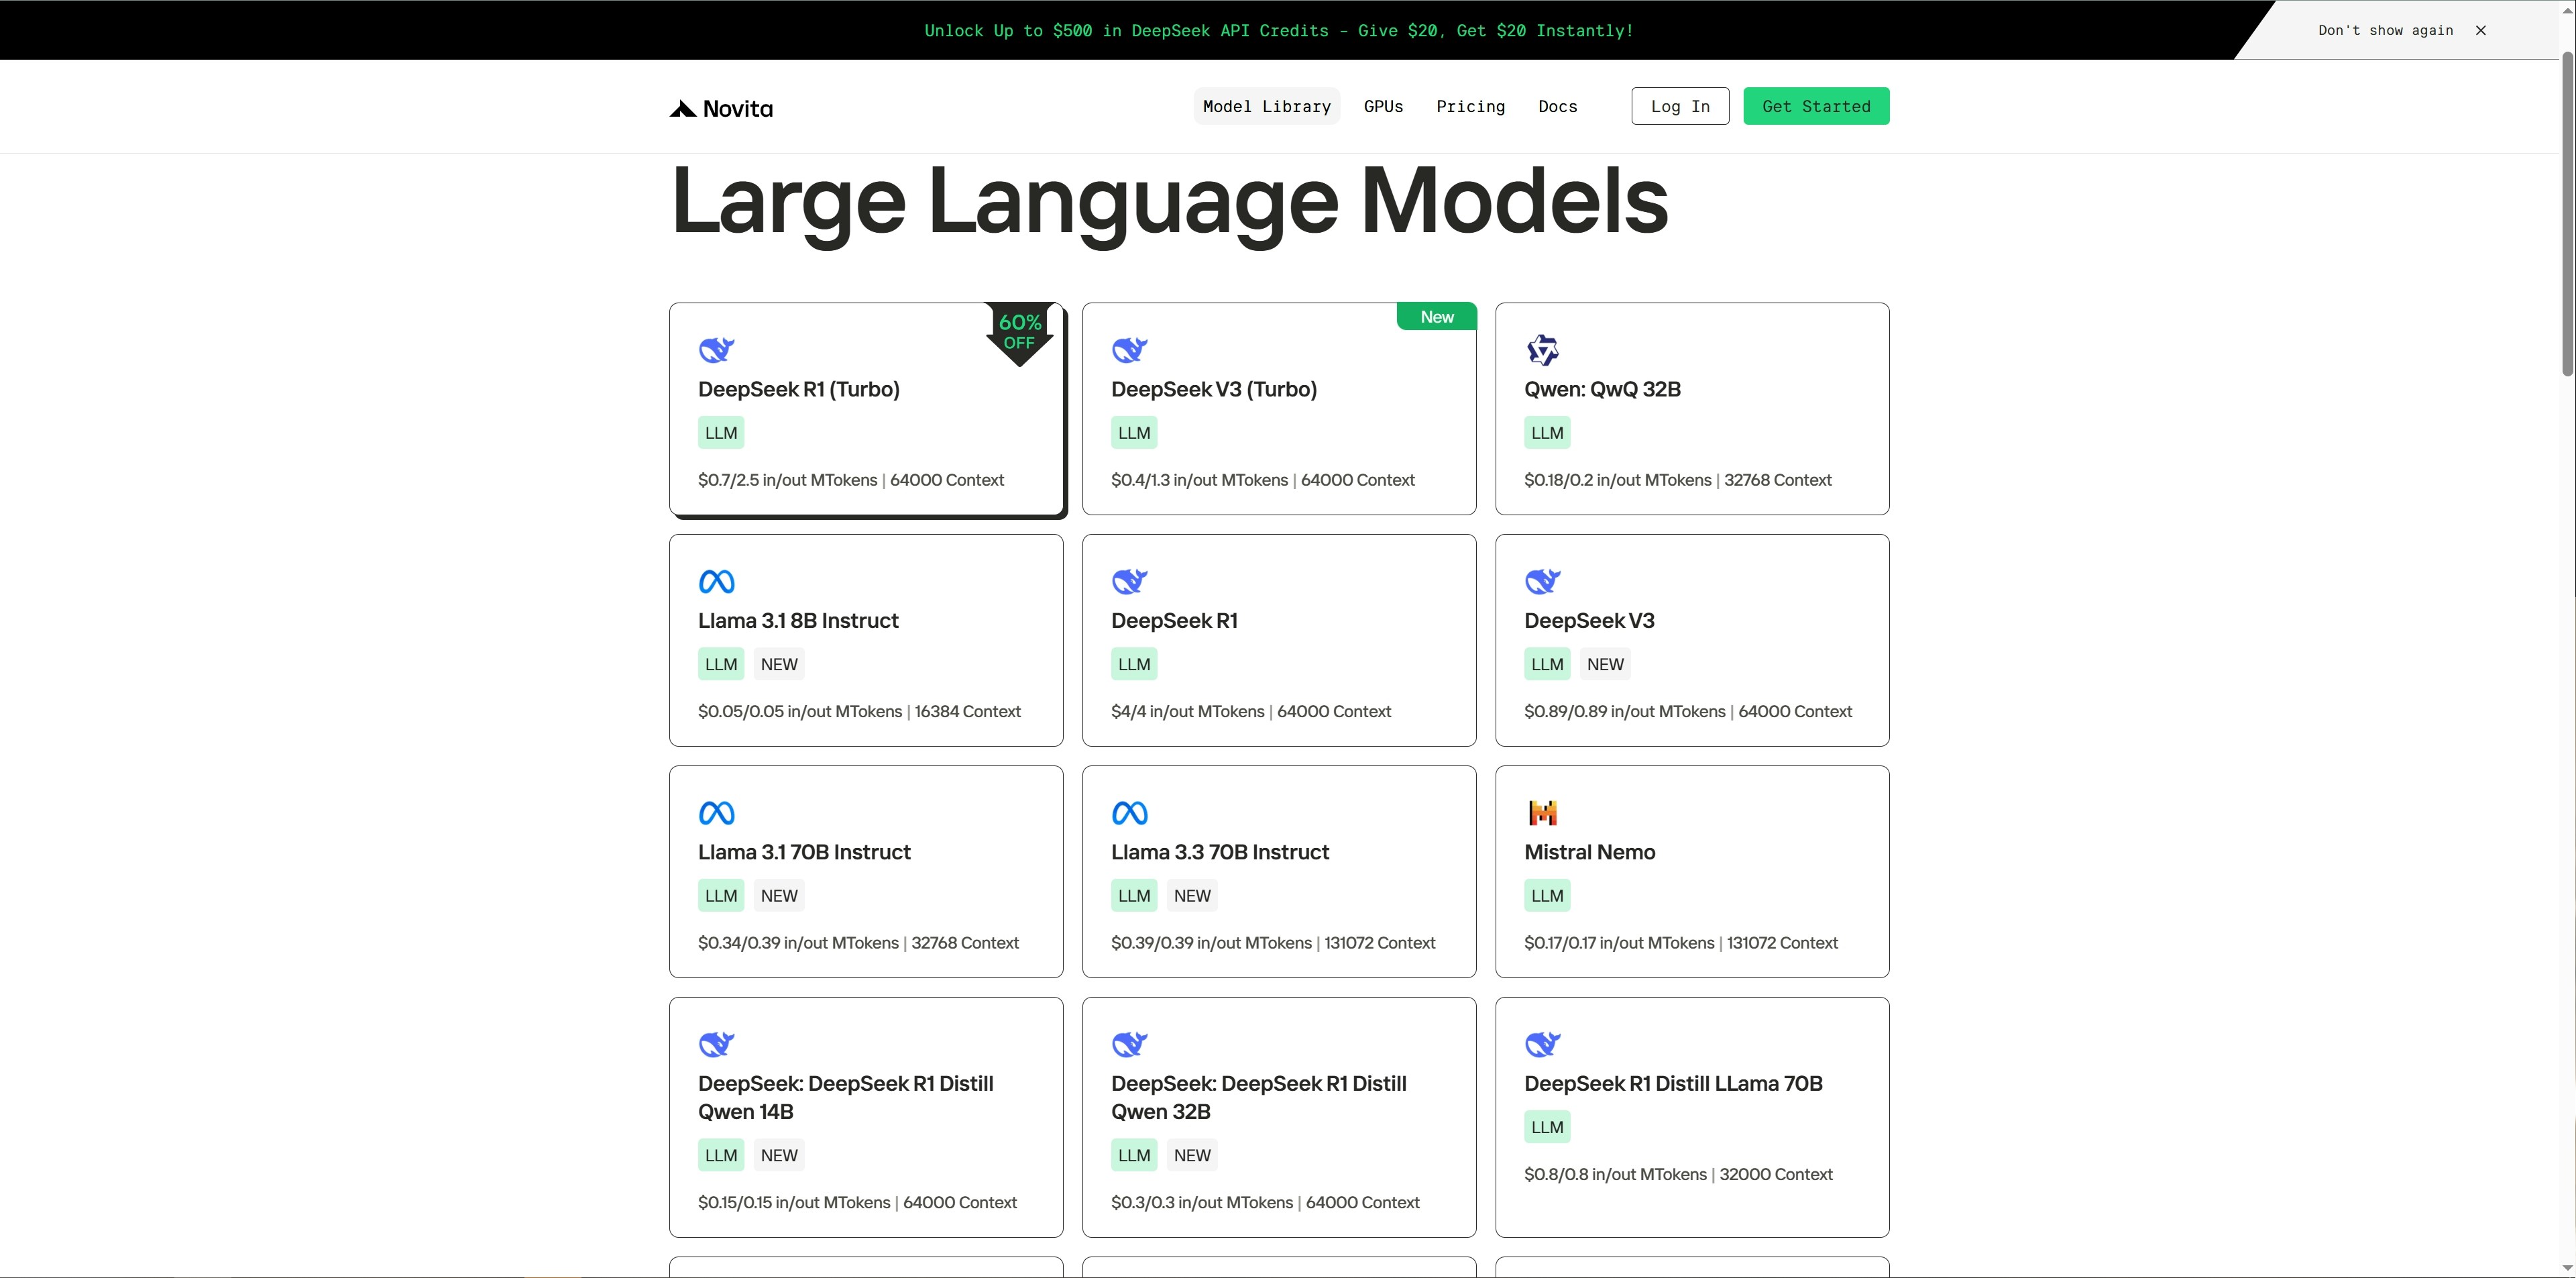 Étape 2 : Accédez à la page de démonstration du modèle choisi et cliquez sur le bouton `Code` à droite.
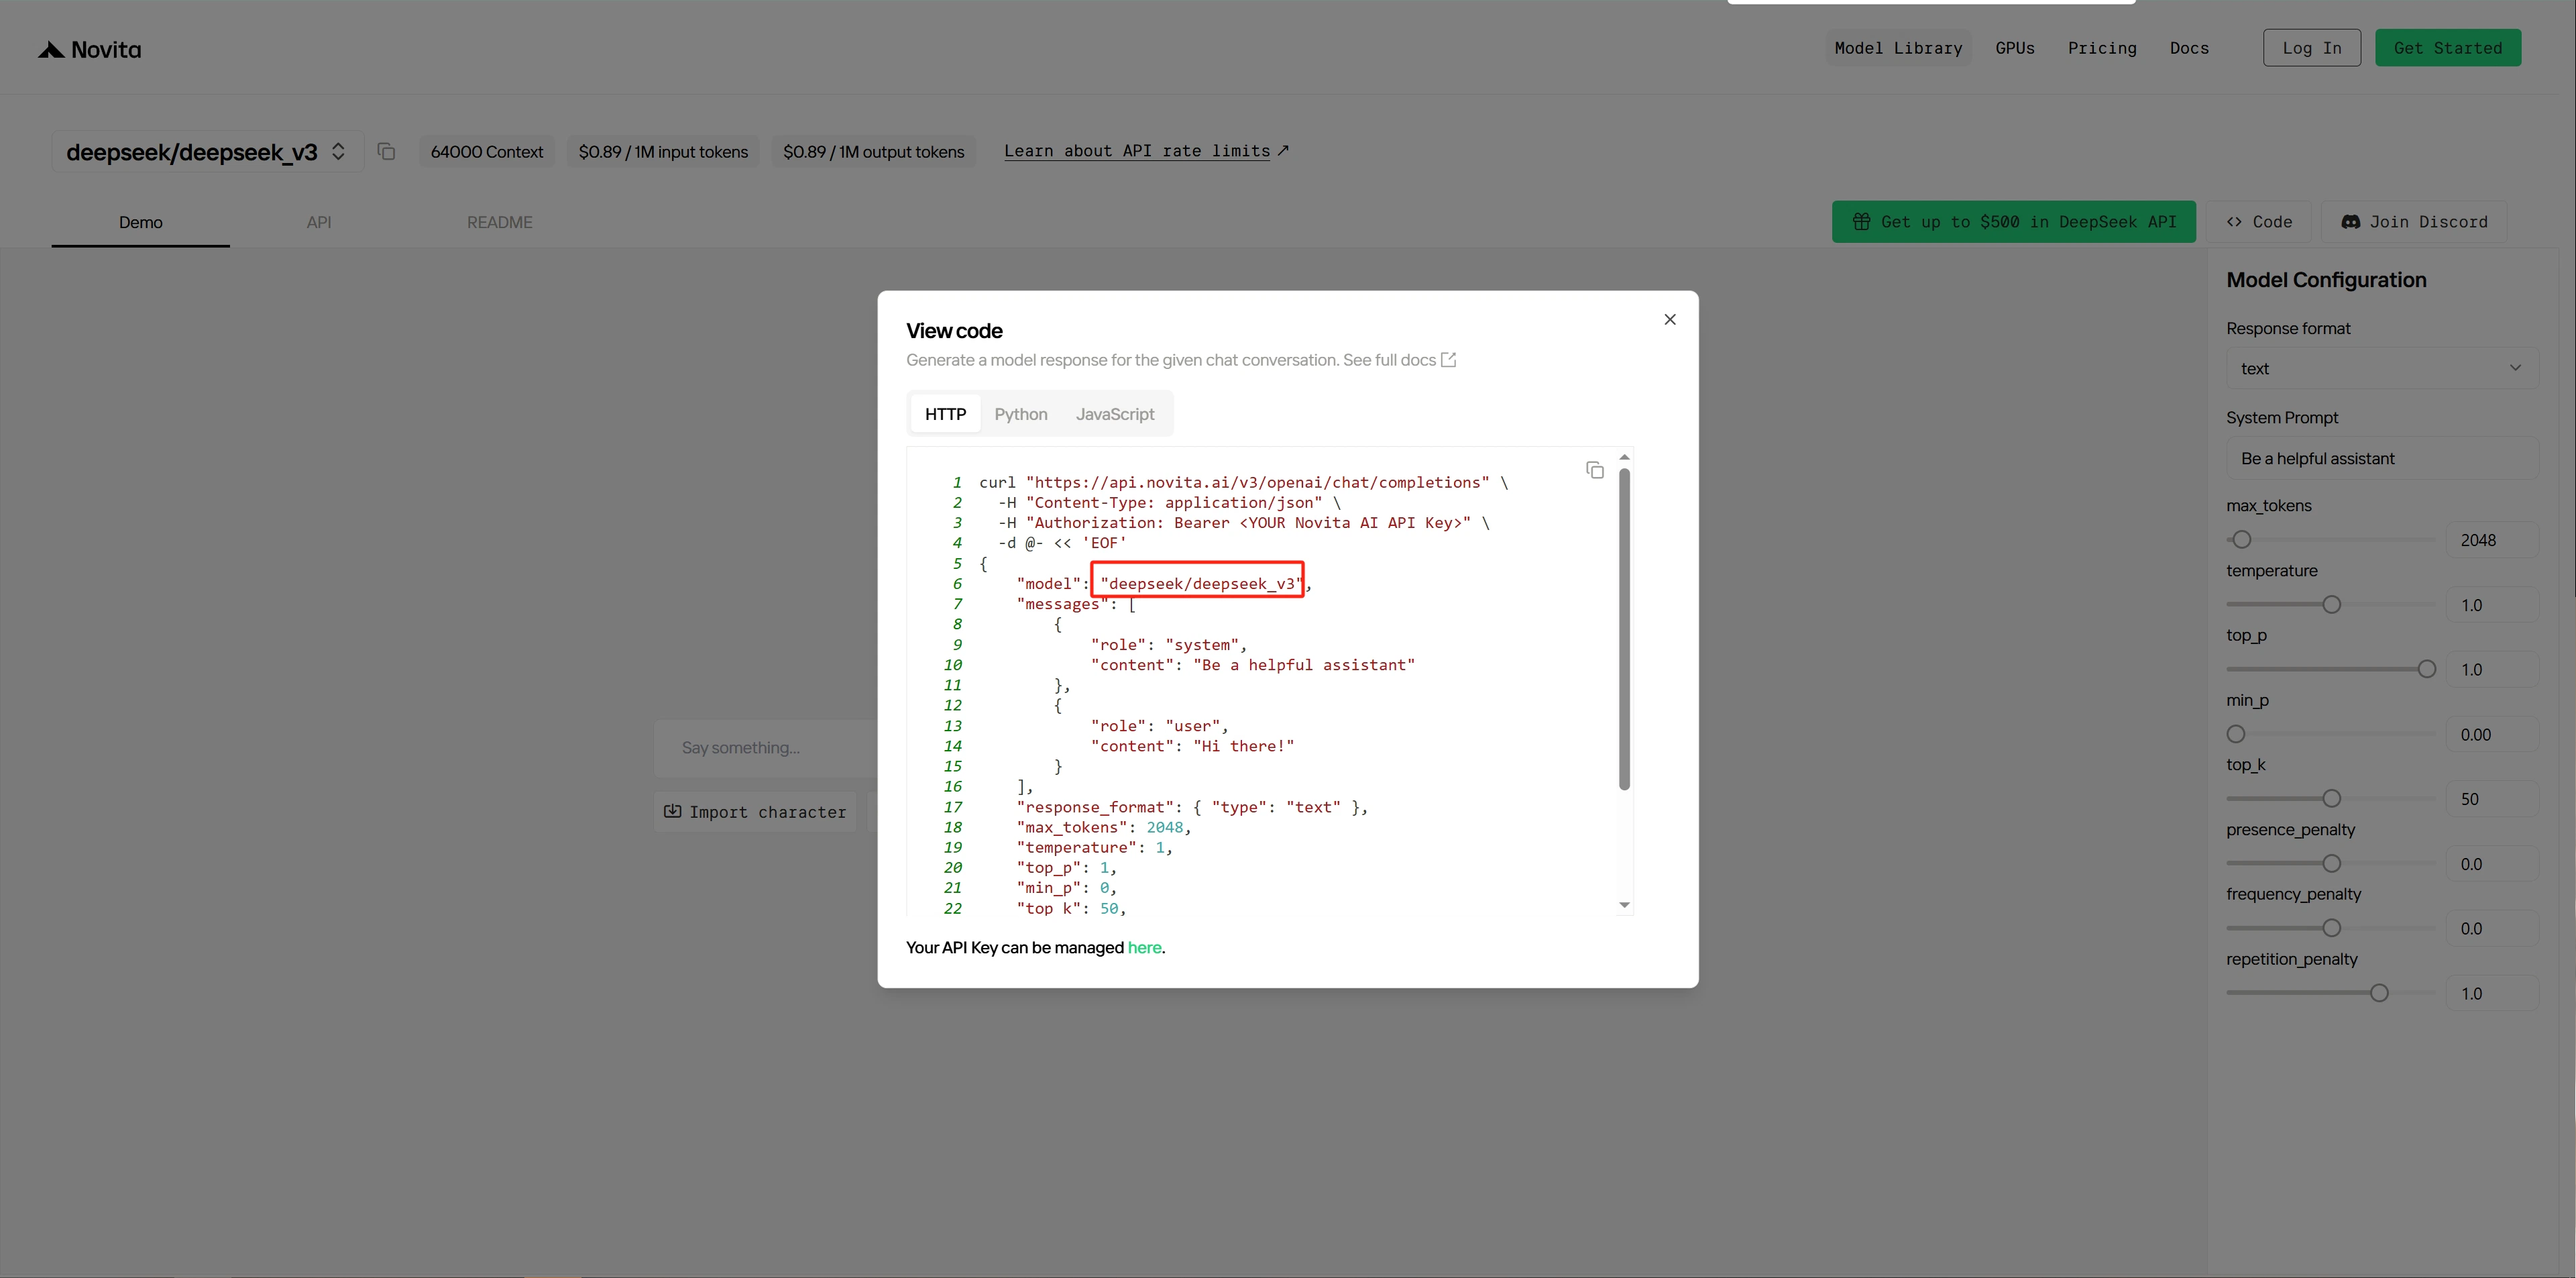
 Étape 3 : Copiez le nom du modèle et notez-le.
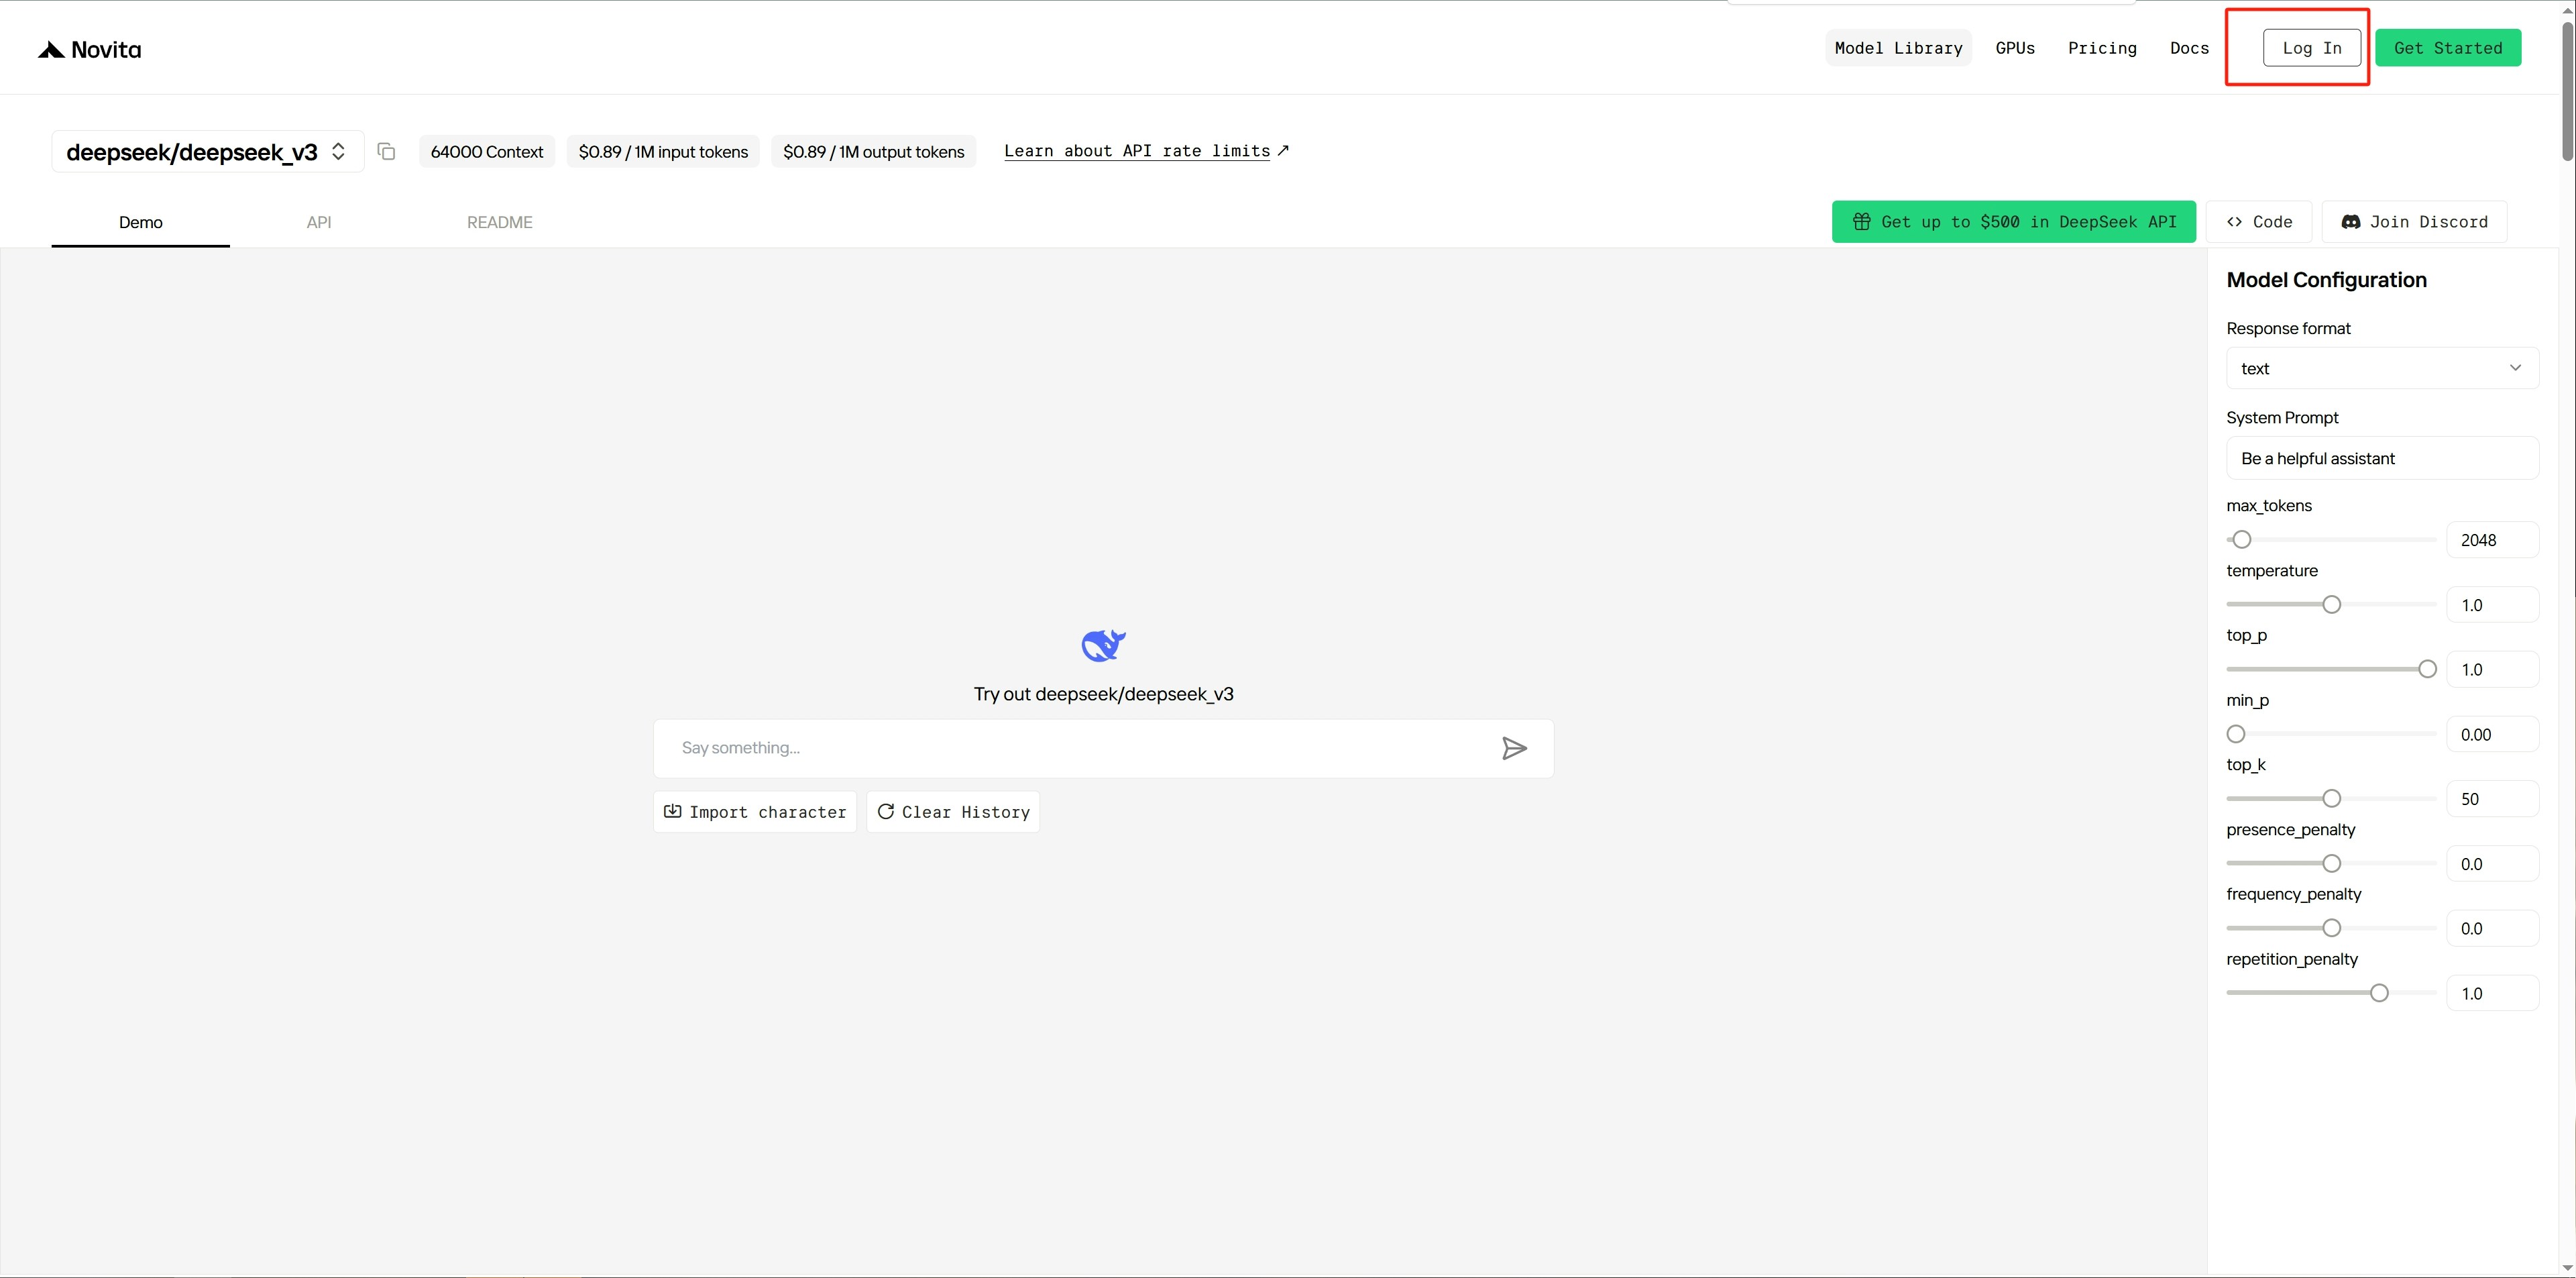
 Étape 4 : [Connectez-vous ](https://novita.ai/user/login)à la plateforme Novita.
 Étape 5 : Après vous être connecté, accédez à la [page des paramètres](https://novita.ai/settings) de la plateforme.
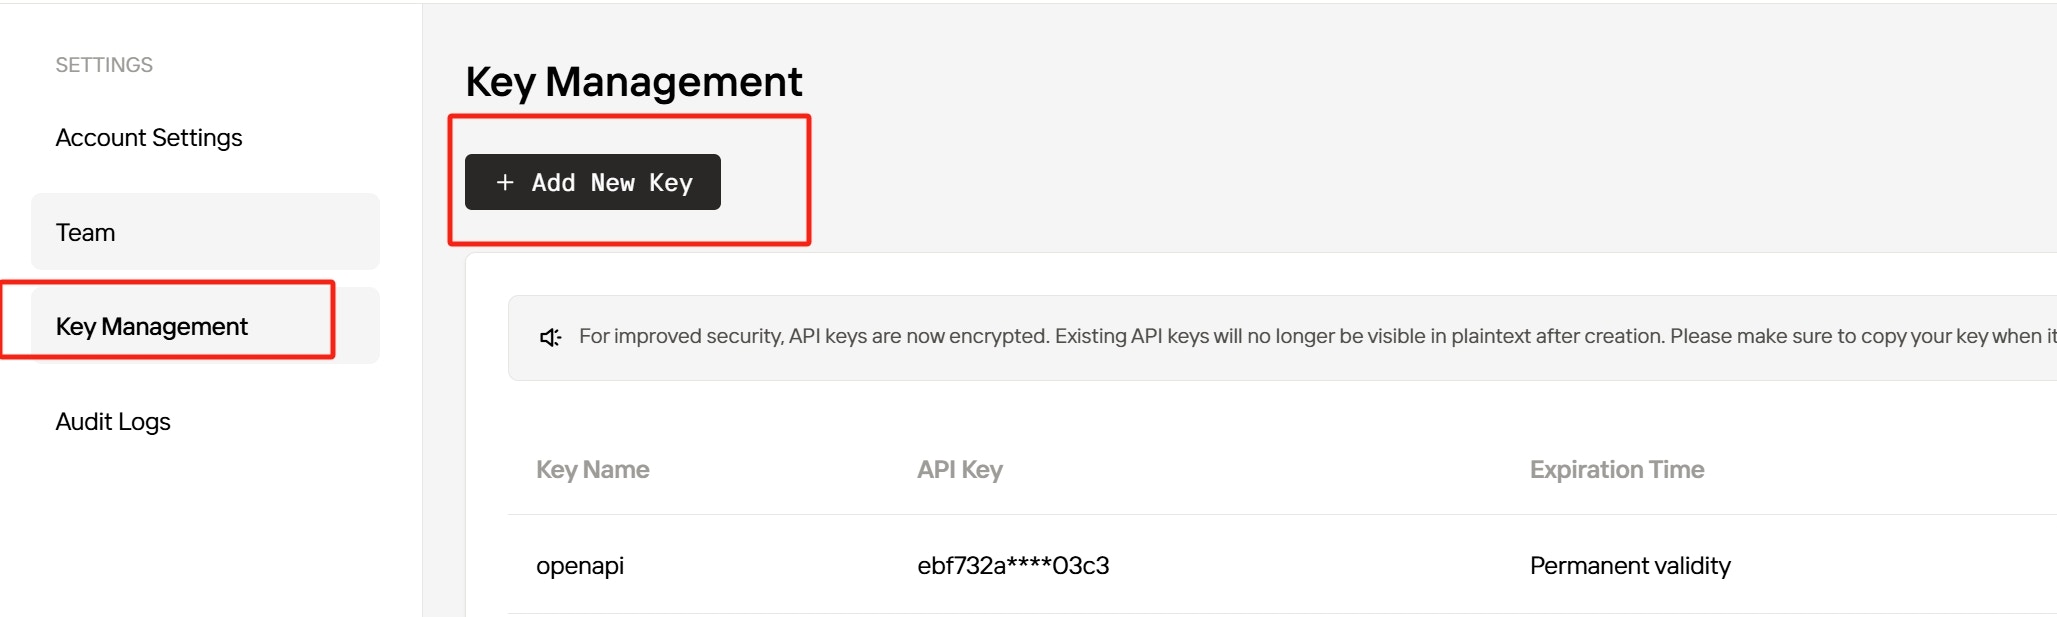
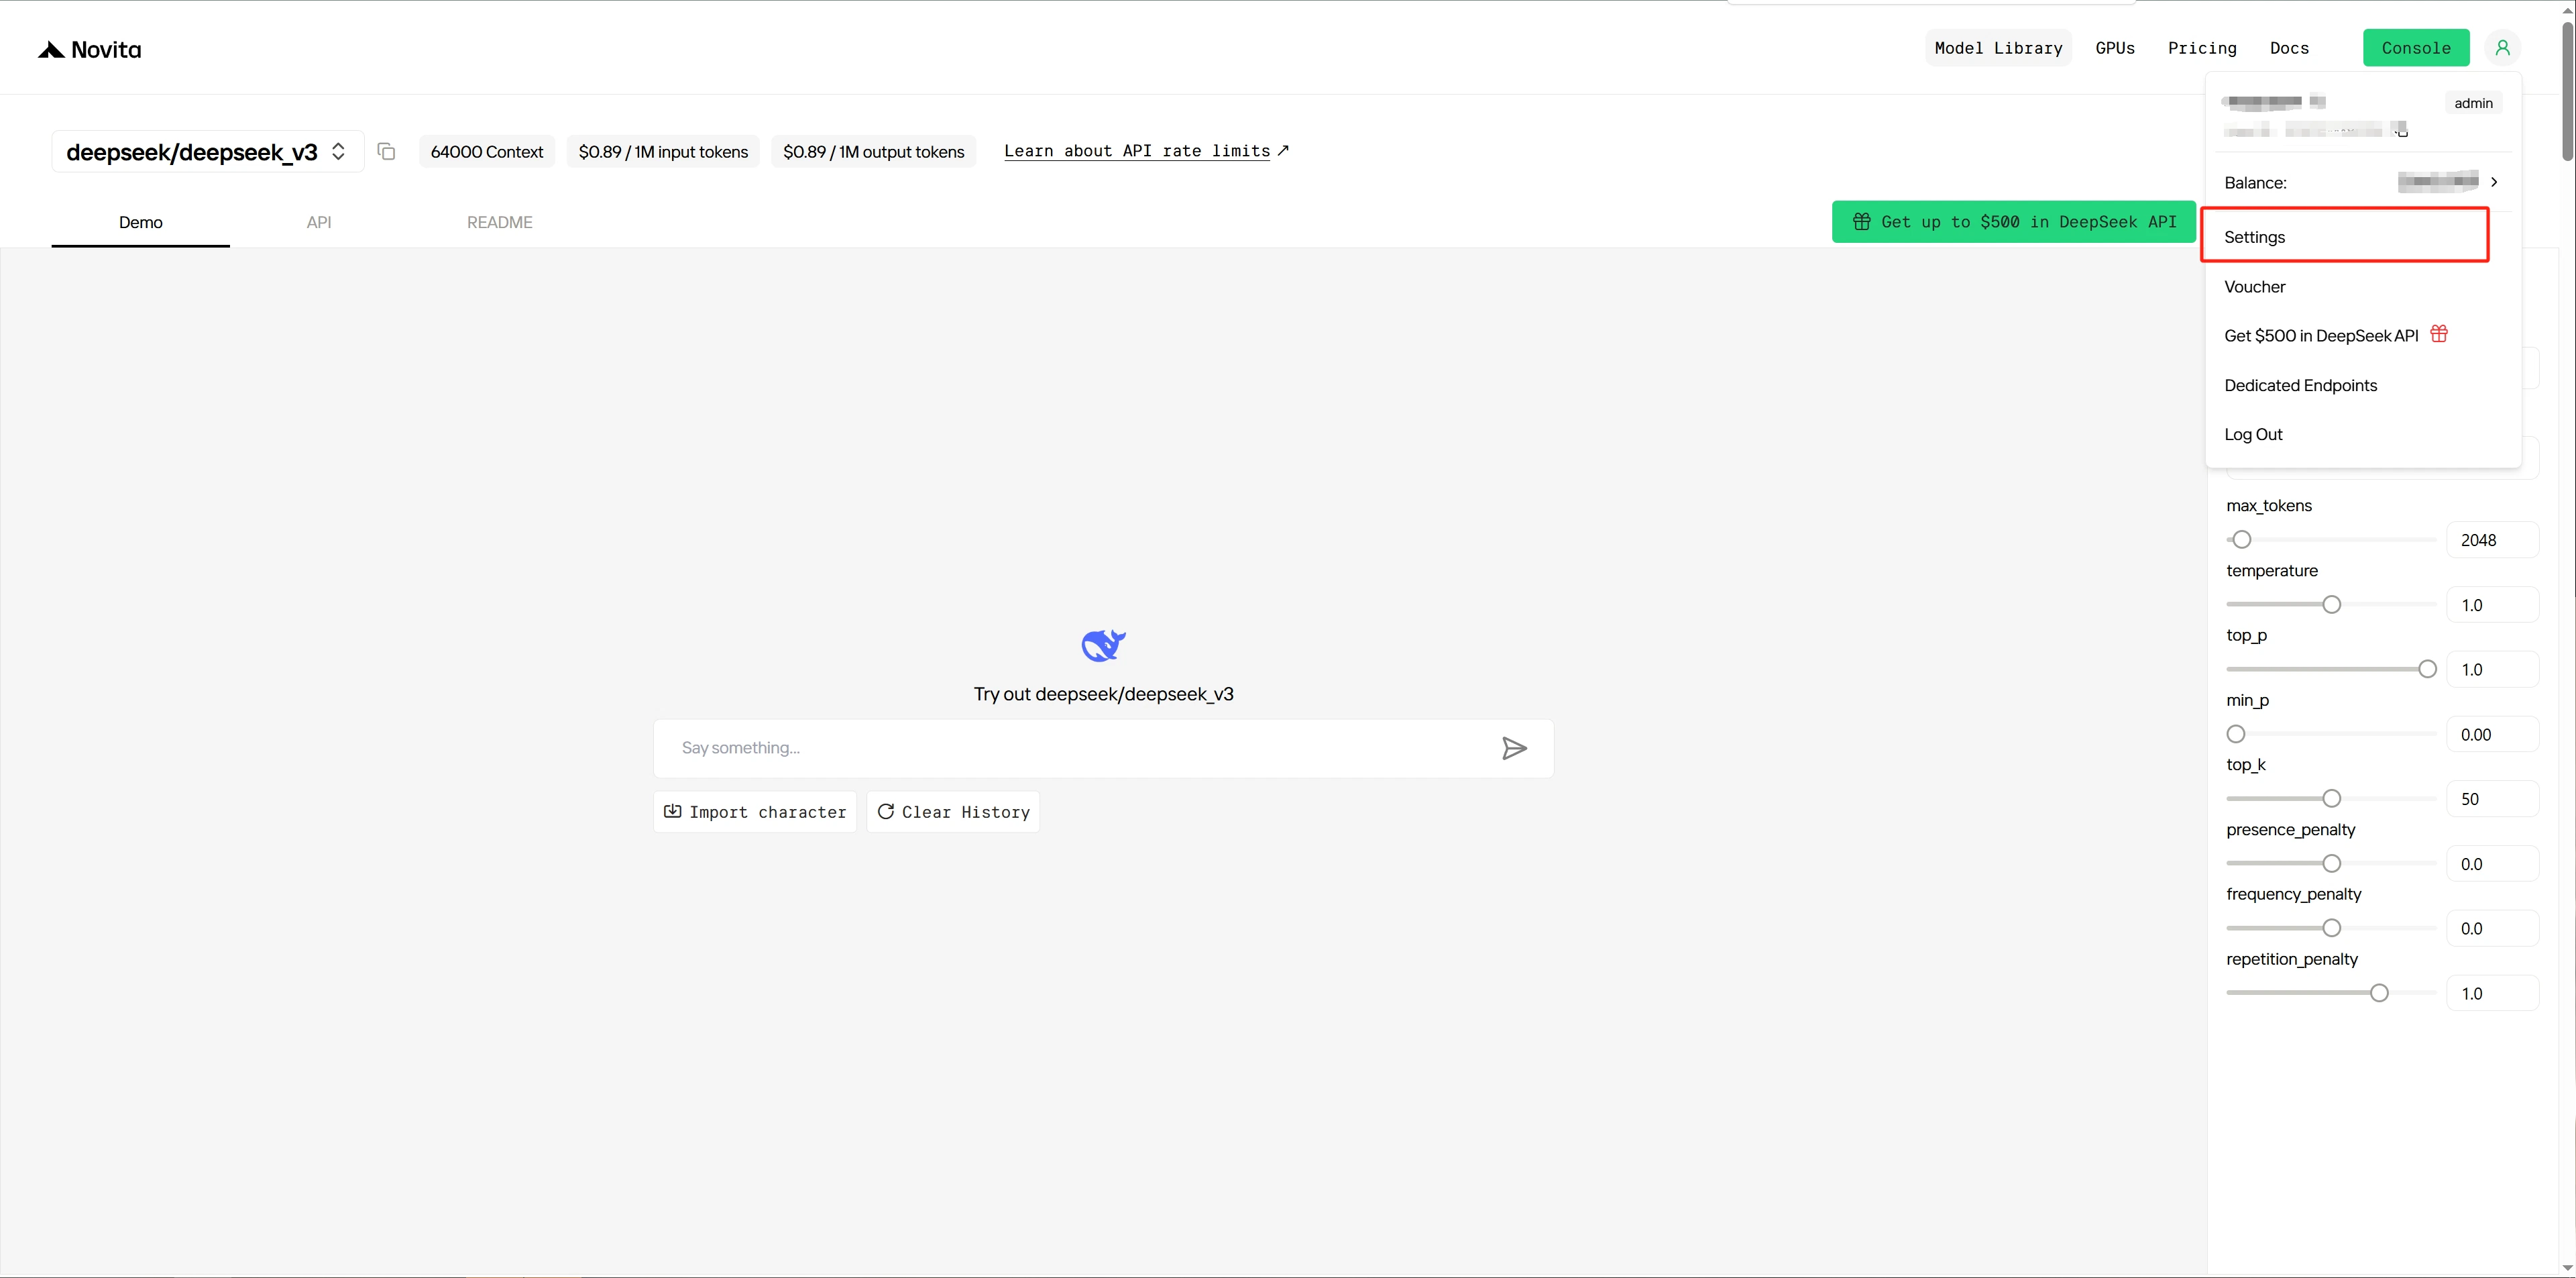 Étape 6 : Créez une nouvelle [clé API](https://novita.ai/settings/key-management) et copiez-la pour l’authentification du service.
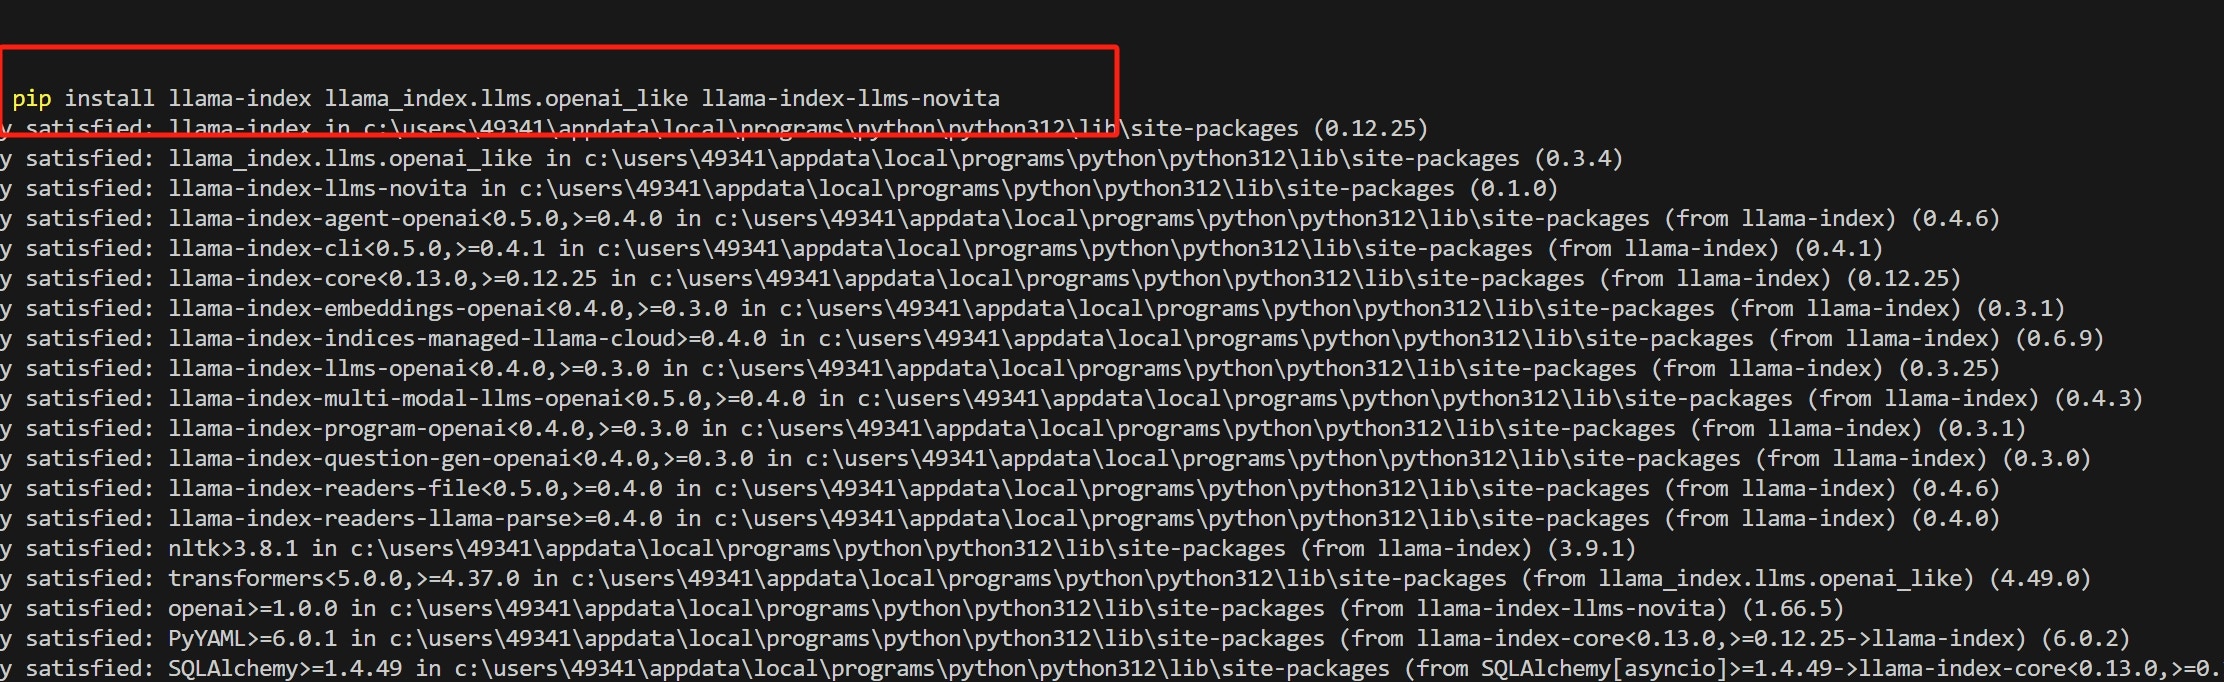
 Étape 7 : Installez `llama_index` et les bibliothèques Python associées en exécutant :
 Étape 8 : Écrivez du code Python et définissez le nom du modèle et la clé API comme paramètres dans la classe NovitaAI.
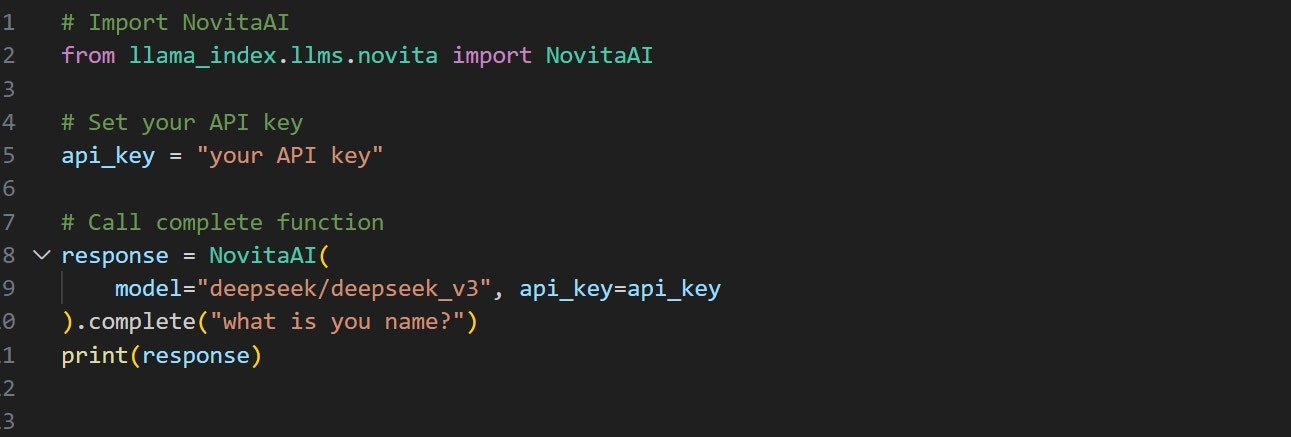 Étape 9 : Exécutez le code pour obtenir la sortie.
 Pour plus d’exemples, consultez la documentation : [llama\_index/llama-index-integrations/llms/llama-index-llms-novita at main · run-llama/llama\_index](https://github.com/run-llama/llama_index/tree/main/llama-index-integrations/llms/llama-index-llms-novita).