> ## Documentation Index
> Fetch the complete documentation index at: https://novita.ai/docs/llms.txt
> Use this file to discover all available pages before exploring further.
# LlamaIndex
> Integrieren Sie Novita AI mühelos mit LlamaIndex, um intelligente, datengestützte Anwendungen zu erstellen.
LlamaIndex ist für optimale Indexierung und Abfrage konzipiert und überzeugt durch hohe Effizienz bei Anwendungen, die präzisen und schnellen Datenzugriff erfordern. Durch die Kombination von [Novita AI](https://novita.ai/) mit LlamaIndex erschließen Sie zentrale Vorteile wie überlegene Genauigkeit beim Datenabruf, unübertroffene Skalierbarkeit und kosteneffiziente Performance.
Dieser Leitfaden zeigt Ihnen, wie Sie LlamaIndex mit Novita AI auf Basis der OpenAl APl verwenden, um intelligentere, skalierbare und äußerst effiziente KI-Lösungen zu entwickeln, die Innovation vorantreiben und Entwicklern außergewöhnliche Ergebnisse liefern.
## **So integrieren Sie die Novita AI API mit LlamaIndex**
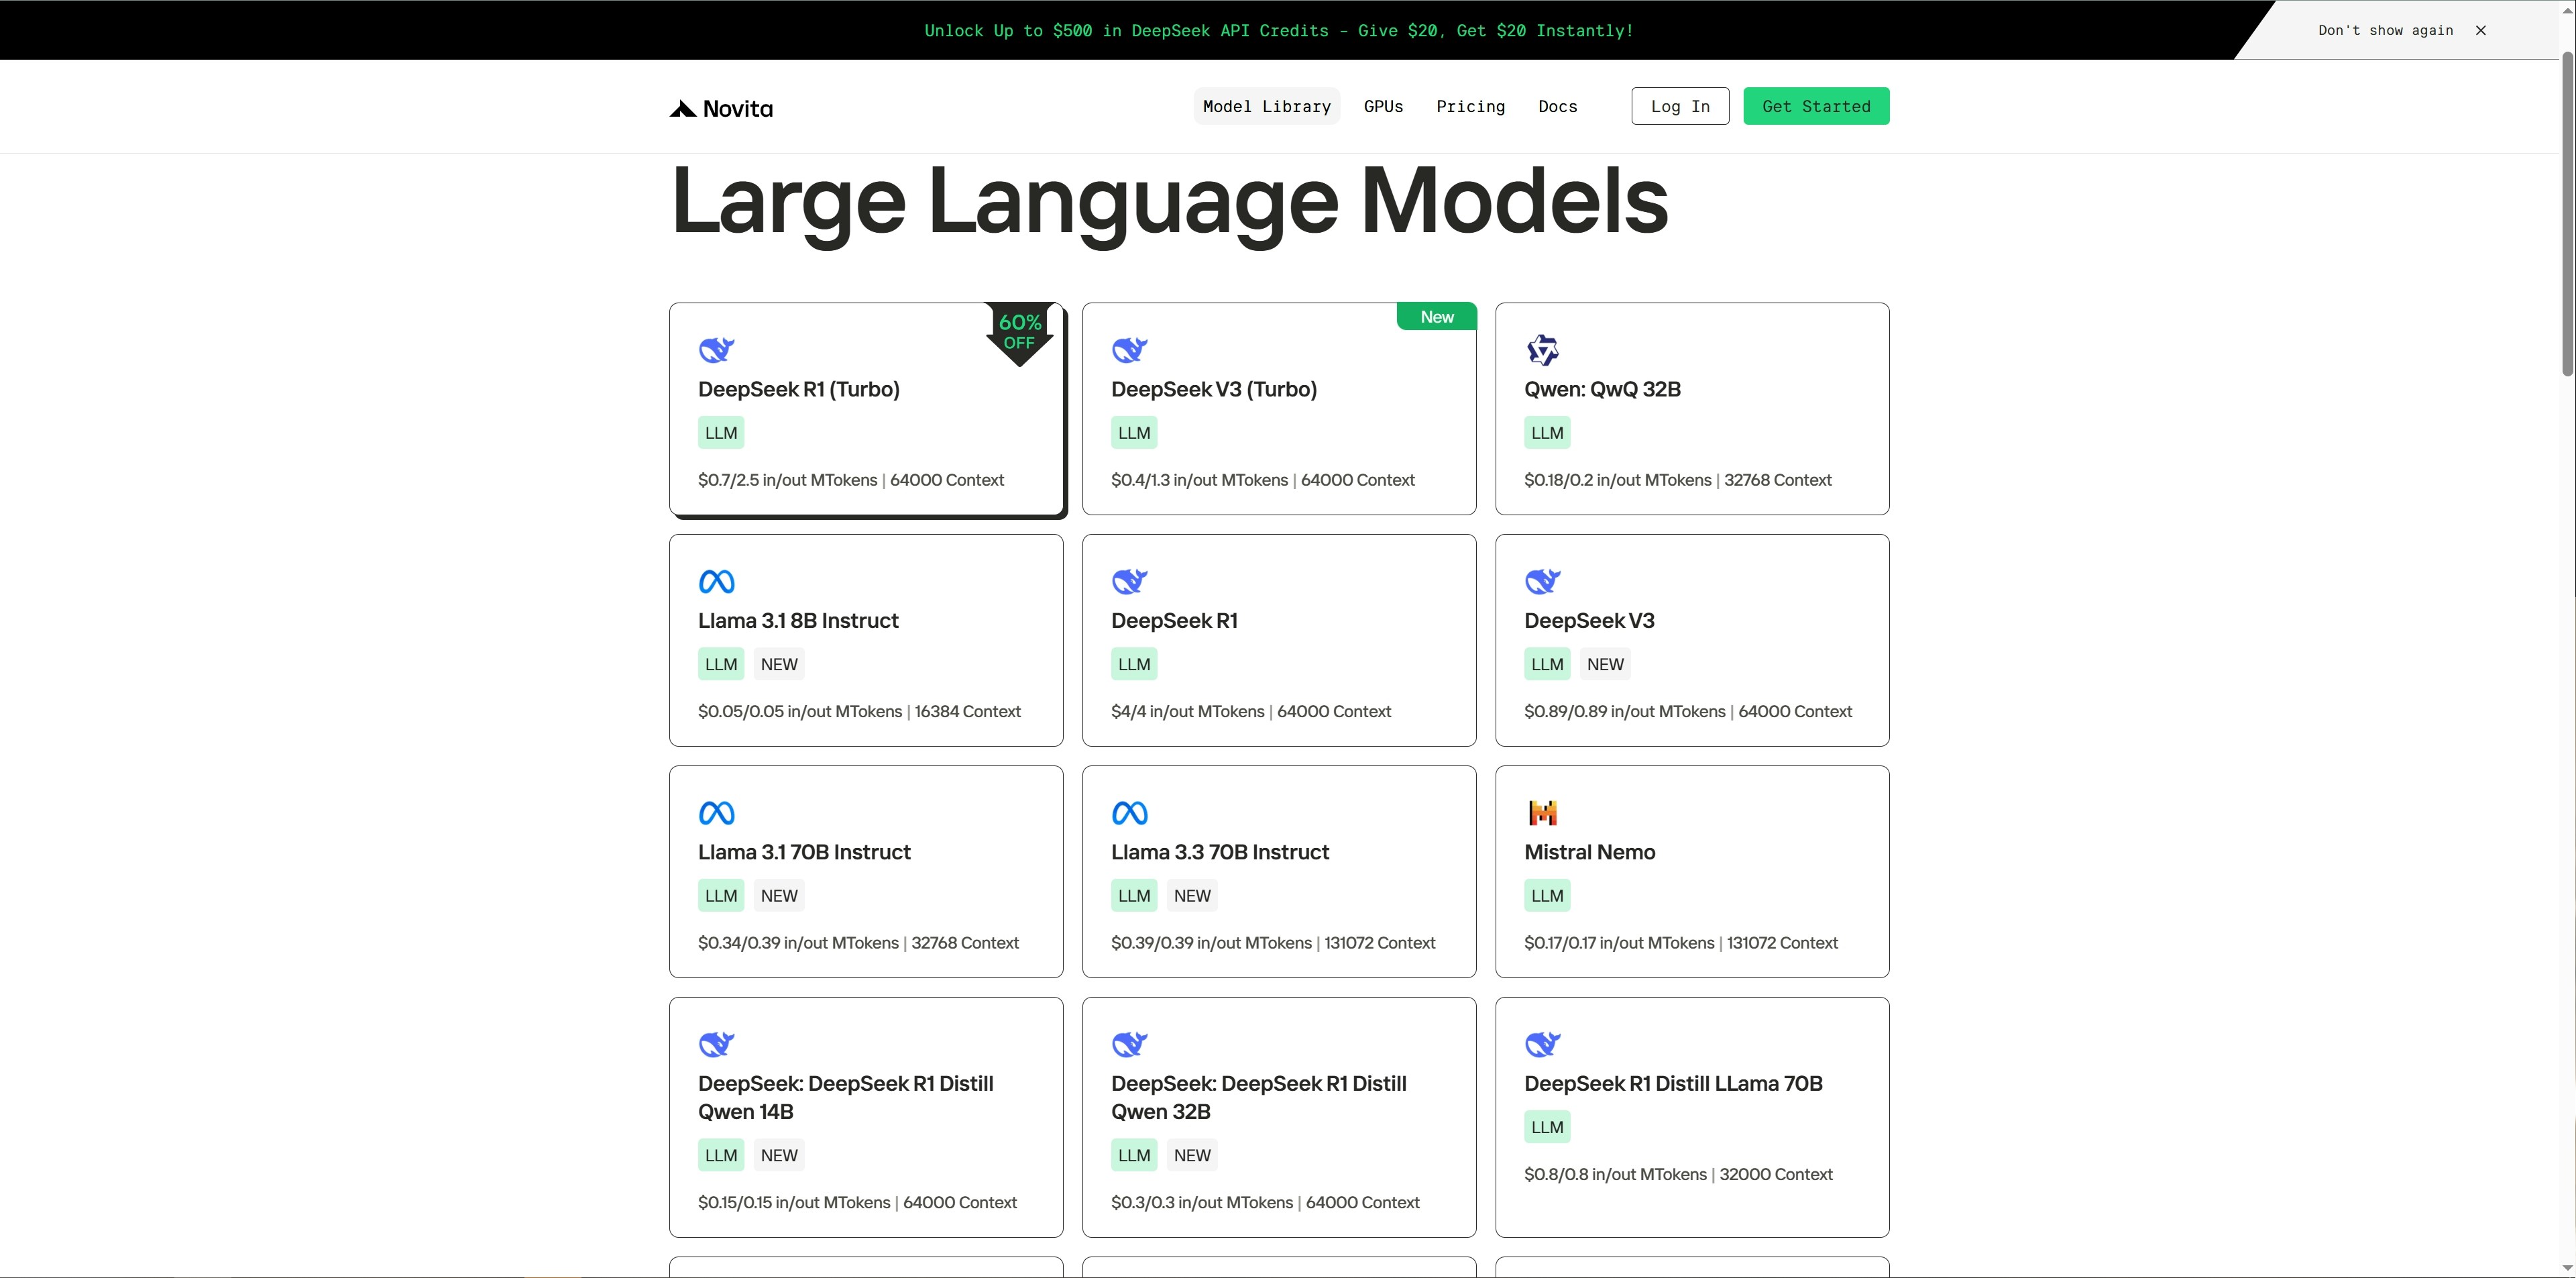
Schritt 1: Besuchen Sie die [Modellbibliothek](https://novita.ai/llm-api) auf Novita AI und wählen Sie ein Modell aus, das Sie interessiert.
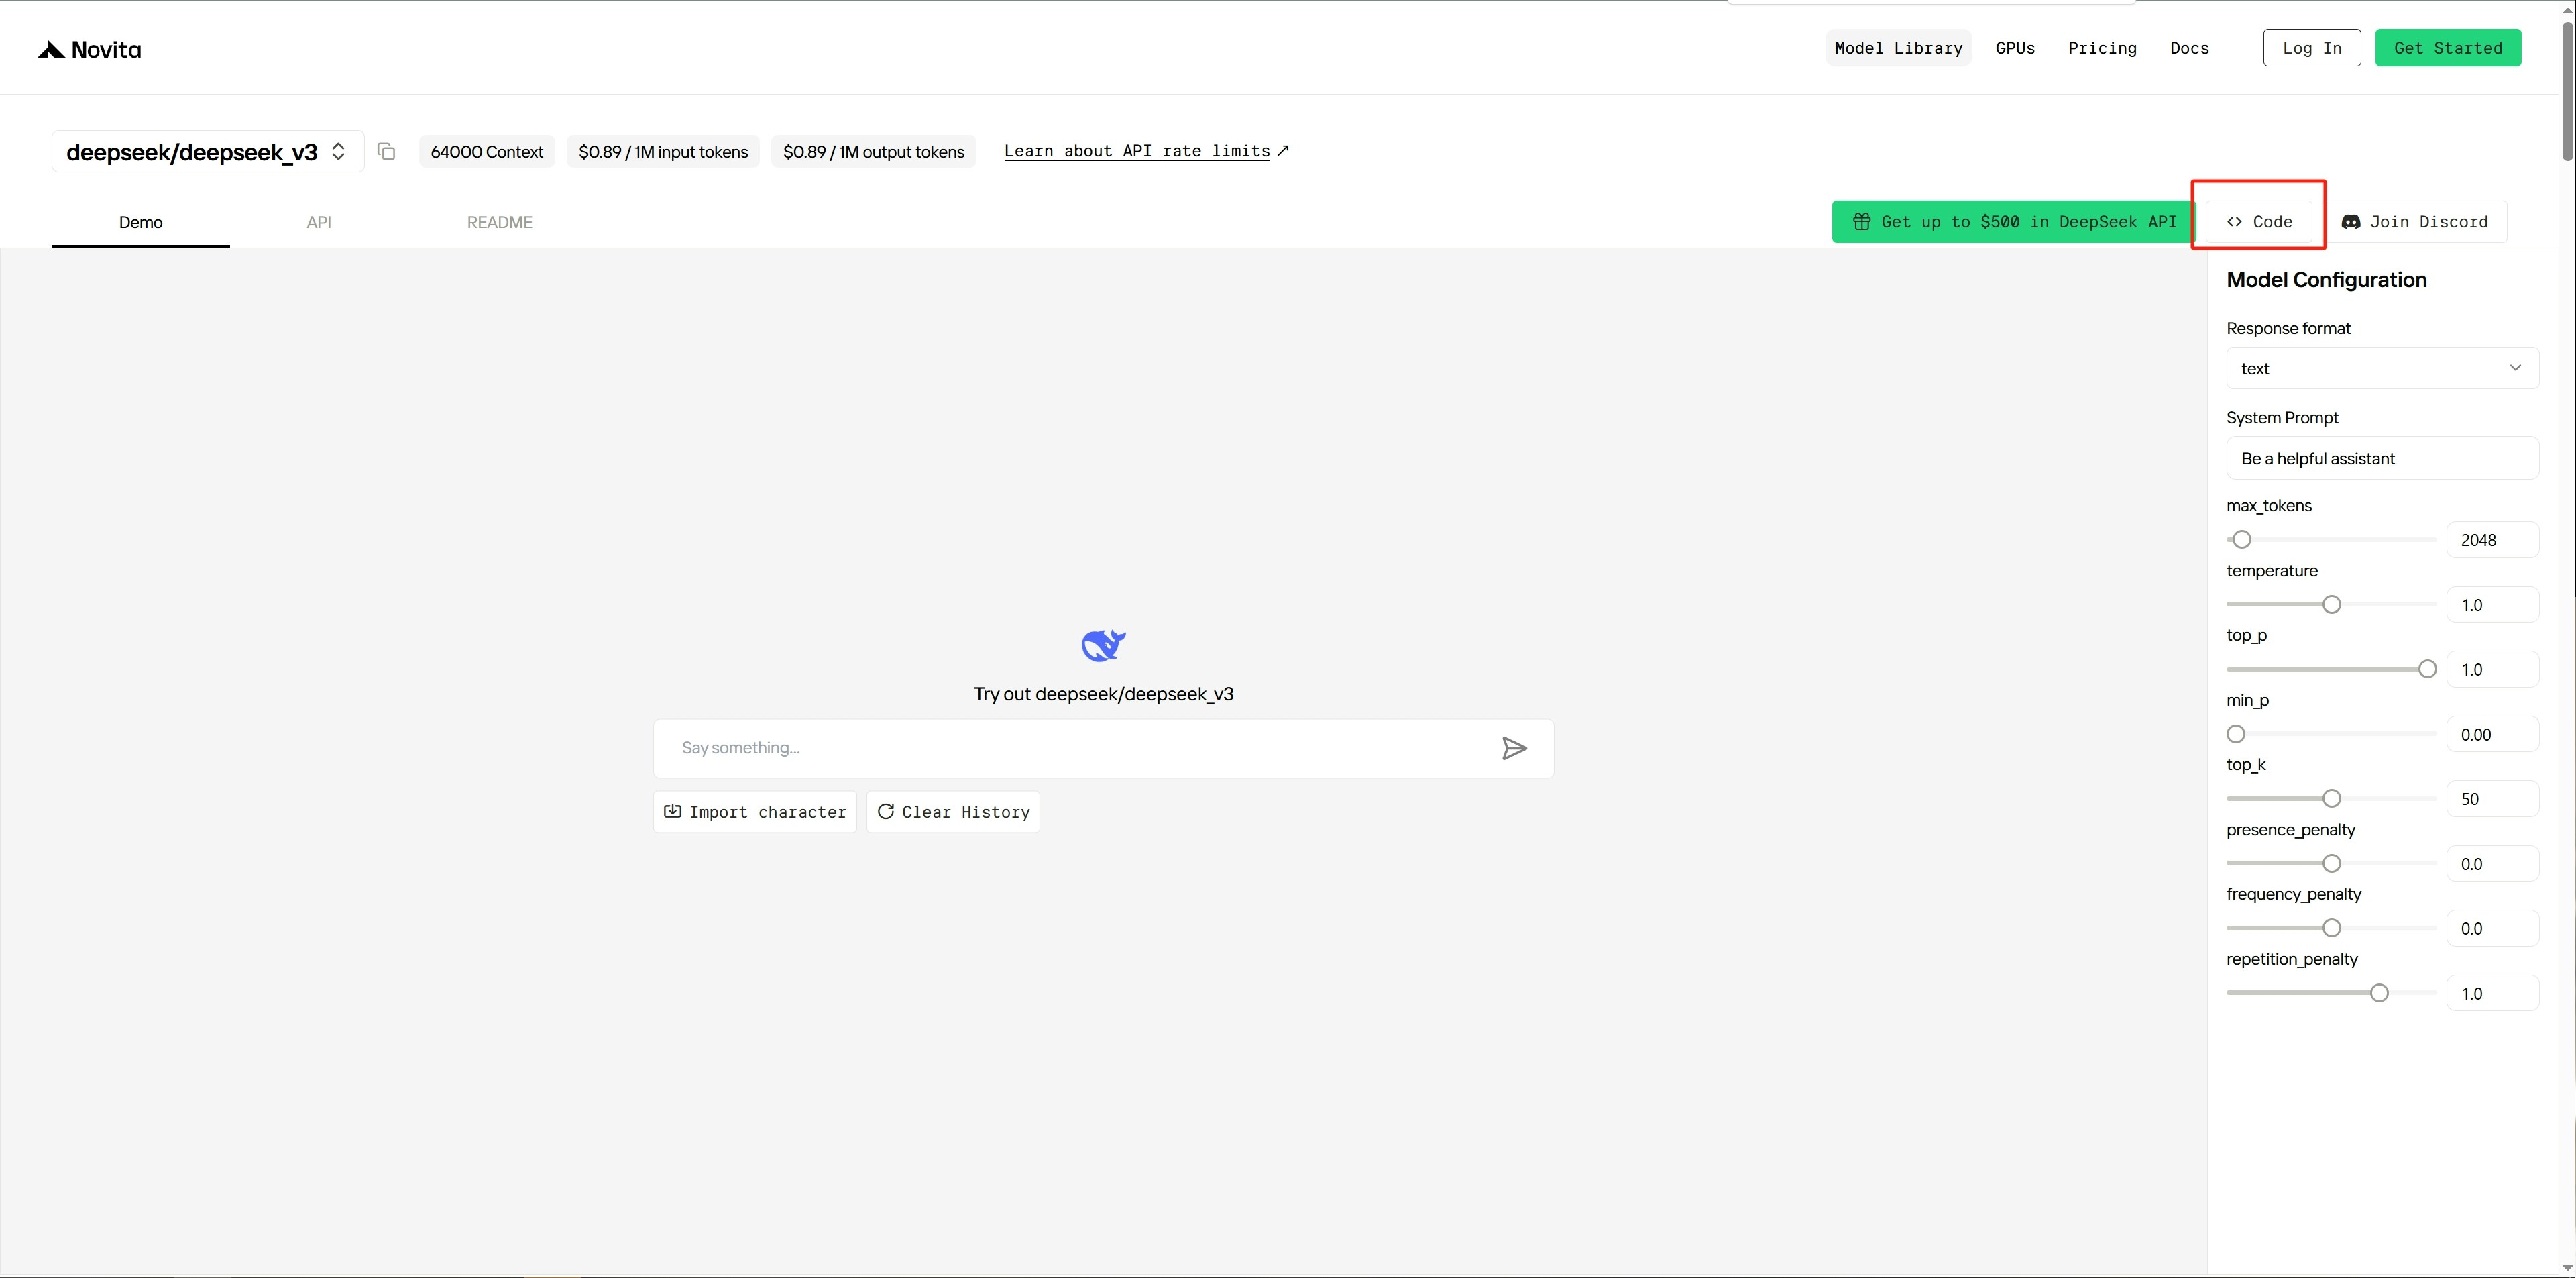
 Schritt 2: Navigieren Sie zur Demoseite des ausgewählten Modells und klicken Sie rechts auf die Schaltfläche `Code`.
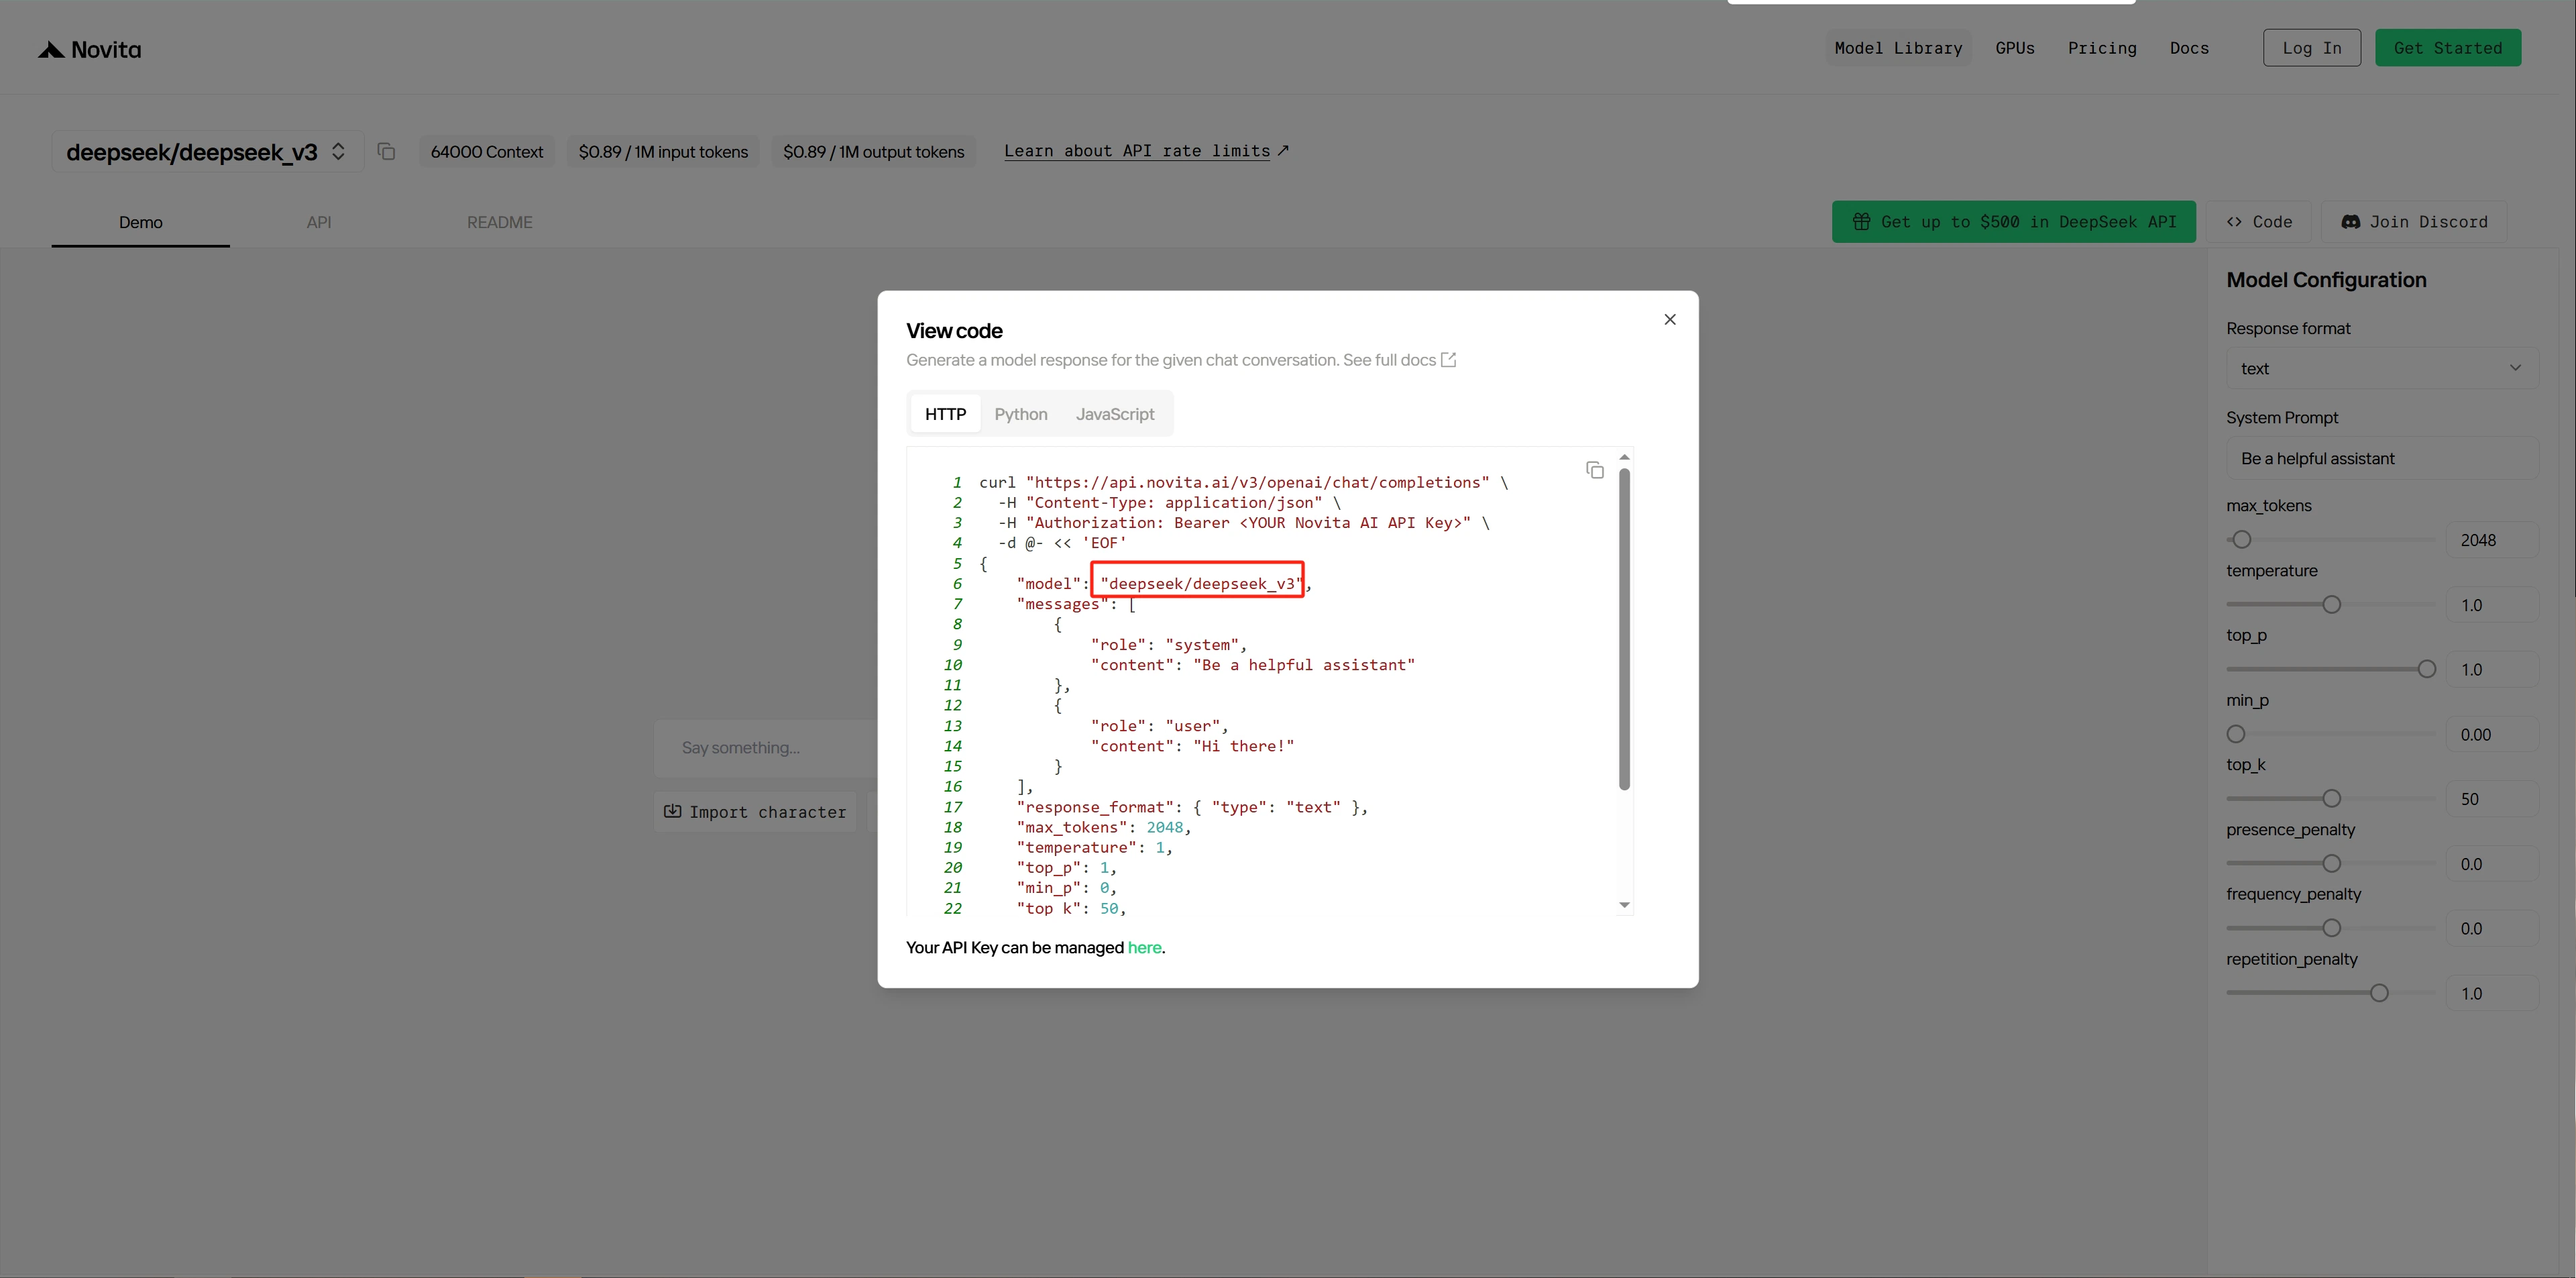
 Schritt 3: Kopieren Sie den Namen des Modells und notieren Sie ihn.
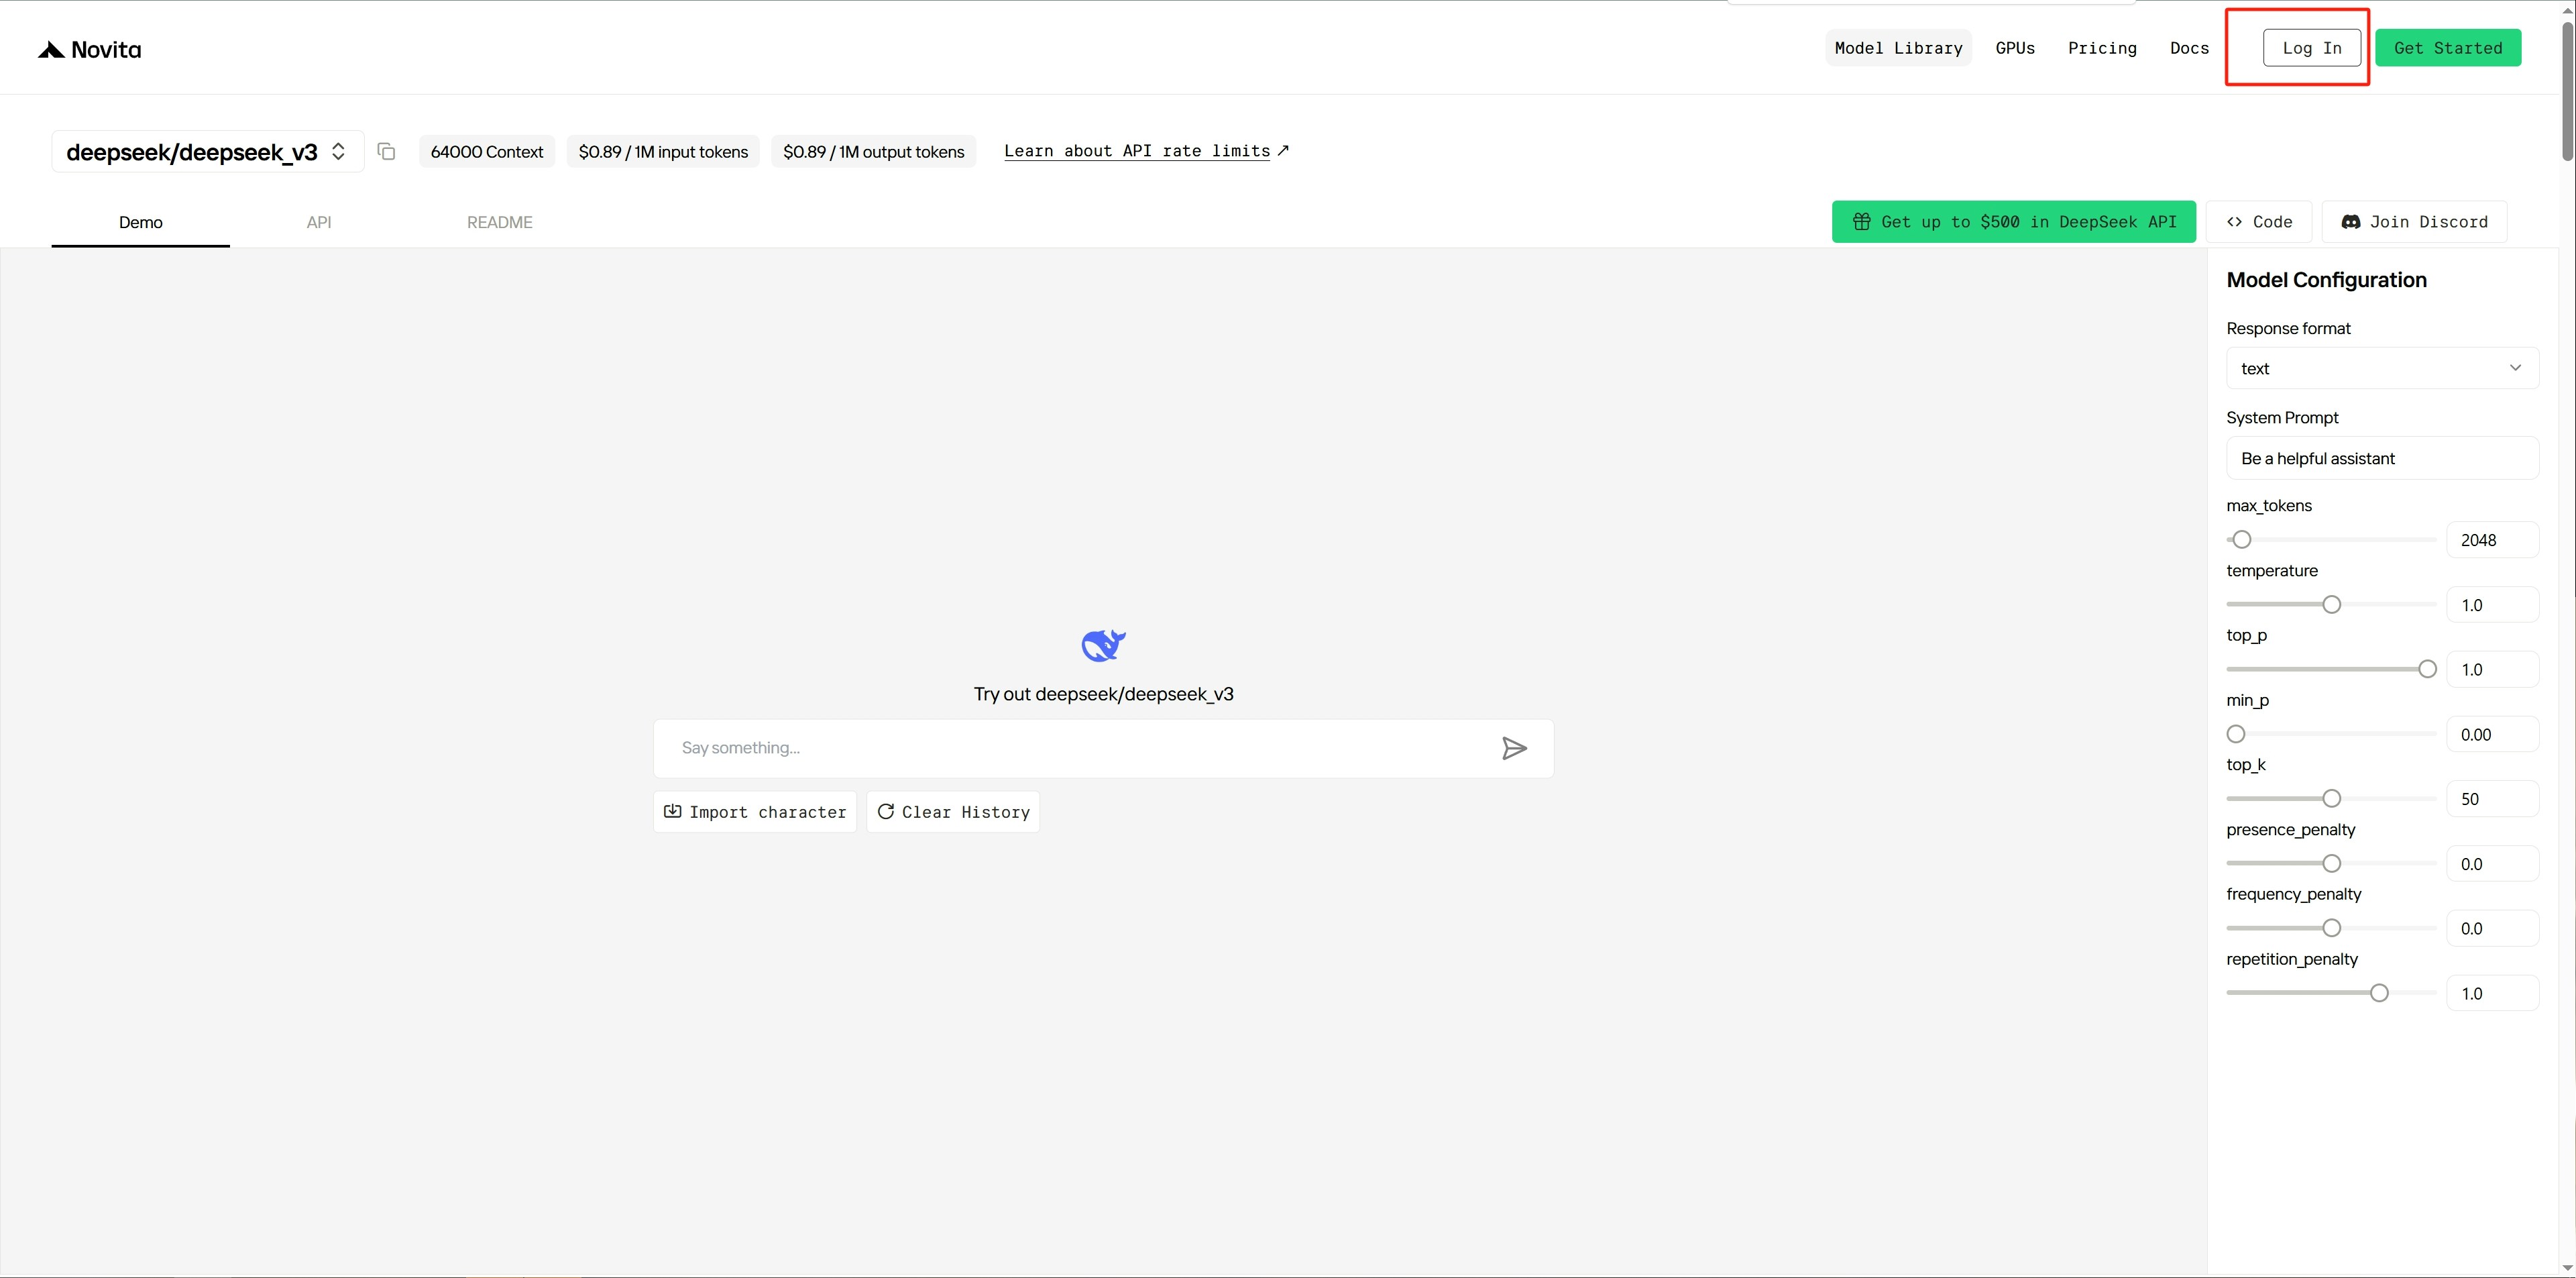
 Schritt 4: [Melden Sie sich ](https://novita.ai/user/login)bei der Novita-Plattform an.
 Schritt 5: Gehen Sie nach der Anmeldung zur [Einstellungsseite](https://novita.ai/settings) der Plattform.
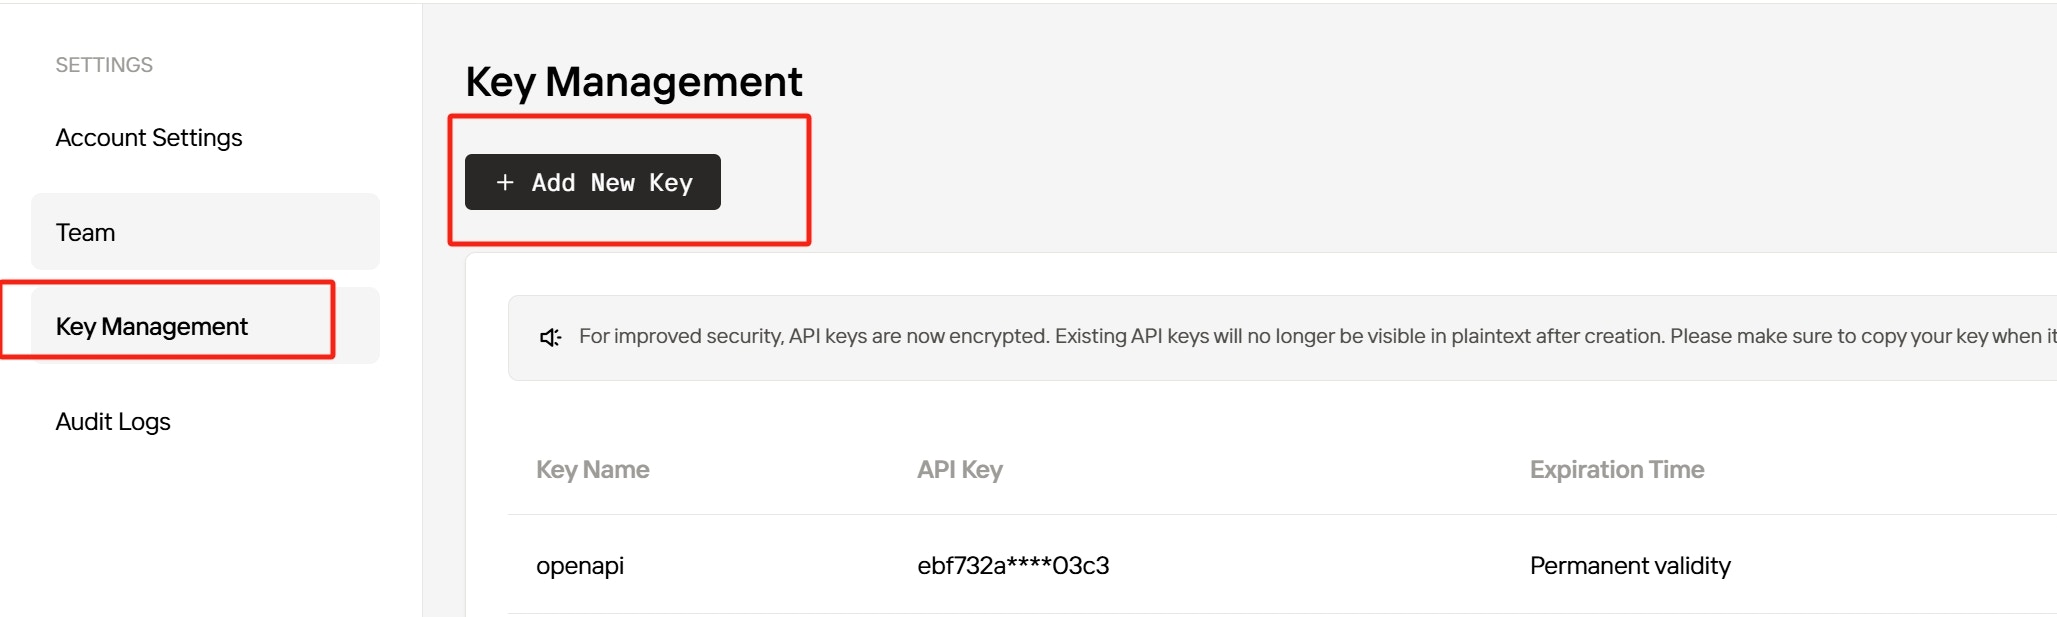
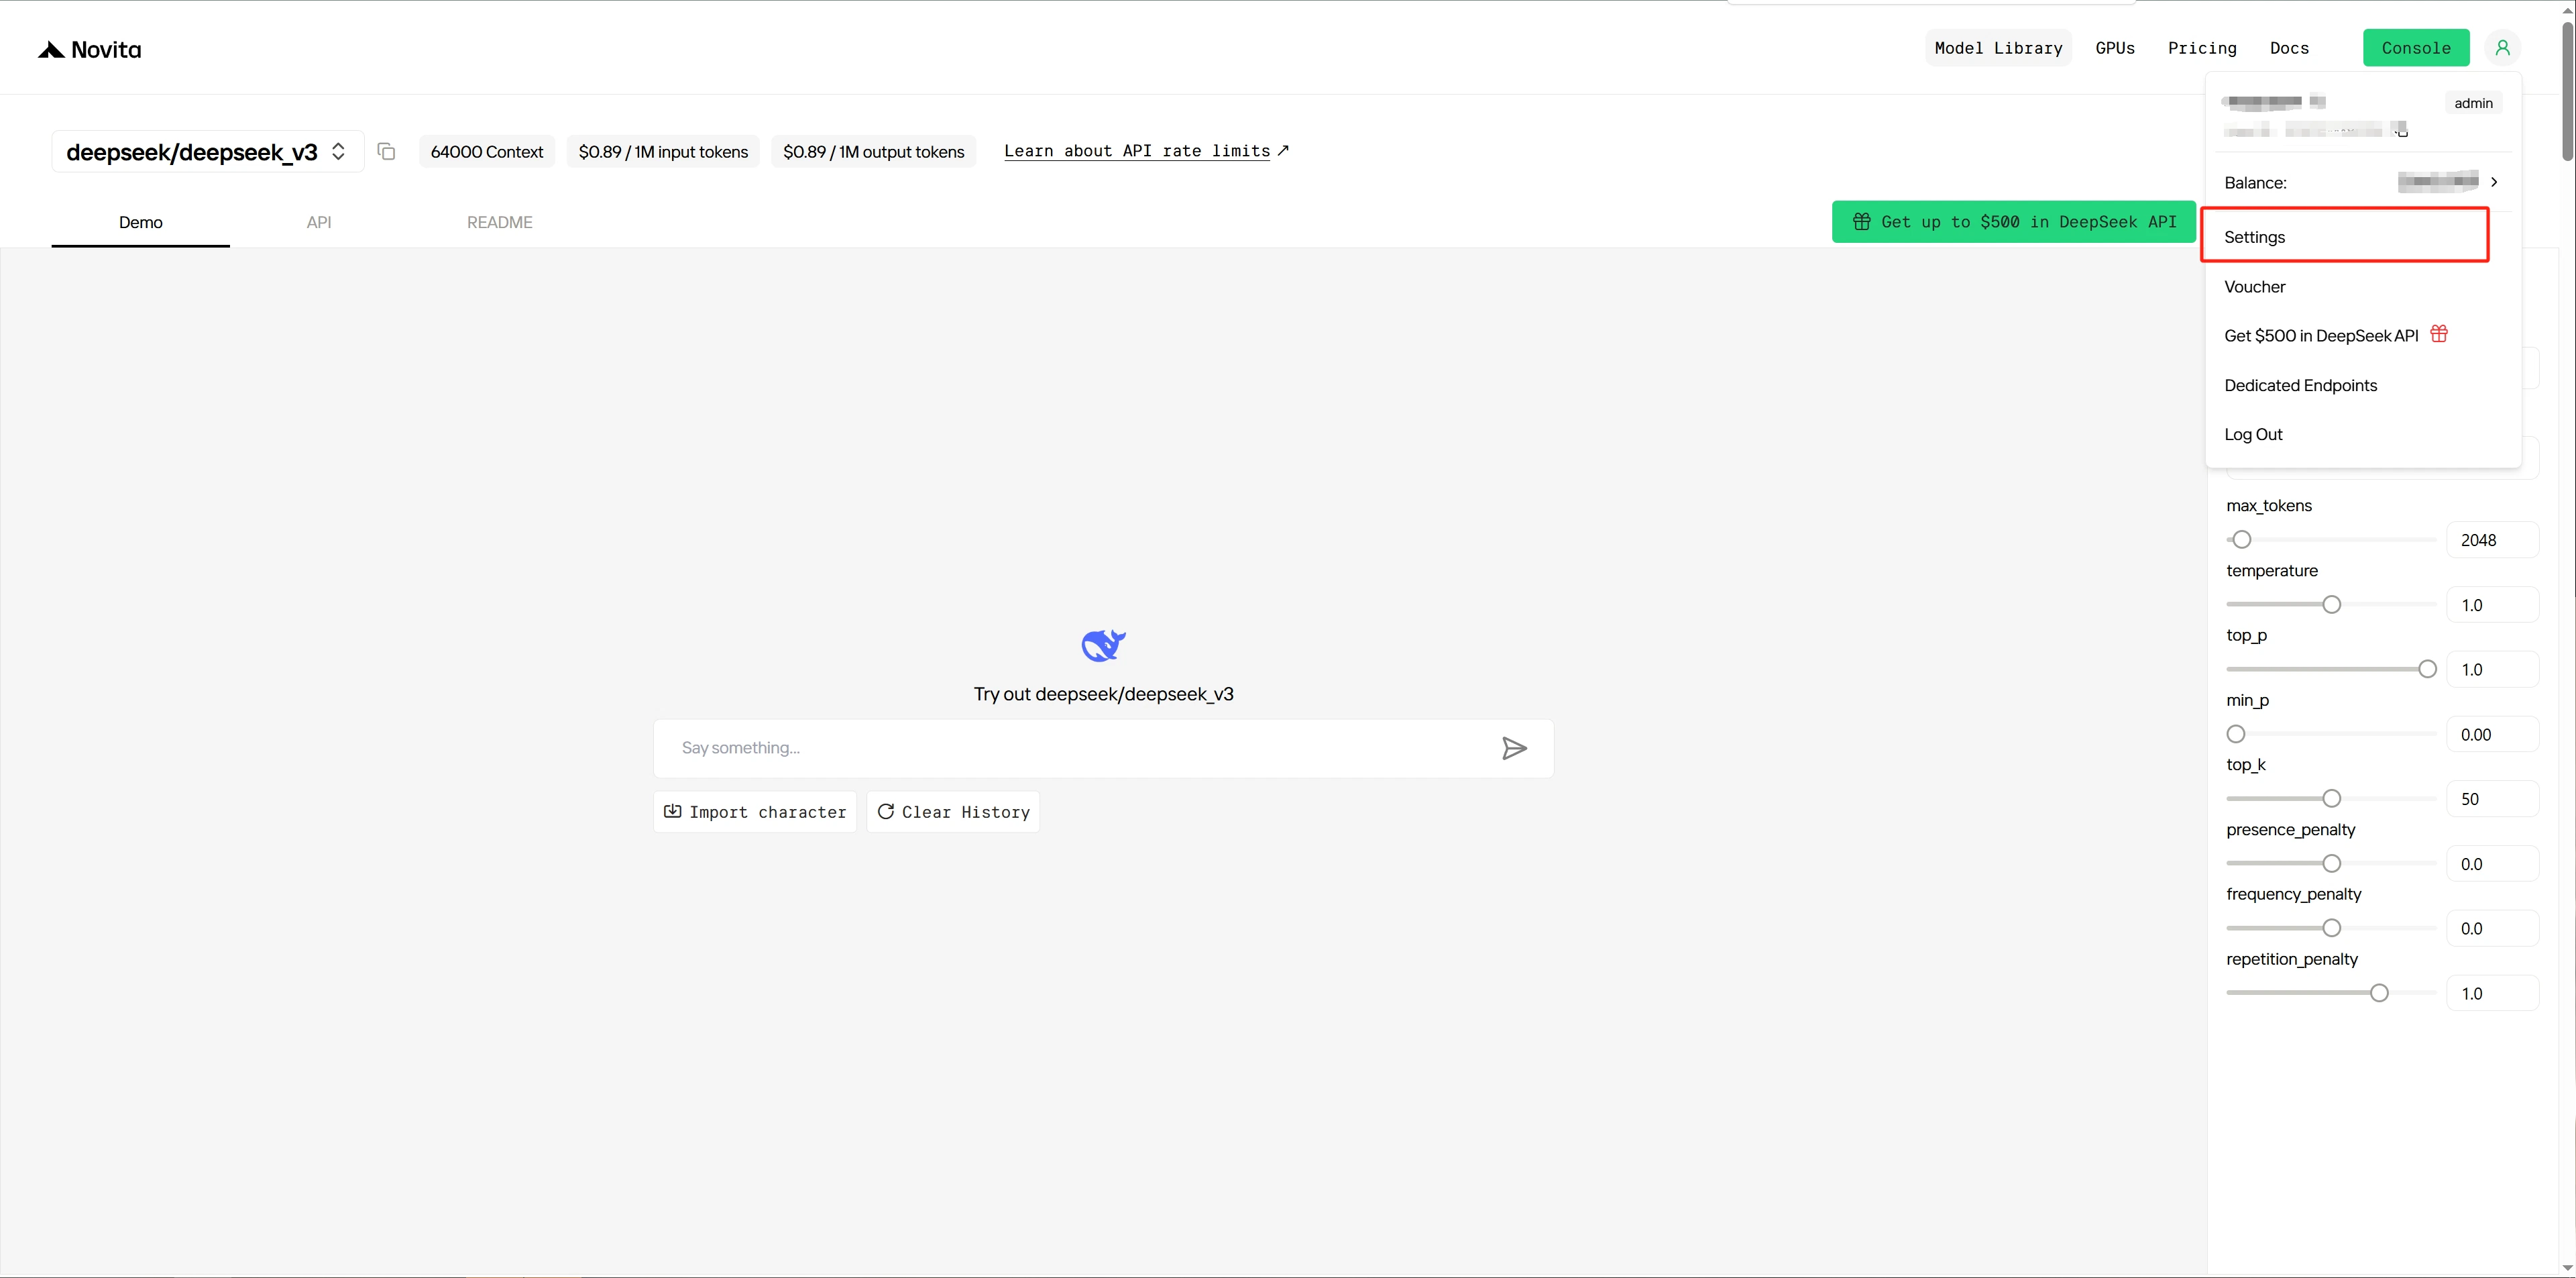 Schritt 6: Erstellen Sie einen neuen [API-Schlüssel](https://novita.ai/settings/key-management) und kopieren Sie ihn für die Service-Authentifizierung.
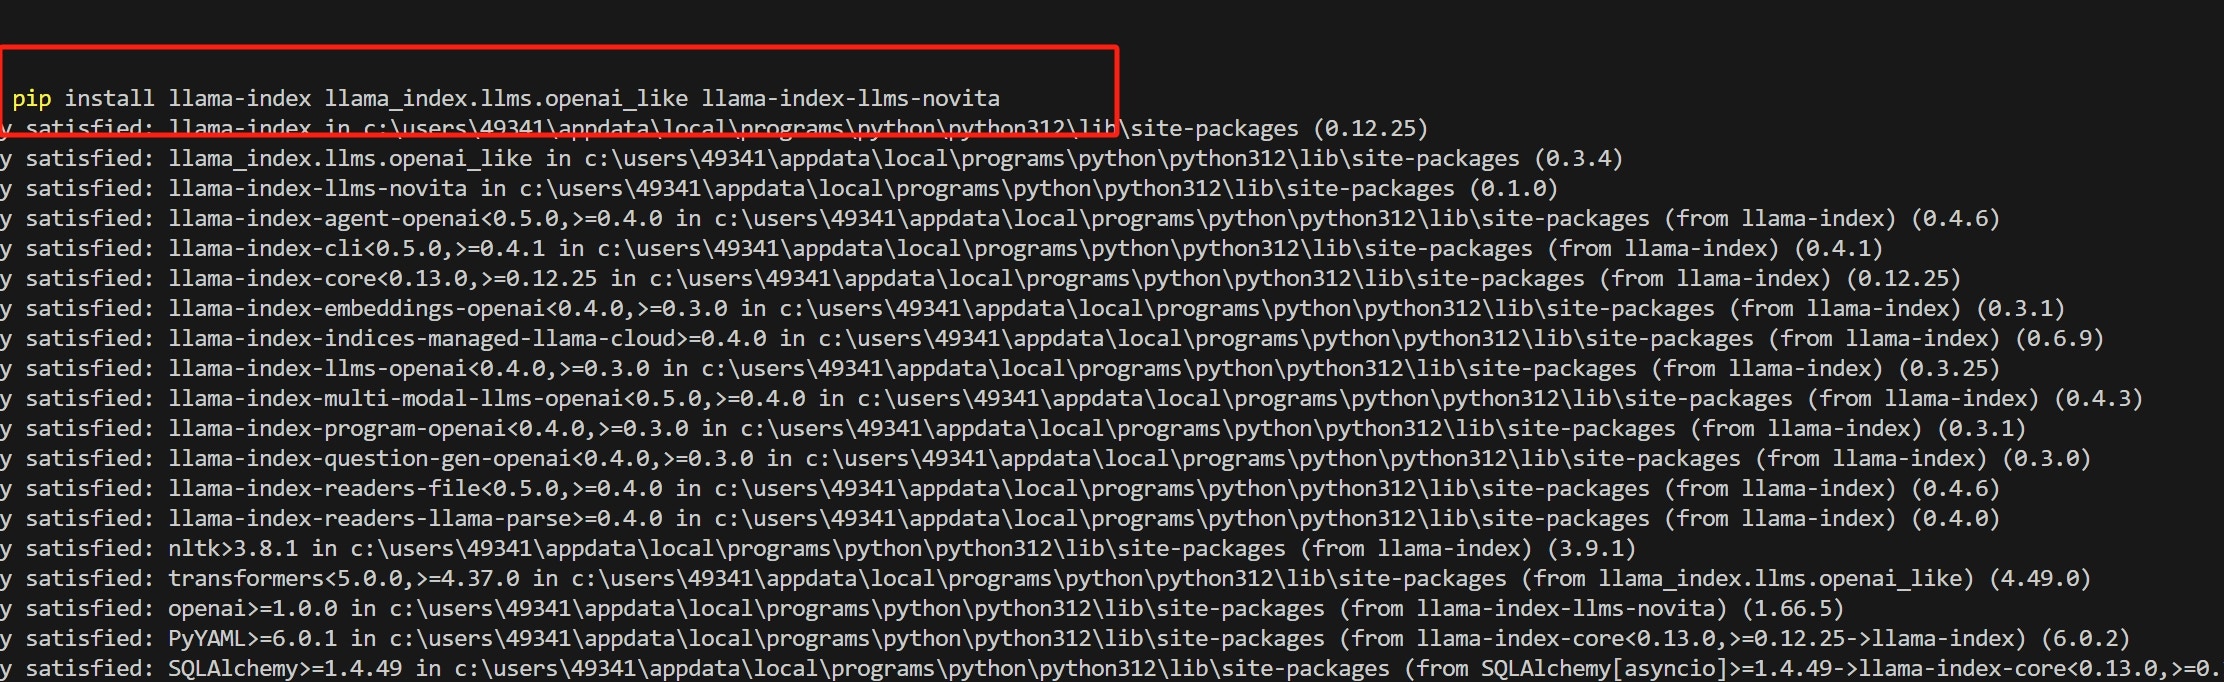
 Schritt 7: Installieren Sie `llama_index` und die zugehörigen Python-Bibliotheken, indem Sie Folgendes ausführen:
 Schritt 8: Schreiben Sie Python-Code und legen Sie den Modellnamen und den API-Schlüssel als Parameter in der NovitaAI-Klasse fest.
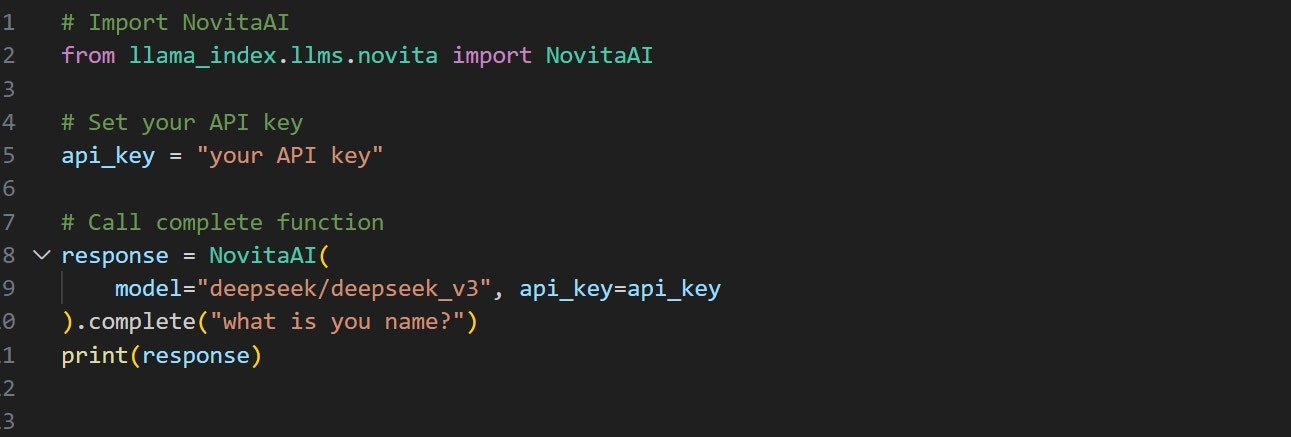 Schritt 9: Führen Sie den Code aus, um die Ausgabe zu erhalten.
 Weitere Beispiele finden Sie in der Dokumentation: [llama\_index/llama-index-integrations/llms/llama-index-llms-novita at main · run-llama/llama\_index](https://github.com/run-llama/llama_index/tree/main/llama-index-integrations/llms/llama-index-llms-novita).