> ## Documentation Index
> Fetch the complete documentation index at: https://novita.ai/docs/llms.txt
> Use this file to discover all available pages before exploring further.
# Continue
> Erfahren Sie, wie Continue und Novita AI zusammenarbeiten, um Ihren Softwareentwicklungs-Workflow zu beschleunigen.
Die leistungsstarke Integration von Continue und Novita AI bringt KI-gestützte Entwicklung direkt in Ihre Coding-Umgebung. So können Sie auf intelligente Codevorschläge, automatisierte Tests und Pair Programming in Echtzeit zugreifen, ohne den Kontext zu wechseln. Novita AI zeichnet sich dadurch aus, KI-Modelle sofort über unsere intuitive API bereitzustellen, mühelos mit unserer kosteneffizienten GPU-Infrastruktur zu skalieren und während Ihres gesamten Entwicklungsprozesses Spitzenleistung aufrechtzuerhalten.
Unsere Schritt-für-Schritt-Anleitung führt Sie durch die Implementierung von Novita AI in Continue und behandelt Methoden zur Verwendung von Continue.dev sowie die Integration von Novita AI mit Continue mithilfe eines API-Schlüssels.
## Wie verwendet man Continue.dev?
### VS Code
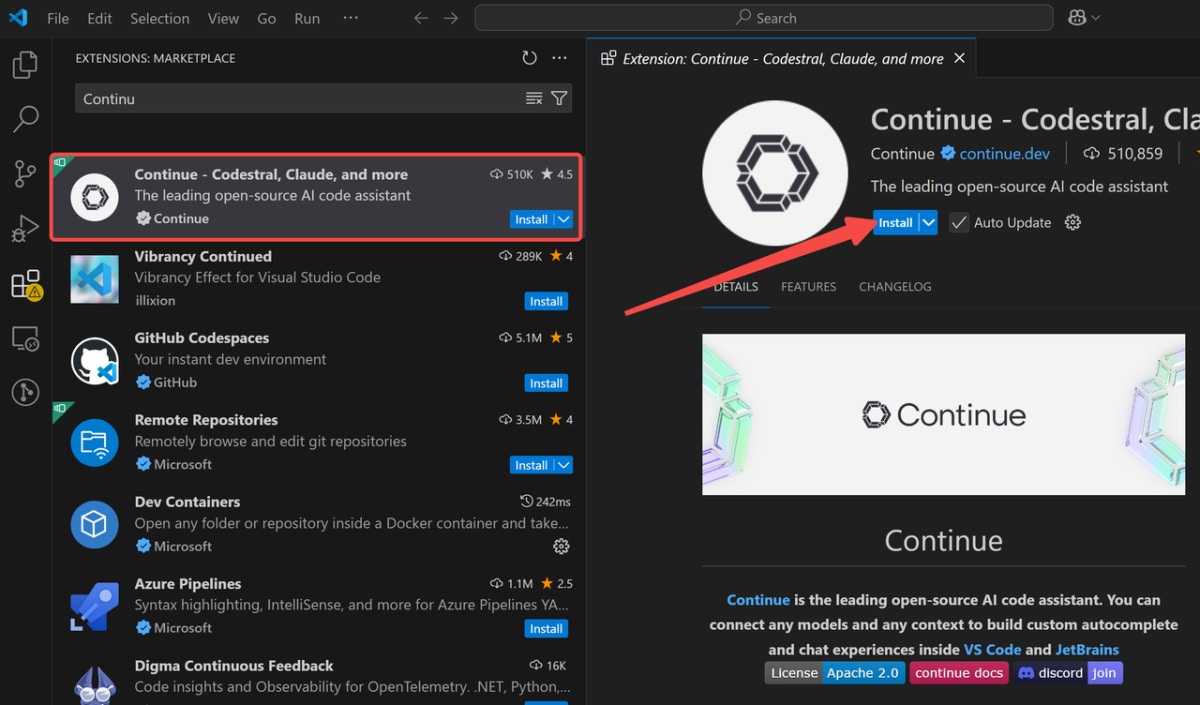
Schritt 1: Klicken Sie auf `Install `, um die Continue-Erweiterung aus dem Visual Studio Marketplace hinzuzufügen.
Schritt 2: Klicken Sie in VS Code erneut auf `Install`, um die Einrichtung der Continue-Erweiterung abzuschließen.
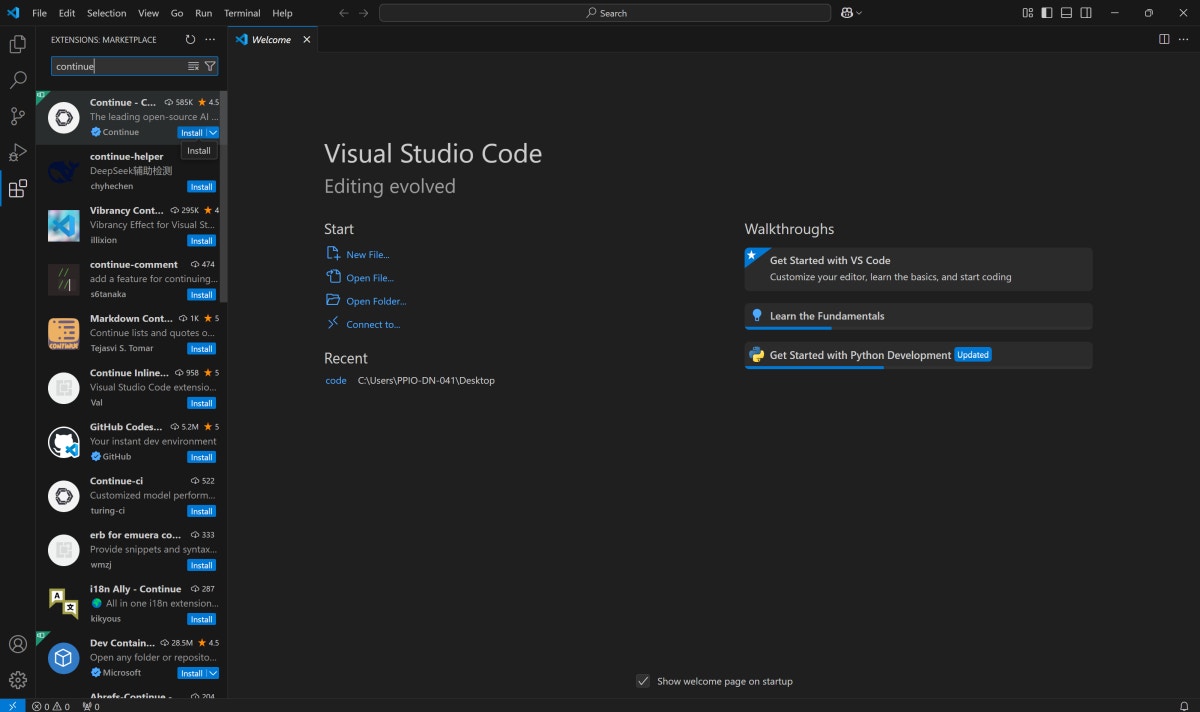
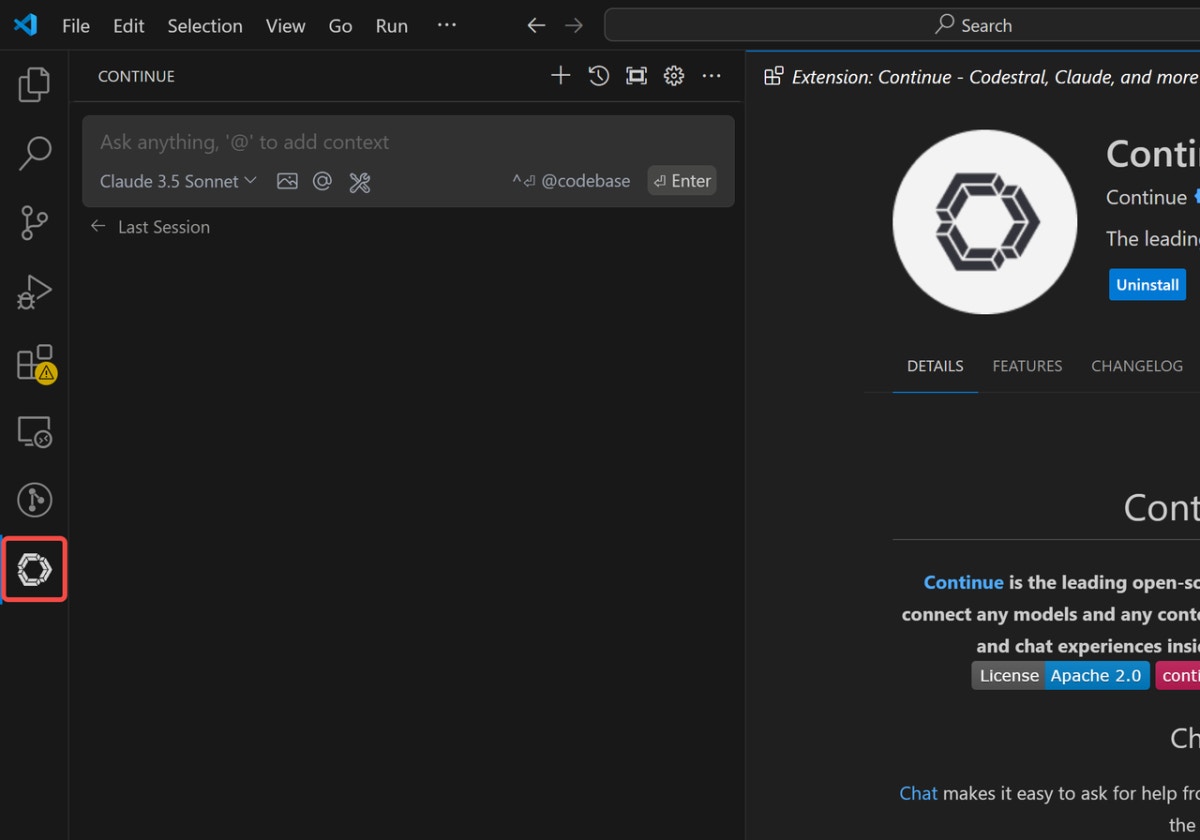
Schritt 3: Verschieben Sie das Continue-Logo in Ihre rechte Seitenleiste, um den Zugriff in Ihrem Workflow zu verbessern.
 ### JetBrains
Schritt 1: Öffnen Sie die IDE-Einstellungen, indem Sie in Ihrer JetBrains-Umgebung Ctrl + Alt + S drücken.
Schritt 2: Navigieren Sie zu den Plugins und suchen Sie im JetBrains Marketplace nach Continue.
Schritt 3: Klicken Sie auf `Install` und finden Sie das Continue-Logo in Ihrer rechten Symbolleiste.
### JetBrains
Schritt 1: Öffnen Sie die IDE-Einstellungen, indem Sie in Ihrer JetBrains-Umgebung Ctrl + Alt + S drücken.
Schritt 2: Navigieren Sie zu den Plugins und suchen Sie im JetBrains Marketplace nach Continue.
Schritt 3: Klicken Sie auf `Install` und finden Sie das Continue-Logo in Ihrer rechten Symbolleiste.
 ## So integrieren Sie Novita AI mit Continue mithilfe eines API-Schlüssels
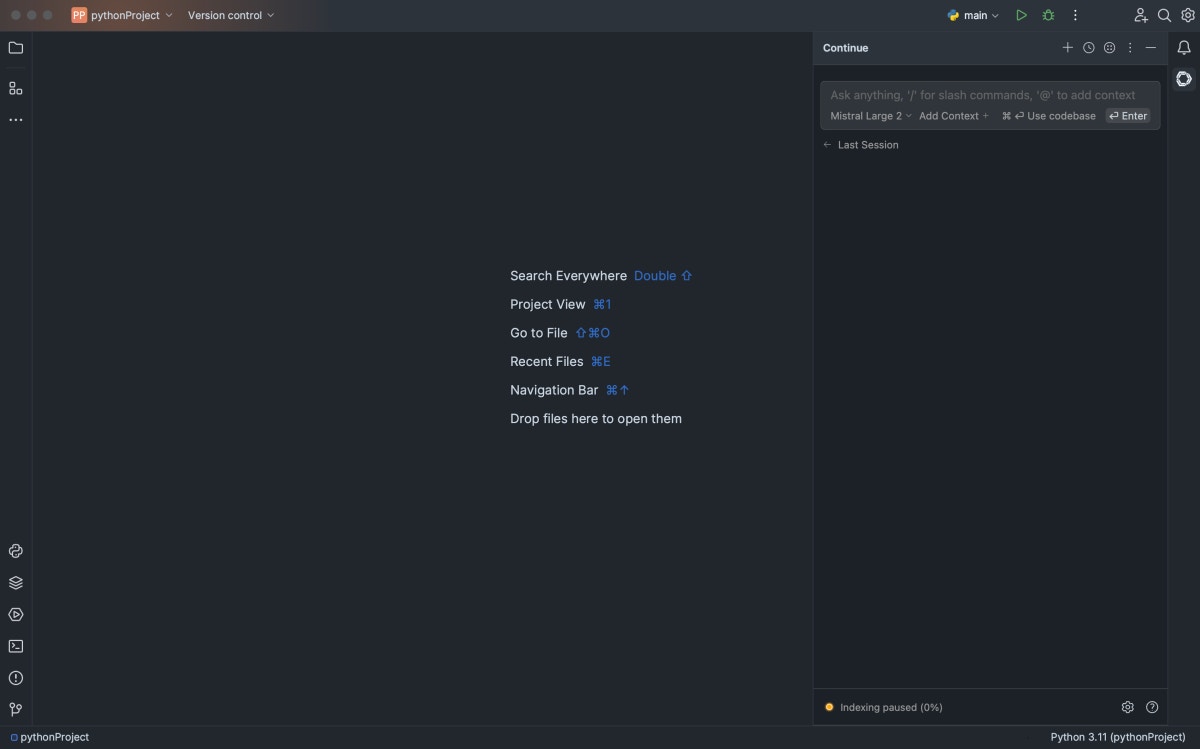
### Schritt 1: VS Code öffnen
## So integrieren Sie Novita AI mit Continue mithilfe eines API-Schlüssels
### Schritt 1: VS Code öffnen
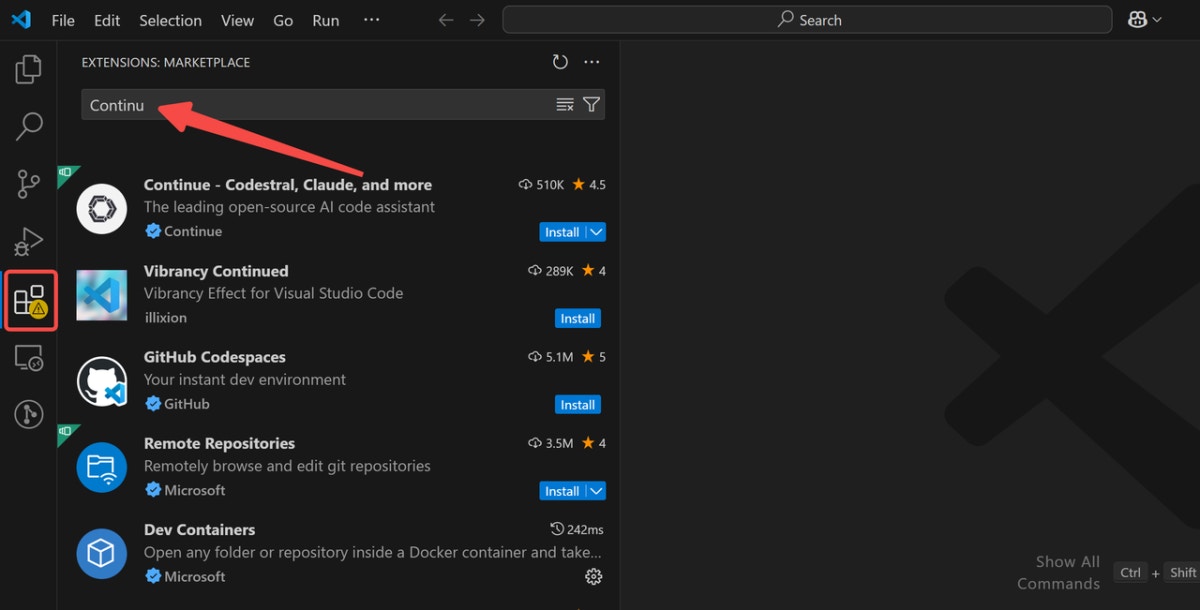
 ### Schritt 2: Continue suchen
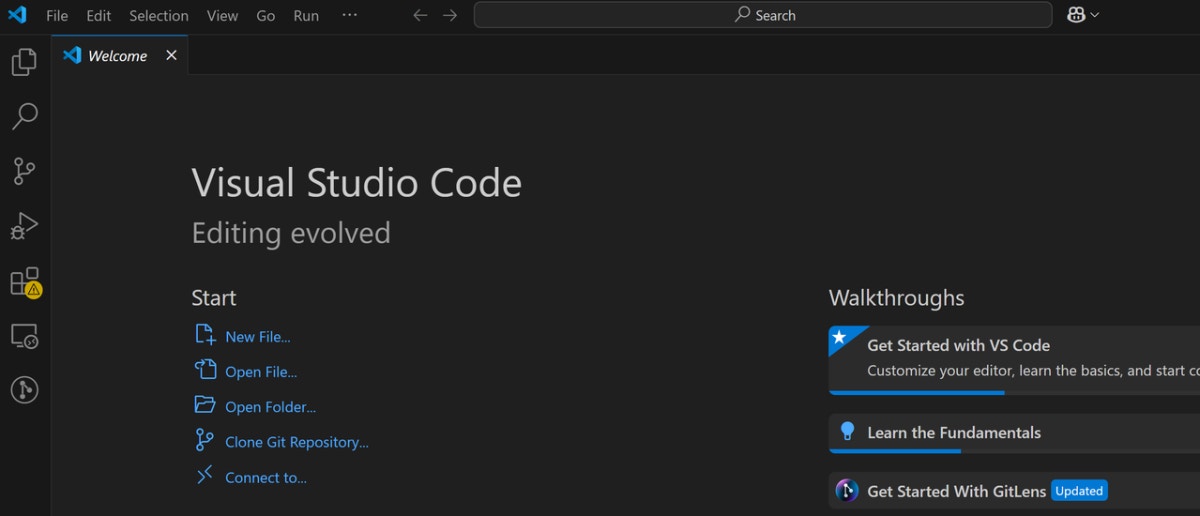
* Navigieren Sie zu den Erweiterungen und suchen Sie in der oberen Suchleiste nach Continue.
### Schritt 2: Continue suchen
* Navigieren Sie zu den Erweiterungen und suchen Sie in der oberen Suchleiste nach Continue.
 ### Schritt 3: Continue installieren
* Installieren Sie die Continue-Erweiterung, indem Sie das erste Ergebnis auswählen.
### Schritt 3: Continue installieren
* Installieren Sie die Continue-Erweiterung, indem Sie das erste Ergebnis auswählen.
 ### Schritt 4: Auf Continue klicken
* Klicken Sie nach Abschluss der Installation auf das Continue-Symbol in Ihrer linken Seitenleiste.
### Schritt 4: Auf Continue klicken
* Klicken Sie nach Abschluss der Installation auf das Continue-Symbol in Ihrer linken Seitenleiste.
 ### Schritt 5: Ihr Chat Model hinzufügen (z. B. Novita AI)
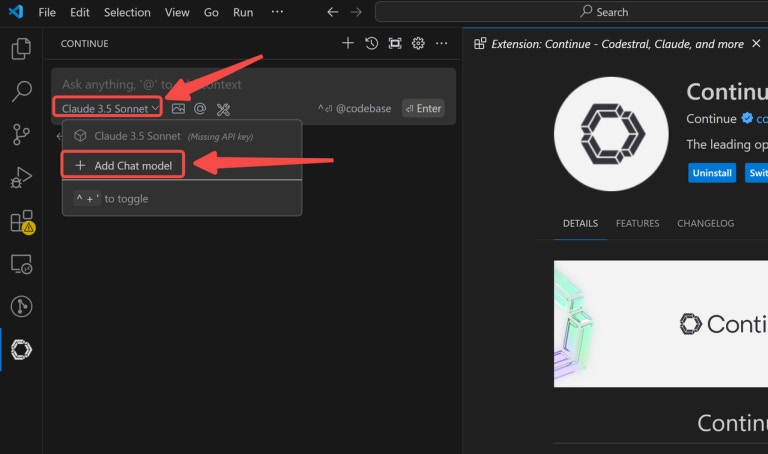
* Wählen Sie an jeder markierten Stelle Novita AI aus dem Anbietermenü aus.
### Schritt 5: Ihr Chat Model hinzufügen (z. B. Novita AI)
* Wählen Sie an jeder markierten Stelle Novita AI aus dem Anbietermenü aus.
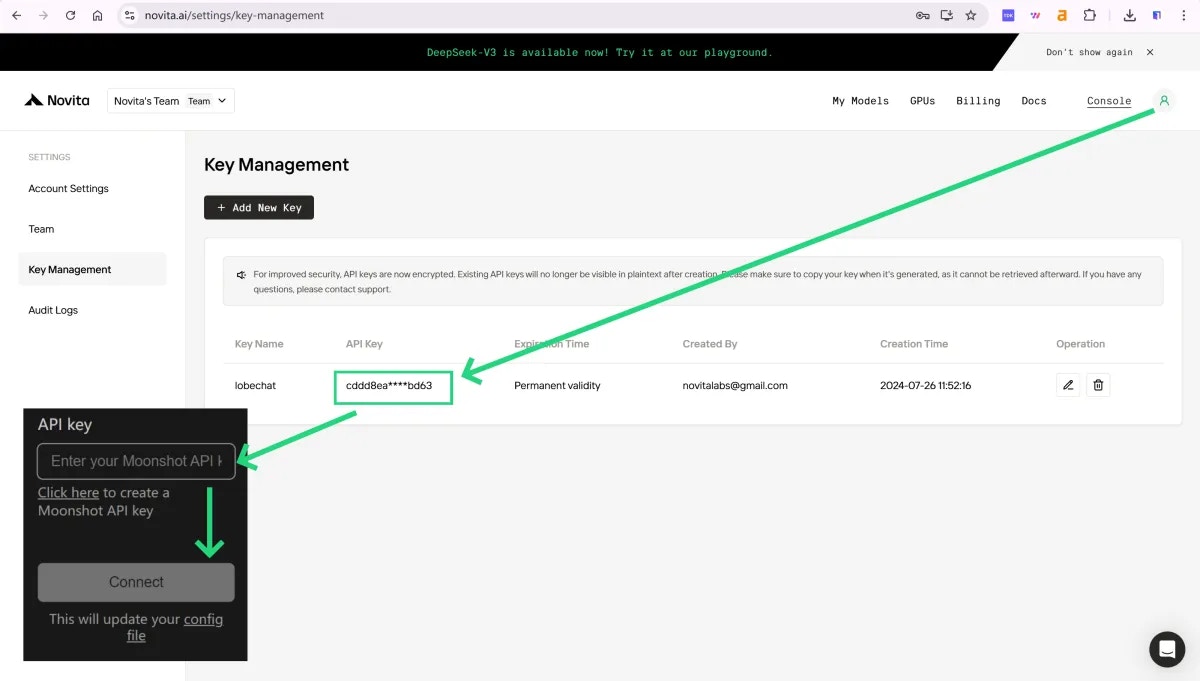
 ### Schritt 6: API-Schlüssel von Novita AI eingeben und Verbindung herstellen
* Kopieren Sie Ihren Novita AI API Key aus dem Bereich des Benutzeravatars zur Authentifizierung.
### Schritt 6: API-Schlüssel von Novita AI eingeben und Verbindung herstellen
* Kopieren Sie Ihren Novita AI API Key aus dem Bereich des Benutzeravatars zur Authentifizierung.